Sharpness is a necessity when it comes to professional photography. However, it’s not a given, especially at a closer range to a subject or when using a wider aperture. A significant amount of blur and out-of-focus area can spoil an image — but focus stacking can help! Pro landscape photographer Mark Denney is here to help out with his easy-to-follow focus stacking guide.
When to Focus Stack
It’s not always necessary to focus stack — especially when shooting distant landscapes featuring smaller details imperceptible to the eye. The human eye also naturally sees out of focus, making a little blur totally acceptable for mid-to-far-range subjects.
When I first learnt to focus stack, I focus stacked everything… but, as I’ve kind of progressed in my own photography, I started to realize that not all scenes need to be focus stacked…
Mark says you’re more likely to encounter issues with sharpness if your subject is within 6 to 8 ft of your camera. To decide, focus a third into the scene and see if the bottom and top thirds are considerably out-of-focus. If so, you may need to focus stack. Detail images, such as of the actual shoreline, small geological formations, or singular flora and fauna, often benefit from stacking.
If you’re unsure, Mark advises you to take a few images with various AF points anyway. That way, you can play around with them and stack them later on if need be. Or choose from multiple singular images with different focus points instead of just one.
How to Focus Stack
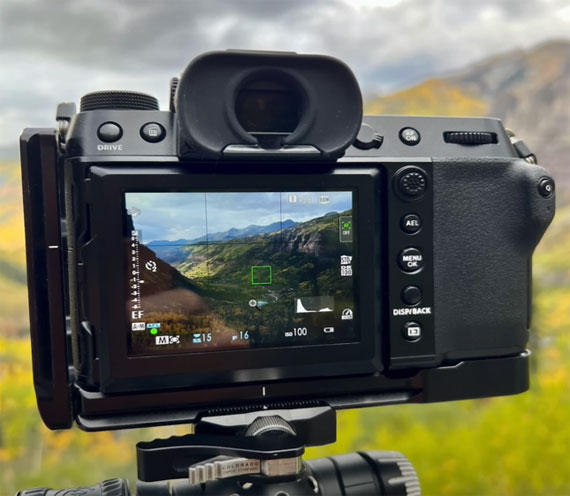
Focus stacking starts on location. You need to take multiple images with different AF points to stack into a sharp composite image back in-studio. Some cameras can be set to do this for you, but you’ll likely need to do so manually.
Ideally, you should focus on the foreground, then the middle, and finally, the background of the image. However, you can take more than three images with differing AF points. Just remember that focal planes run from the bottom to the top of the camera, not left to right. So you can move your AF point up or down without focusing left or right to get good results.
Most importantly, make sure that you don’t disturb your tripod or camera to ensure all your images align. If you do bump it mid-process, start again to ensure all your images line up later on. Mark advises that you always review images on-location, as well, as it’ll be too late to fix once off-location.
Easy Focus Stacking Editing Process
Now the moment of truth, it’s time to stack your photographs into a composite image. Here’s Marks’ easy step-by-step process — no intermediate Photoshop or editing skills required! Ideally, you should be running one of the latest Photoshop and Lightroom CC programs, though.
To create a composite image:
- Import your images into Lightroom and select the best ones for stacking.
- Mark prefers to edit .RAW files, as they offer more scope for adjustments than other types.
- Edit one of the selected image’s lighting settings in Lightroom.
- Then sync the same settings across all the images you’ll use.
- Once done, highlight all the images in Lightroom.
- Then, right-click and select Edit in… > Open as layers in Photoshop…
- Wait until all the layers are open in Photoshop, which could take up to a few minutes.
- Hold the Shift key and click to highlight all the layers.
- In the top menu, click Edit, then Auto Align Layers…
- Stay on Auto, then click OK. Aligning is necessary as moving AF points results in minuscule distortions — yes, even if you didn’t move the camera or tripod.
- Hold the Shift key and click to highlight all the layers again.
- In the top menu, click Edit, then Auto Blend Layers…
- Select Stacked Images and ensure Seamless Tones and Colors and Content Aware Fill Transparent Areas are also ticked.
- Then, click OK. Photoshop will now automatically blend or stack the images according to where whichever is the sharpest.
- The program will also mask the existing layers separately while also producing a separate master file. So you can make adjustments if necessary.
- When you’re happy, select and move the master file back to Lightroom to do any final lighting edits.
- Click File… > Save…, and the composite image should populate in the Lightroom menu automatically. You should have Bridge installed and both programs set up on the same Adobe profile, though.
Wrapping Up
Focus stacking is an interesting technique that you can use to bring an entire image into focus. Mark often doesn’t use it because some blur and unfocused areas are natural and often aesthetically pleasing in an image. However, his method is easy and simple enough for anyone to test out for themselves.
Like This Article?
Don't Miss The Next One!
Join over 100,000 photographers of all experience levels who receive our free photography tips and articles to stay current: