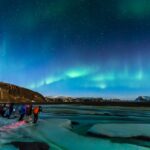
Capturing a subject requires mastery of various camera settings — including ISO. However, adjusting this setting can come with its pitfalls, especially at the higher end of the spectrum. Higher ISOs result in more exposure but can also pack unwanted noise. In his latest tutorial, Scott Walker shares his tips on how to easily and effectively edit out luminance and color noise.
Understand How ISO Works
Most people think that a higher ISO increases the sensitivity of a camera’s sensor. And that you can simply replicate another photographer’s ISO settings to get the same or similarly noise-free results. However, as Scott informs us, increasing ISO actually increases the gain of signal coming from a camera’s sensor.
Therefore — as each camera features a unique sensor — each’s ISO settings and results also vary. That’s why you need to research your camera to improve noise levels effectively. Not to apply the ISO settings other photographers are using with different camera bodies and equipment.
Usually, people also advise photographers to increase ISO bit by bit, taking test shots until they are unhappy with the noise. However, Scott says that doing so is a bad idea. Instead, he suggests that you vary your shutter speed to compensate for exposure while sticking to the lowest-noise ISO.
Research Your Cameras Unique ISO
The Photons and Photos website is a resource that Scott draws on to improve noise in his images. On it, you can reference the noise levels for each type of camera body per ISO setting, mapped out on a graph.
While most believe noise increases with ISO, this is not entirely true. Many cameras feature dual-gain ISO, meaning noise doesn’t always increase linearly alongside ISO on these models. Instead, noise may increase up to ISO 400 to 1110, then drop off and increase again.
So Scott advises you to research your camera, then pick an ISO with the least noise. Usually, its base ISO will be best. But figures vary per model, with anywhere from 60 to 200 ISO usually standard. If yours is a dual-gain camera, an ISO setting where noise drops off closer to your base ISO is also a solid choice.
Know Your Noise Types
There are two main types of noise:
- Luminance noise — otherwise known simply as noise, which shows up as salt and pepper or black and white blotches.
- Chrominance noise — otherwise known as color noise, which shows up as red, green, and blue blotches.
Master Your Detail Editing Tools
In Lightroom and most major photo editing software, you can use noise reduction tools to correct both chrominance and luminance. Specifically, the “Luminance” slider for luminance noise and the “Color” slider for chrominance noise. Plus, the “Detail,” “Contrast,” “Smoothness,” and any other unique sliders under them.
However, adjusting noise can also unattractively decrease your image sharpness and vice versa. Luckily, you can usually adjust both noise and sharpness in the same “Detail” pop-up in Lightroom and similar software. A balance between the two is key, so playing around may be necessary.
… when you’re working in a package like Lightroom or Camera Raw, it really is about compromise between detail and noise…
While editing, you can also mask parts of your image to keep them sharp while adjusting noise levels elsewhere. Scott presses the ALT or Option key to see where he’s applying the mask when moving the “Masking” slider. White areas are those that will be sharpened, and black will not.
The same masking trick applies to the “Radius” and “Detail” sliders, which show edited areas embossed instead. For radius adjustment, Scott suggests you aim to increase it until just before the lines become dark. If any embossing looks black, take the radius adjustment down a notch.
Leverage One-Click Software
Besides third-party editors, there are other effective, one-click solutions on offer. Scott is a firm proponent of letting your camera’s software do the work for you. Most cameras come with a complimentary package, which you can use to adjust everything from exposure to noise levels.
For Scott’s camera, he uses the Sony Image Editor, allowing him to select “Auto” for noise reduction. Next, he transfers the image to Lightroom to work on the noise adjustments a little more. You can also use AI software, which doesn’t require any technical skill or knowledge to master. Instead, it does the work for you.
Scott uses Topaz DeNoise AI for this tutorial, which offers both one-click and more controlled adjustments. AI Clear is the one-click mode, accessible in the middle of the tab on the right-hand menu. Simply choose your settings, then click “Update.” The handy image preview slider even allows you to see the difference between the before and after shots with ease.
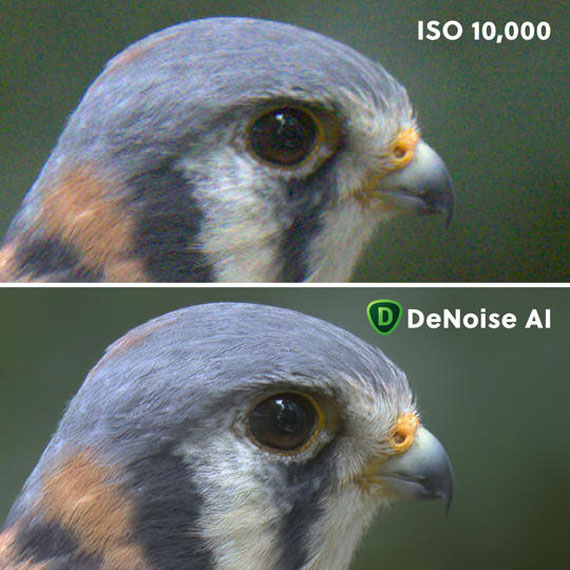
Denoise AI Example
Tips for Editing Out Noise in Photoshop
So far, Scott has talked a lot about how to edit noise out using basic editing software — such as one-click, AI, and lighting editors. However, Photoshop is far and away the most complex, allowing you to take full control of the entire editing and noise reduction process. Scott has his own method, which he claims is far and away the most effective for de-noising an image.
Scott’s favorite Photoshop noise reduction method:
- To start, he duplicates the image into multiple layers in Photoshop. One each for the background, stick, fish, bird’s plumage, eye, and beak.
- Next, he moves each layer into Topaz, but you can use Camera Raw or Lightroom if you prefer.
- He chooses to work in the Denoise AI mode this time, which offers more control.
- Next, he adjusts each layer’s settings uniquely, according to the settings that best highlight the specific focus/subject of that layer.
- Once complete, he heads back to Photoshop to continue editing and layer masking to create a composite image.
- He sets his paintbrush to black and white, adds a layer mask to each, and gets painting. Black conceals, painting out the current layer, and white reveals the current layer.
- You need to paint out the parts you didn’t reduce noise for on each layer consecutively. Though, you can also use the select tools to do so more easily or crisply.
- Only your current layer should be selected, so no other layers show through and confuse you during this process.
- As all the images are exactly the same regarding alignment, exposure, and hue, your masking need not be perfect.
- Once selected, all images should meld into one another while still being both sharp and noise-free.
Wrapping Up
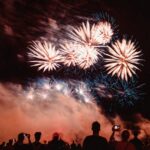
Editing out a myriad of tiny black, white, red, green, and blue dots from images may seem impossible. But noise is a reality of photography — especially when shooting at high ISO. Luckily, there are tons of effective tools and techniques you can use to smooth them out, including Scott’s go-to methods!
Learn more: DeNoise A.I. for Noise Reduction
Like This Article?
Don't Miss The Next One!
Join over 100,000 photographers of all experience levels who receive our free photography tips and articles to stay current: