Night photography has a way of exposing every weakness in your technique.
Photos that looked perfectly sharp on your camera screen suddenly appear blurry. Colors look muddy. Highlights blow out. Shadows become noisy. And those stars you hoped would be crisp points of light turn into streaks.
The good news? Most disappointing night photos aren’t caused by expensive gear—they’re caused by a handful of common mistakes. If you stop making these errors, your night photography will improve dramatically.
Reminder: only a little while left for the Milky Way Photo Guide 🌔 Summer Nights Sale
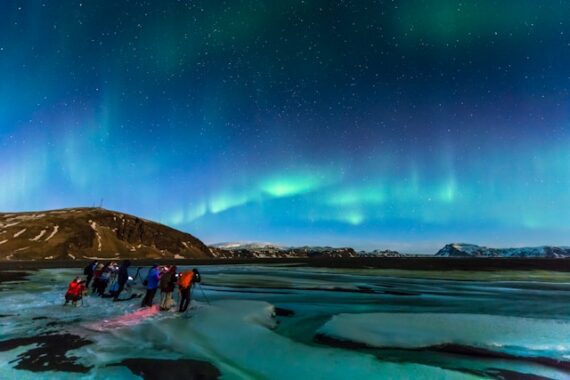
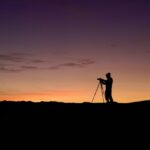
Photo captured by Ken Cheung
1. Stop Handholding Your Camera
Unless you’re intentionally shooting handheld street scenes, trying to handhold your camera at night is usually a recipe for blurry images.
As light levels drop, shutter speeds become much longer.
Even the slightest movement from your hands can soften an otherwise beautiful image.
Instead:
- Use a sturdy tripod whenever possible.
- Trigger the shutter with a remote release or self-timer.
- Enable a 2-second delay if you don’t have a remote.
A stable camera is the foundation of sharp night photography.
2. Stop Using Auto Mode
Your camera has no idea what kind of night photo you’re trying to create.
It may:
- Raise ISO much higher than necessary.
- Choose an aperture that’s too wide or too narrow.
- Pick shutter speeds that don’t match your subject.
Night photography almost always benefits from Manual Mode or Priority Modes.
You gain complete control over:
- Exposure
- Motion blur
- Noise
- Depth of field
Learning these settings is one of the biggest upgrades you can make.
3. Stop Leaving Autofocus On
Autofocus systems rely on contrast, and at night there often isn’t enough of it.
Your camera may hunt back and forth or lock onto the wrong object entirely.
Instead:
- Focus before it gets dark if possible.
- Use Live View magnification.
- Manually focus on a bright star or distant light.
- Switch the lens to Manual Focus so it stays locked.
Many blurry night photos are simply the result of missed focus.
4. Stop Using the Lowest ISO Every Time
Many photographers assume ISO 100 is always the best choice.
While that’s often true during the day, it can force shutter speeds that are far too long once the sun goes down.
Sometimes increasing your ISO produces a cleaner final image because it allows you to use a faster shutter speed.
Don’t be afraid of ISO 800, 1600, or even 3200 if the situation calls for it.
A little noise is usually much easier to fix than motion blur.
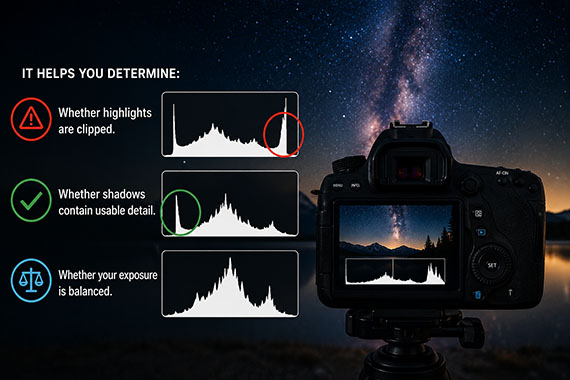
5. Stop Ignoring the Histogram
Your camera’s LCD can be misleading in the dark.
It often makes photos appear brighter than they really are.
Instead of judging exposure by the screen alone, check the histogram.
It helps you determine:
- Whether highlights are clipped.
- Whether shadows contain usable detail.
- Whether your exposure is balanced.
The histogram is a much more reliable guide than your eyes in low light.
6. Stop Shooting Wide Open Without Thinking
Many lenses become softer at their widest aperture.
While settings like f/1.4 or f/1.8 let in more light, they can also reduce corner sharpness and increase optical imperfections.
If your scene allows it, try stopping down by about one stop.
The small loss in light is often worth the increase in image quality.
7. Stop Forgetting About White Balance
Auto White Balance often struggles under artificial lighting.
Streetlights, LEDs, neon signs, and moonlight can all produce different color casts.
Instead:
- Shoot RAW.
- Experiment with Kelvin white balance.
- Fine-tune the colors during editing.
A carefully chosen white balance can make your night photos look far more natural.
8. Stop Rushing Your Composition
Darkness makes it tempting to point your camera at the brightest subject and press the shutter.
Instead, slow down and evaluate the scene.
Ask yourself:
- Is there an interesting foreground?
- Can leading lines strengthen the composition?
- Would reflections improve the image?
- Would moving a few feet create a better angle?
The best night photos combine technical precision with thoughtful composition.
9. Stop Leaving Image Stabilization On When Using a Tripod
Image stabilization is incredibly useful for handheld photography.
However, on some cameras and lenses it can actually introduce small movements when mounted on a tripod.
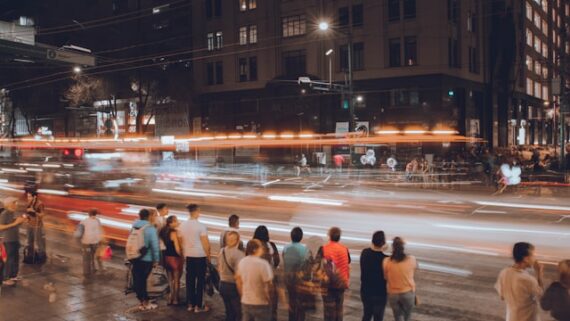
Photo captured by Roger Ce
If your camera is securely mounted:
- Turn image stabilization off.
- Let the tripod provide all the stability.
Some newer cameras automatically detect tripod use, so check your camera’s manual to see how yours behaves.
10. Stop Taking Just One Exposure
Night scenes often contain an enormous range of brightness.
One exposure may preserve the city lights while another captures shadow detail.
Taking multiple exposures gives you more flexibility during editing and increases the odds of coming home with a keeper.
It costs almost nothing to take a few extra frames.
Better Night Photography Starts With Better Habits
You don’t need the newest camera or the fastest lens to create beautiful night photographs.
In many cases, simply avoiding these common mistakes can produce noticeably sharper, cleaner, and more professional-looking images.
The next time you’re shooting after dark, remember to:
- Use a tripod.
- Focus manually when needed.
- Take control of your exposure in Manual Mode.
- Check your histogram regularly.
- Don’t be afraid to raise your ISO.
- Slow down and compose with intention.
Night photography rewards patience. The more deliberate your approach, the more consistently you’ll capture images that truly reflect the beauty of the scene.
For Further Training:
If you want a simple, field-ready way to get all of this right, the Milky Way Photography Field Guide breaks it down step-by-step.
Inside, you’ll learn when the Milky Way is visible, where to look, how the galactic core moves across the sky, which camera settings to use, and photo editing tricks.
Right now, it’s part of our Summer Nights Sale—timed perfectly for the months when most photographers start planning their Milky Way shoots.
Deal ending soon: Milky Way Photography Guide Summer Nights Sale
Like This Article?
Don't Miss The Next One!
Join over 100,000 photographers of all experience levels who receive our free photography tips and articles to stay current:


Leave a Reply