If you pay close attention to portraits taken by professionals, you will notice one thing they have in common. The subjects’ eyes sparkle. Catchlights are the lights reflected off of the subject’s eyes. They’re important because they add life to an image. Without catchlights, a portrait looks dull and lifeless. Michael Corsentino discusses everything you need to know about catchlights:
Single or Multiple Catchlights?
The light source for catchlights can be natural or artificial. And depending on the number of light sources, catchlights can be single or multiple. Corsentino prefers to keep the catchlights as natural as possible (i.e., a single catchlight with a single light source). However, depending on your project or the lighting setup that you’re using, you can end up with multiple catchlights. It’s all about preference.
Pay attention to the intensity of the catchlights whenever you have multiple catchlights. Make sure that the catchlights being formed by the key light are brighter than those formed by the fill light. The fill catchlight should be as subtle as possible in order to keep the image looking more natural. Corsentino suggests using V-flats or a silver reflector close to the subject to open up shadows while still keeping the secondary catchlight as subtle as possible.
How Lighting affects Catchlights
Corsentino recommends placing catchlights at the 10, 12, 2 o’clock positions—or anywhere between. And as far as shape is concerned, you want your catchlights creating crescent shapes at the top of the eyes.
You can use clamshell lighting to put catchlights at the 12 o’clock position. For this setup, get your key light to light the subject from the front from a slightly higher angle pointing downward at 45 degrees. To fill in the shadows, place a reflector below the subject’s face.
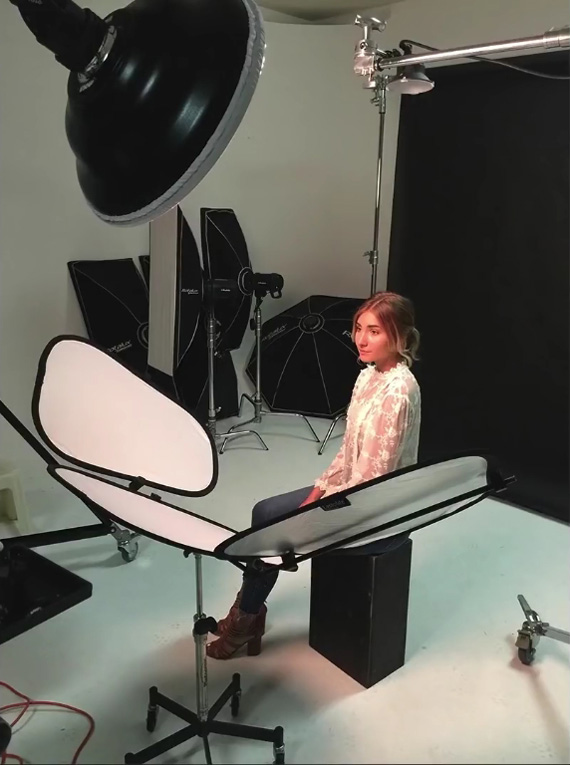
Clamshell lighting setup
Catchlights at 12 o’clock position using clamshell lighting setup
Again, be careful about the intensity of the catchlights being formed by the reflector. You don’t want the catchlights to be too distracting. And if you’re using another strobe to fill in the shadows instead of a reflector, power the fill light down so as to make the fill catchlights subtle.
Notice the fill catchlight at the bottom of the light due to a fill light placed below the model.
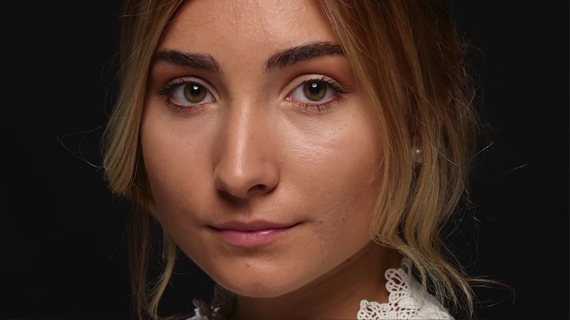
The next lighting technique that you can try out is Rembrandt lighting. Place the key light high and to one side at the front of the subject. Then, use a reflector on the other side to fill the shadows. In the video, Corsentino uses a large white V-flat as a reflector for a soft fill.
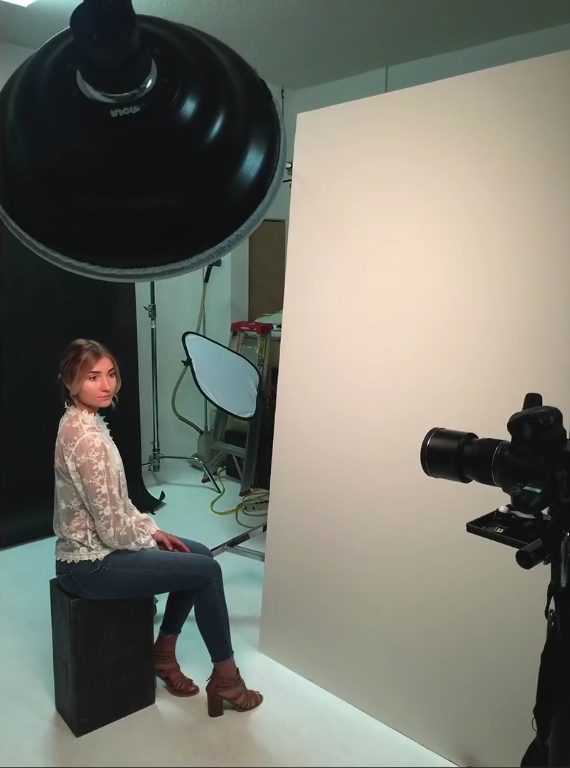
Rembrandt lighting setup
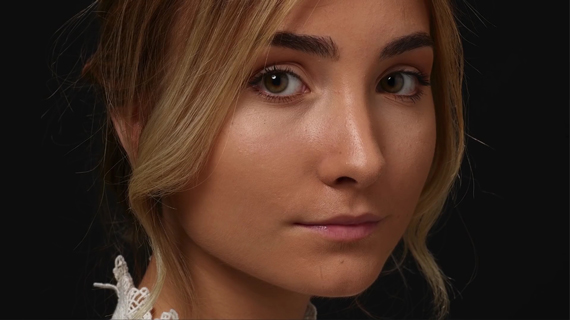
Catchlight at 10 o’clock position using Rembrandt lighting
Placing the key light on the left side of the camera creates the catchlight at the 10 o’clock position. And the large reflecting surface has created no secondary fill catchlight, hence no distraction.
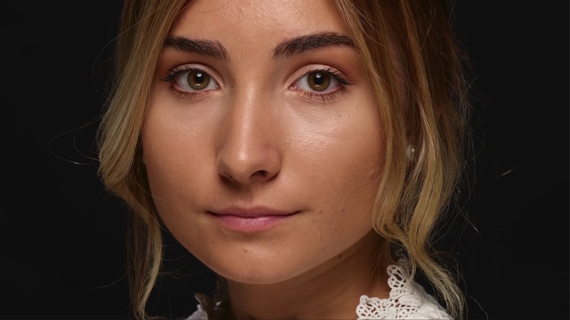
But when Corsentino replaces the V-flat with a fill light, you can see that the fill catchlight again shows up as a distraction. He prefers using broad surfaces for soft reflections to a fill light. But again, it’s all personal preference.
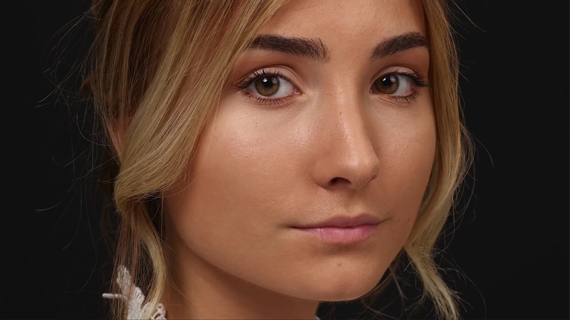
Notice the fill catchlight caused due to a fill light
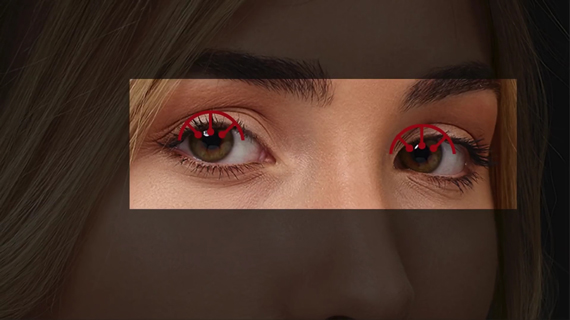
Finally, Corsentino demonstrates the use of a double light setup that is popular in commercial portraiture. When using this setup, the lights are placed one on either side of the camera position facing the model, creating a double catchlight. Corsentino suggests that you use this setup on male models and also prefers the look in black and white.
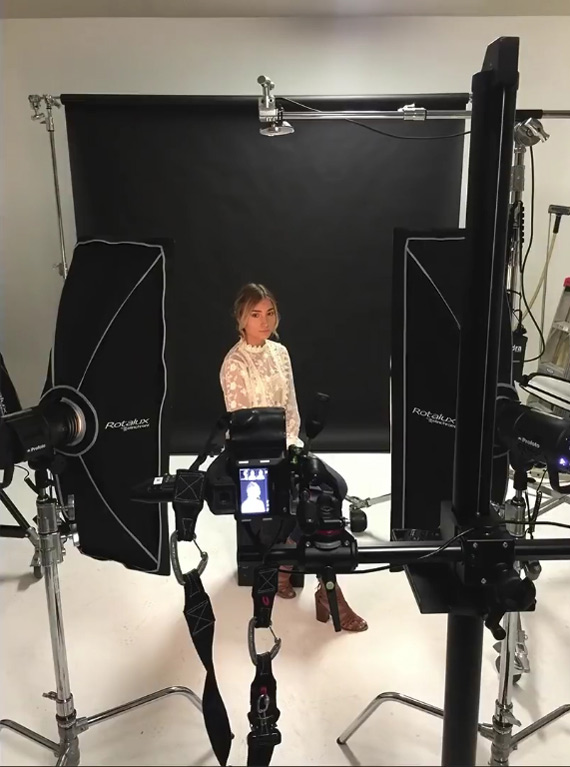
Double light setup

Two catchlights formed in each eye using a double light setup
To sum things up, your setup for catchlights depends on preference and need. Some may prefer single catchlights while others prefer multiple catchlights. Which do you prefer?
Like This Article?
Don't Miss The Next One!
Join over 100,000 photographers of all experience levels who receive our free photography tips and articles to stay current:


Great tutorial! I really appreciate the emphasis on personal preference. Without accounting for personal preference, the world really could get by just having a single photographer and his/her clones to cover volume of demand.
That said, I really like the single catchlight — but I actually prefer the second and additional catchlights. Just that I don’t like them equally bright (as in the clamshell setup) at all. To me, it livens the eye, makes it glossier. … More of a mood thing, right? The single catchlight is part of a more dramatic, “moodier” mood. And I did catch you alluding to that, that multiple catchlights are more for commercial shoots (like for advertising or glamour photography?).
In short I want *both* single catchlight and double catchlight in my skillset. I want both options for different purposes. Thanks for showing how to control them, either way!!!
(You didn’t mention ring lights. Thanks for that as well! I never, ever find ring lights flattering. Talk about distracting, there’s what distracts me.)
Oh — one other thing. You didn’t mention catchlights relative to iris/pupil ratio. Can you comment on this?
A catchlight on giant pupil with thin iris border is one thing. A catchlight igniting an iris, raising scintillating colors and textures in the iris, is another.
To me, though, careful. It’s about balance. You?
I like natural outdoor lighting (because I don’t have constant lights in my studio kit) — because it narrows the pupil, exposes more iris. But too bright outside and the subject gets pinpoint pupils. Pinpoint pupils, way over-retracted, are again, distracting. Alarming.
Cut out the repetition and the video is 1/2 as long and more to the point.