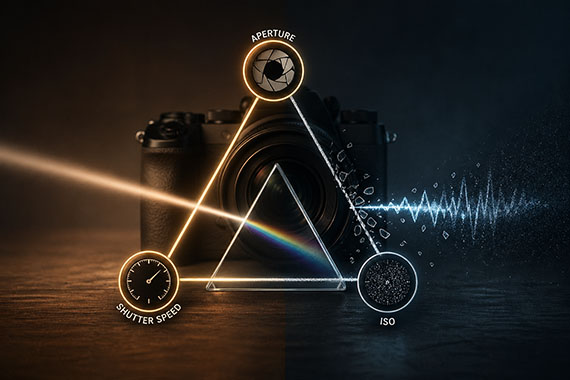
Most photographers are taught the same foundational concept early on: the Exposure Triangle. Aperture, shutter speed, and ISO — three equal parts that work together to create a balanced exposure.
It’s simple. It’s clean. It’s easy to remember.
It’s also… misleading.
Because while aperture and shutter speed directly control light, ISO does something very different. And misunderstanding that difference is one of the fastest ways to end up with inconsistent, unpredictable results.
Related: Want to master manual mode faster? PictureCorrect Premium is designed to be an accelerator with lessons, exercises, and more — and it’s only $1 to try this weekend
The Real Problem With the “Triangle”
The classic explanation suggests all three settings are interchangeable. Need a brighter image? Raise ISO. Too bright? Lower ISO. Just treat it like a third dial.
But that framing quietly implies something untrue:
ISO does not control how much light hits your sensor.
Aperture and shutter speed do. They are physical controls:
- Aperture determines how much light enters the lens.
- Shutter speed determines how long the sensor is exposed to that light.
ISO, on the other hand, doesn’t gather light. It amplifies the signal after the light has already been captured.
That’s a big distinction.
What ISO Is Actually Doing
When you raise ISO, your camera isn’t making the scene brighter in a physical sense. It’s taking the data already captured and boosting it.
That means:
- You’re not improving exposure — you’re increasing brightness after the fact.
- You’re also amplifying noise along with the signal.
- You’re reducing how much flexibility you have in post-processing.
In other words, ISO is closer to a volume knob than a light switch.
Why This Matters for Consistency
Here’s where things start to fall apart for a lot of photographers.
If you treat ISO as an equal partner in exposure, you might use a fast shutter speed and high ISO in one shot, then use a slower shutter speed and lower ISO in another.
Both images might look similarly bright on your screen.
But they are not equal exposures.
The lower ISO image likely captured more actual light and will usually give you:
- Less noise
- Better dynamic range
- More recoverable detail
The higher ISO version may look fine at first glance, but it is often a weaker file underneath.
The Better Way to Think About Exposure
Instead of thinking of exposure as a triangle, think of it in two steps.
First, set your exposure using aperture and shutter speed. These determine how much light you actually capture. This is your true exposure.
Second, use ISO as a supporting adjustment. ISO helps you reach a usable brightness level, but it should not be your primary tool for exposure decisions.
This shift in thinking changes everything.
A Practical Example
Imagine you’re shooting in low light.
You could shoot at:
- 1/100s, f/2.8, ISO 6400
- 1/50s, f/2.8, ISO 3200
Both might look similarly bright.
But the second option gathers twice as much light because the shutter stays open twice as long.
That usually means:
- A cleaner image
- Better color
- More editing flexibility
The only reason to choose the first option is if you need that faster shutter speed to freeze motion.
Now you’re making a deliberate trade-off — not just spinning the ISO dial to fix brightness.
When ISO Does Matter First
There are situations where ISO becomes more of a priority:
- Fast-moving subjects where shutter speed is non-negotiable
- Handheld shooting in very low light
- Scenes where aperture is already wide open
In those cases, ISO becomes the necessary compromise.
But notice what’s happening: ISO isn’t leading. It’s reacting.
Why the Triangle Still Gets Taught
To be fair, the exposure triangle isn’t useless. It’s a helpful starting point, especially for beginners trying to understand why a photo gets brighter or darker.
But it oversimplifies reality.
And that simplification often sticks, leading photographers to rely on ISO in ways that quietly degrade their images.
The Bottom Line
Aperture and shutter speed determine how much light you capture.
ISO determines how that captured light is interpreted.
Treating them as equals leads to inconsistent results, unnecessary noise, and weaker files.
Once you separate these roles, your decisions become clearer: capture as much light as your scene allows, then use ISO only when needed to support that exposure.
That’s when consistency starts to click — and your images start holding up, not just on the back of your camera, but in editing and final output too.
Premium Subscribers Are Already Ahead:
Every week, more photographers are joining PictureCorrect Premium (only $1 to try this weekend) to level up their craft — and you could be next. Subscribers receive expert-led tutorials, creative challenges, and printable exercises that make each lesson stick.

Whether you’re working to master manual control, or advanced techniques, Premium gives you the structure to make steady progress. The special $1 intro offer is wrapping up this evening, and once it’s gone, so is your chance to lock in early access.
Deal ending soon: Weekend Special Enrollment PictureCorrect Premium
Like This Article?
Don't Miss The Next One!
Join over 100,000 photographers of all experience levels who receive our free photography tips and articles to stay current:


Leave a Reply