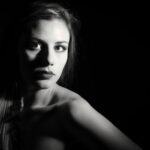
But that doesn’t mean that’s all there is to it. You should also think about the angle of the light entering the frame, what kind of shadows you want, and whether you want to use fill-in-flash (using flash to light the subject if you have a really bright background). If you are shooting at night you can create all sorts of cool effects like lights in motion, pictures with moonlight, or silhouettes like the one shown here. The following are just some examples of all the possibilities.


Silhouettes are another interesting example of using light. The way to create a silhouette is to have significantly brighter light coming from behind the subject. In doing this it is important to take your camera light reading off of the background instead of the subject in order for the camera to adjust for an exposure based on the backlight. If you do this the subject will be successfully underexposed like in the picture at the top of this page.

The shutter speed was set for around 30 seconds, the camera was set on a tripod and someone stood next to the camera with a flashlight. The subject then stood in one place while the flashlight was pointed at him and moved in an up and down motion. After around 15 seconds the flashlight was turned off and the subject was told to move to his left. Then the flashlight was pointed at him again and moved up and down until the camera finished the exposure.
For Further Training on Using Light:
Check out this popular eBook designed to help photographers learn how to use light more effectively. PictureCorrect readers can receive more than 15% off by entering the discount code picturecorrect before purchasing. It can be found here: Seeing the Light
Like This Article?
Don't Miss The Next One!
Join over 100,000 photographers of all experience levels who receive our free photography tips and articles to stay current:


Thank you so much for sharing this.
I like the ideas you share. I came here for looking importance of light in photography and I found something more interesting than the exact subject. Thank you very much.
Good tips of using lights. Thank you for sharing!
wow! I love these photos! These are amazing. Thank you so much for sharing this.
thanks for this info. I am inspired to play with light in my photograph. will post in my blog soon. Great work.