Today’s article was kindly shared with us by Ignacio Palacios, author of the 12 Types of Natural Light which is designed to help photographers harness the incredible power of light.
The Golden Hour may be the most popular time for landscape photography but calling it the magic hour isn’t fair to its often overlooked sibling, the ‘blue hour’. Sometimes the best light happens after the light source (to the naked eye) is gone! But there isn’t much of it, so you are going to have to use a slow shutter speed and a tripod!
Twilight is the light that you get after sunset (or before sunrise). This light is very propitious for landscape photography. At those times, shadows are almost non-existent which works to simplify contrast issues. The colours are also vividly saturated.
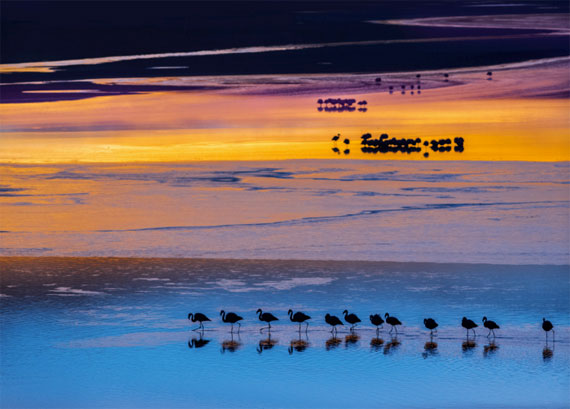
Flamingos photographed after sunset, Red Lagoon, Bolivia. The richness of the blues, purple and pinks where captured using a slow shutter speed, absorbing the effects of the ‘blue hour’
It is the moment when most amateur photographers pack up their cameras and go home, as soon as the sun has set. They are missing out one of the best lights to photograph. It is diffused and directional with very soft edges, and very unpredictable. This light creates images with vivid blue skies and may turn some landscapes into dramatic silhouettes. Although it is referred to as the ‘blue hour’, it is normally much shorter in its time frame, typically 15-20 minutes depending on season and latitude. After the sun sets, the quality and type of light changes very quickly and therefore you might want to take several shots and keep shooting until you see that the best light has faded completely.
Right after the sun dips below the horizon, you’ll get reds and orange tones before the light changes to blues, pinks and purples. Often, the best light hits around 20 to 25 minutes after sunset. While our eyes will often see black, our camera’s sensor will see deep cobalt blues and rich pinks.
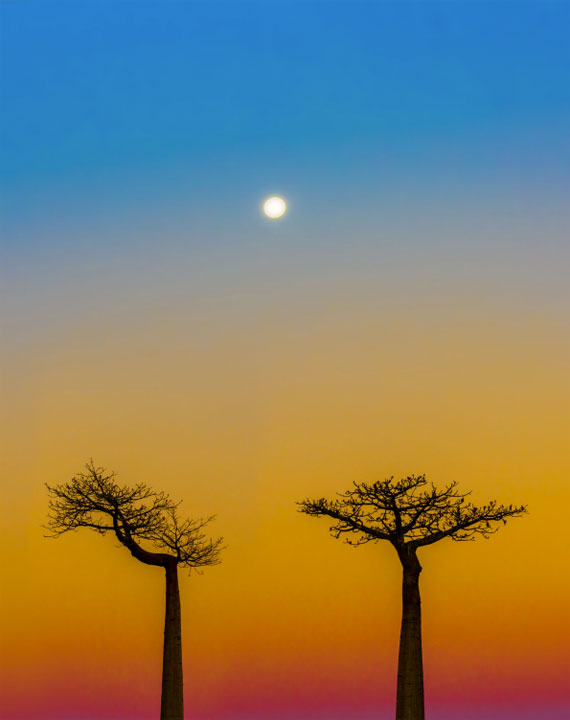
Image photographed after sunset at the avenue of baobabs in Madagascar, featuring the vivid blue of the sky, present during the ‘blue hour’
Tip: don’t use the auto white balance when you are photographing during twilight. Auto white balance might get rid of (and add) some colour casts and you don’t want it to remove (or add) to the subtle colours casts by this light. Set your white balance to cloudy or daylight.
Twilight offers unique lighting conditions that can create a magical atmosphere for a variety of photography genres. Here are some types of photography you might want to try at twilight:
Landscape Photography: The soft, diffused light of twilight is perfect for landscape photography. The sky often takes on beautiful hues, and the low light can create a sense of drama and mystery.
Cityscape Photography: City lights begin to twinkle as daylight fades, providing a great opportunity for cityscape photography. The mix of natural and artificial light can create stunning images.
Long Exposure Photography: Twilight is a great time for long exposure shots. Whether it’s the movement of stars in the sky, the ebb and flow of the sea, or light trails from vehicles, long exposure can create an ethereal, otherworldly feel.
Astrophotography: As twilight transitions into night, stars begin to appear. This can be an excellent time for astrophotography, including shots of the Milky Way, star trails, or even certain celestial events like meteor showers.
Silhouette Photography: The contrast between a dark foreground and the lighter sky can create stunning silhouettes. This can be used for various types of photography, from portraits to wildlife.
Architectural Photography: The artificial lights from buildings combined with the fading natural light can give a new perspective to architectural structures. Reflective surfaces like glass or water can add to the effect.
Wildlife Photography: Some animals are more active during dawn and dusk. This can provide unique opportunities for wildlife photographers, although it may be more challenging due to the lower light levels.
Remember, each of these types of photography will require slightly different techniques and settings, so be sure to do a bit of research and practice before you go out to shoot.
For Further Training:
Creating magnificent images requires the photographer to have full control over the tools at their disposal and understanding how light works is one of the most important elements to have in your creative arsenal. Grasping how light works is complex as it bounces off some subjects, passes through others, creates large or small shadows, influences colour and has a dramatic effect on your final image.
Finding Light in Photography
Understanding how to harness this incredible power of light requires you to understand the concepts of position, strength and colour and our success as photographers depend on our ability to predict and choose the best light or learn to work with what we have on offer.
This is a fantastic book for photographers of all skill levels. The book is full of beautiful images along with lots of helpful tips and techniques.
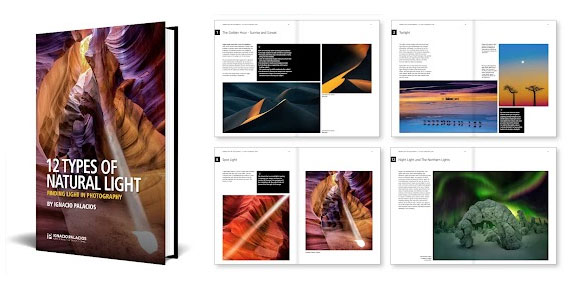
Found here: The 12 Types of Natural Light Guide
Like This Article?
Don't Miss The Next One!
Join over 100,000 photographers of all experience levels who receive our free photography tips and articles to stay current:


Leave a Reply