Light painting is a fun photography technique where photographers use camera flashes, flashlights, and spotlights to paint light in a scene. It can easily qualify as the best/most fun night photography technique. Although many photographers have attempted it before, only a few have mastered the technique. Below are some very useful tips to consider when you want to perfect your light painting skills.
1. Try out different light sources
This is very important You shouldn’t try painting everything using the same light. To avoid odd and flat pictures, consider using different light sources, otherwise your work will defy the sole purpose of light painting, which is to create unique light impressions on different landscape parts at night.
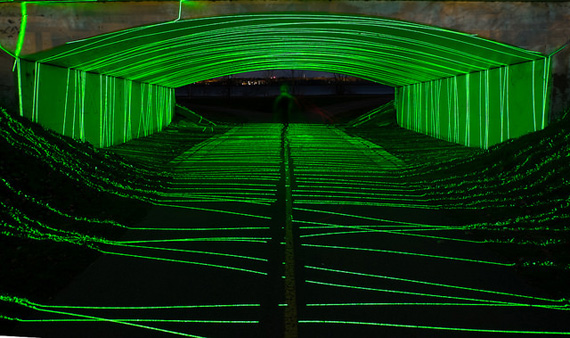
Photo by David Russo; ISO 400, f/4.5, 30-second exposure.
2. Use dimmable light sources
For the best results, you need to choose dimmable light sources, because light painting relies heavily on light intensity. To get the best results, you must be able to alter light intensity whichever way you like to ensure every part of a photo gets the right amount of light.
3. Take care of the noise
It is important to note that long exposures create more noise. Because of this, take time painting in light, but don’t forget to factor in this small detail; it can be the difference between good and bad lighting photography.
4. Take multiple shots
To get the best light painting photos, you need to take as many shots as possible. Multiple shots help you treat different parts of a photo separately which should be the case in light painting.
5. Use flashlights that don’t have hot spots
Moving your flashlight beam randomly when taking light photos doesn’t make a big difference even if your flashlight has a hot spot (a bright circle located at the center of the beam). The hotspot does, however, make a big difference when you are considering fine details in scenes. If you don’t have money to buy the perfect flashlight, consider taping tissue paper or wax paper over your flashlight lens to eliminate hot spots.

Photo by Stephen Poff; ISO 100, f/11.0, 67-second exposure.
6. Include night photography techniques
Just because you are light painting shouldn’t mean you forget typical night photography techniques. You must consider techniques like mirror lockup, cable release, long exposure noise reduction, etc., to ensure you get the best outcome.
7. Mix ambient light
You should also remember to incorporate ambient light—like street lights or moon light—to add mood to your photos. Using flashlights shouldn’t mean you ignore all other light sources.

Photo by Dave Edens; ISO 1600, f/25.0, 15-second exposure.
Keep these tips in mind next time you head out for a light painting shoot.
About the Author:
Swee Shiong Chong writes for SG East Photography, a photography blog on techniques and equipment that is used in creating all types of photography from around the world.
Like This Article?
Don't Miss The Next One!
Join over 100,000 photographers of all experience levels who receive our free photography tips and articles to stay current:


What do you recommend for the best flashlight. I’d like one with no hot spots and still be able to change the size of the light cone.
Any suggestions?
Several of your examples (in my opinion) show light drawing which is much easier than light painting. I wish everybody could accept the fact that the two techniques are very different!!!!!!!!!!!!!!