Digital photography has made photography a whole lot easier. Built-in light meters do a good job most of the time but they get fooled in tricky lighting situations. Just imagine how challenging it was for film photographers to get correct exposures. If you still struggle with exposure when using film, photographer Jay P. Morgan shares three ways to set the correct exposure with and without a light meter:
Built-in camera meters are reflective meters and work by metering everything to 18% grey. A white scene when metered to 18% grey appears darker, and a dark scene when metered to 18% grey appears brighter than required. Built-in light meters thus can get fooled rather easily and can produce undesirable results.
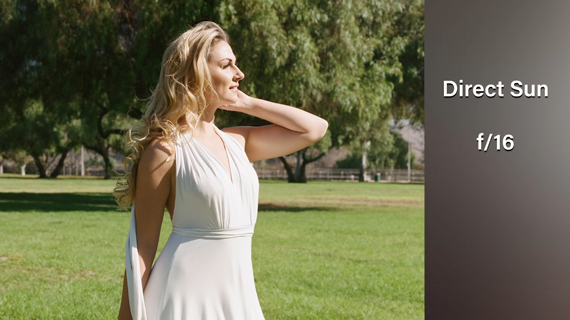
Use the Sunny 16 Rule
The Sunny 16 rule is a tried and tested method to get proper exposure on sunny days. According to this rule, when you set your aperture to f/16, your shutter speed should be the reciprocal of the film speed (or ISO). So if you’re using a 400 film stock, your settings would be f/16, 1/400 second (or close), film speed or ISO 400.
But if it’s not sunny outside, you can follow the guide below to set your aperture:
- sunny: f/16
- overcast: f/11
- more overcast: f/8
- heavy overcast: f/5.6
- shade: f/4
Morgan suggests that you slightly overexpose your shots as film prefers to be overexposed rather than underexposed.
Use a Digital Camera
While this tip from Morgan sounds crazy, it will make your work with film a whole lot easier if you happen to have a digital camera around.
- Set the ISO of your digital camera at half the box speed of your film. If your film has a speed of 400, set the ISO on your digital camera to 200. This will help in getting a denser negative, as it overexposes by one stop.
- Set your digital camera’s aperture according to the depth of field you need.
- Set the digital camera’s shutter speed for correct exposure and take the photo.
- Once you’re happy with the result from your digital camera, use the same shutter speed and aperture on your film camera and take the picture.
Use an External Light Meter
Using an external light meter is a foolproof way to get a correct exposure every time. Built-in light meters are reflective light meters and are fooled quite easily. However, external light meters are incident light meters and measure the amount of light falling on your subject precisely.
- Place the light meter close to your subject with the bulb pointing toward the camera. Note that if the bulb is pushed in, it cuts the exposure by almost a third to half a stop. Morgan recommends leaving it out and pointing it straight at the camera.
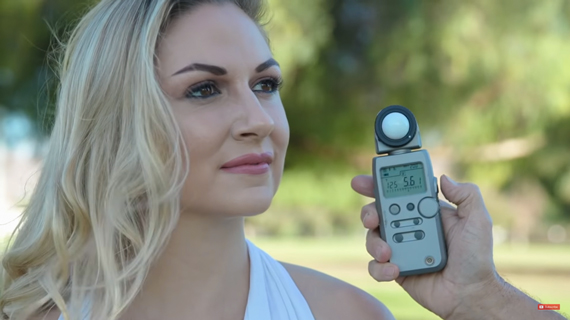
- In order to get a dense negative, halve the ISO setting in the meter so that you overexpose by one stop. For instance, if your film speed is 400, set it to 200 in the light meter. For his Fuji 400, Morgan inputs ISO 100 to get an even denser negative.
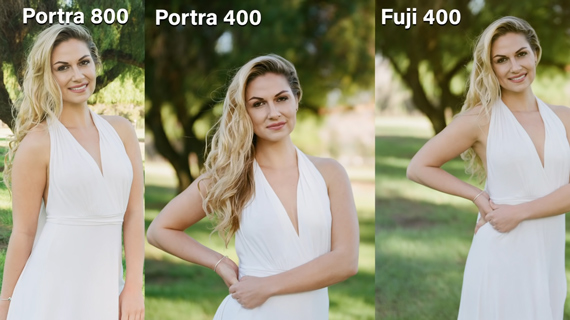
Remember, negatives love to be overexposed a bit and don’t give good results when they are underexposed. Which method do you think works best to help you expose your film better? Let us know.
Like This Article?
Don't Miss The Next One!
Join over 100,000 photographers of all experience levels who receive our free photography tips and articles to stay current:


Leave a Reply