If you’re willing to get up before sunrise this week, you may be able to photograph one of the night sky’s more unusual sights.
It’s called zodiacal light—sometimes nicknamed the “false dawn.”
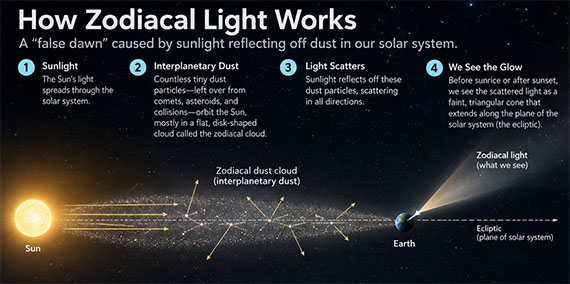
Unlike the Milky Way, aurora, or a meteor shower, zodiacal light isn’t something happening far out in space. It’s sunlight reflecting from countless particles of interplanetary dust spread through the inner solar system.
From a truly dark location, that scattered sunlight can appear as a large, faint triangular column of light extending upward from the horizon.
Related reminder: offer ending soon for the Photo Adventure Cheat Sheets at 80% Off
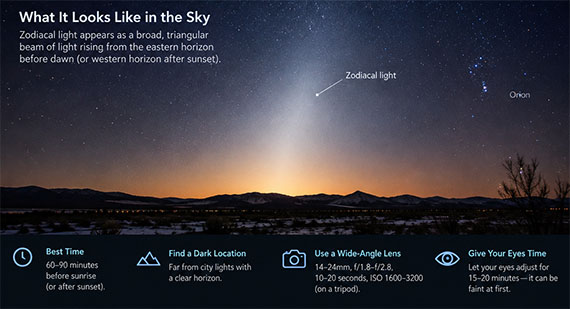
And mid-to-late September is a particularly good time to look for it before dawn from the Northern Hemisphere.
Why This Week Is Interesting
Around the September equinox, the angle of the ecliptic—the path followed by the Sun, Moon, and planets—is especially favorable in the pre-dawn eastern sky for Northern Hemisphere observers.
That causes the zodiacal light to extend more steeply upward from the horizon, making its distinctive cone shape easier to recognize.
The darker your sky, the better.
You’ll want to find a location far from city lights with a clear eastern horizon and start looking roughly 60–90 minutes before sunrise, before morning twilight becomes too strong.
How to Photograph It
Photographing zodiacal light is surprisingly similar to photographing the Milky Way.
Start with:
- Wide-angle lens: roughly 14–24mm
- Aperture: f/1.8–f/2.8 if possible
- Shutter speed: around 10–20 seconds
- ISO: approximately 1600–3200
- Focus: manually focus on a bright star
- Tripod: essential
Treat these as starting points rather than fixed settings.
Take a test shot and examine the histogram. Zodiacal light is relatively faint, so your camera may reveal considerably more of it than you can initially see with your eyes.
What Are You Looking For?
Don’t expect a bright beam.
Look east before dawn for a broad triangular glow that is brightest near the horizon and gradually becomes narrower and fainter as it reaches upward.
It can easily be mistaken for distant city glow.
The difference is its shape: light pollution generally hugs the horizon, while zodiacal light can stretch surprisingly high into the sky along the zodiac.
For the best photograph, try placing something recognizable beneath it—a mountain ridge, desert landscape, lone tree, rock formation, or distant silhouette.
That gives the strange cone of light some scale.
One Important Tip
Give your eyes time to adjust.
Spend 15–20 minutes away from bright lights and your phone screen before deciding you can’t see anything. Zodiacal light can be subtle at first, but once you recognize its shape, it often becomes much easier to see.
And if you’ve photographed the Milky Way plenty of times already, this is a fun reason to point your camera somewhere different.
You might just capture a “false dawn” caused by sunlight reflecting from dust floating through our solar system.
For Further Training:
For help remembering the camera settings for difficult situations like this, a set of Photography Adventure Cheat Sheets are designed to help. They are currently 80% off for a Summer Adventures Sale ☀️ which wraps up soon if you want to check them out.
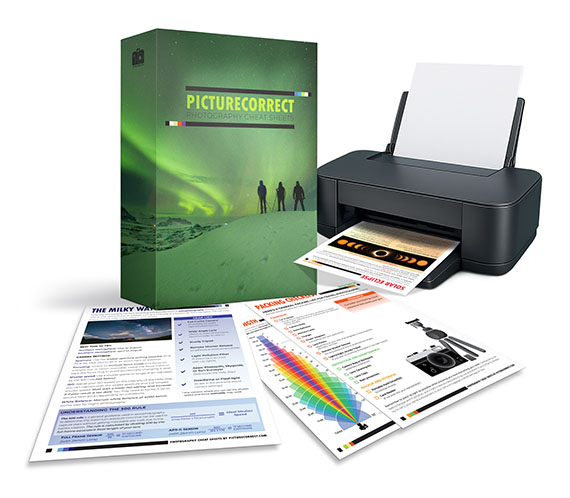
The perfect companion for any photographer. Print one out whenever you need it. Whether you’re going on vacation or seeking out a specific photography adventure, these cheat sheets can provide you with the knowledge and inspiration you need to create your best work yet.
Deal ending soon: Photography Cheat Sheets ☀️ Summer Adventure Sale
Like This Article?
Don't Miss The Next One!
Join over 100,000 photographers of all experience levels who receive our free photography tips and articles to stay current:

Leave a Reply