A hyperlapse is a form of timelapse photography where the position of the camera moves between each exposure to create a nice, seamless tracking shot in timelapse form. It’s pretty easy to do, but not so easy to make it look good. UK filmmaker Cal Thomson shows us how to shoot smooth long exposure hyperlapses:
When shooting long exposures, you’ll definitely need a tripod. To get impactful blurring and streaking effects in daylight, you’ll need an ND filter. And to eliminate camera shake from pushing the shutter button, it’s best to use an intervalometer.
Hyperlapse Equipment
- Canon 6D
- Tamron 24-70mm f/2.8 lens
- Manfrotto 501 tripod
- ND filter
- intervalometer
Composition
When considering your frame, Thomson recommends shooting a nice wide-angle landscape with nothing in the foreground. Also consider your move—what’s your start point and end point going to be? Planning ahead will save you from unnecessary problems while you’re shooting.
Camera Placement and Timing
For his hyperlapse of MediaCityUK on the banks of the Manchester Ship Canal, Thomson sets his interval to about 12 seconds so after the remote automatically fires the camera he has about 10 seconds to move the tripod and re-frame the shot before it fires again. Try to measure out the distance and placement of each camera movement.
Tips to Produce a Crisp Hyperlapse
- Use manual mode to avoid changes between shots.
- Shoot RAW instead of JPEG so you have uncompressed images to edit later.
Because he shoots RAW, Thomson can push the images further in Adobe Lightroom 5 without any loss in quality. He then stabilizes them using Warp Stabilizer in Adobe After Effects CC.
Editing the Images in Lightroom 5
In Lightroom, Thomson brings the highlights down and shadows up and adjusts the white and black points to add contrast to the image. He also increases the clarity and vibrance to sharpen the image and bring the color out. You can make your own adjustments to get an image you’re happy with by also adjusting exposure, white balance, and framing.
To sync all the photos and make adjustments to all the images, press Cmd + A to select them all and hit Sync, making sure all the boxes are ticked. Then you can export the images by going to File > Export. Here you can change to files to JPEG, choose file size, and name the file.
Creating the Hyperlapse in Adobe After Effects
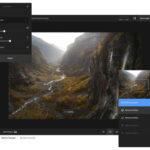
Open After Effects and click New Composition and name your new composition. Select 1920 x 1280 for a full HD frame. Import your footage by choosing your file and making sure JPEG sequence is selected.
Now you can use the Warp Stabilizer to even out the footage so it’s not jittery, but flows smoothly from one image to the next. Go to Effects and Presets on the right and drag and drop the Warp Stabilizer onto the image. This will analyze all the information in the shot and automatically stabilize it.
Once your sequence is nice and smooth, go to Composition > Add to Render Queue. Rename it if you want, then click Render.
And there you have it—your very own beautiful and professional looking hyperlapse!
Like This Article?
Don't Miss The Next One!
Join over 100,000 photographers of all experience levels who receive our free photography tips and articles to stay current:


Leave a Reply