In this article, let’s look at HOW you can actually create your first luminosity mask for yourself…
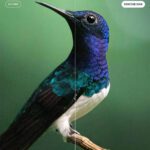
You can run through these steps on your own shot, try to pick a shot that’s kinda similar for the purpose of this demo – i.e. a bright sky with a dark foreground.
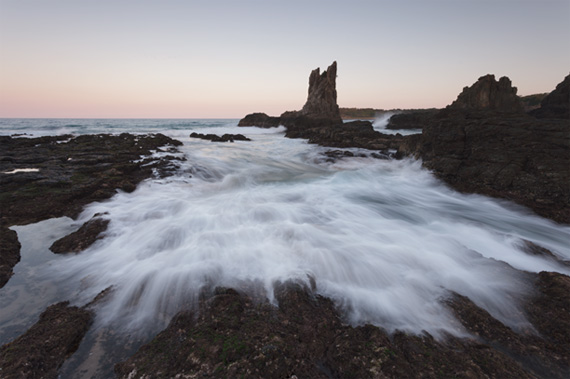
Bright sky, dark foreground
First step, open up the image in Photoshop and activate the Channels panel.
(Either click in the sidebar if it’s there, or choose “Window > Channels” from the menu)
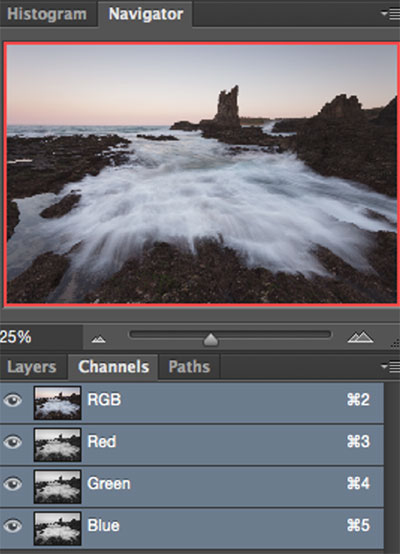
Channels Panel
The Channels panel shows us 4 channels. There is a lot more to learn about channels, but that’s a larger topic for another day.
For now, lets just run through the steps you need to follow to create your first luminosity mask…
Actually, before we do that… Let me take a quick step back and give you a bit more background…
The “normal” way to create a selection in Photoshop is to draw a shape into the image with the Marquee tool. Everything inside that shape is part of the selection, regardless of brightness, colour, or anything else. If it’s inside the marching ants, it’s part of the selection…
Now, when you add any kind of adjustment layer (curves, saturation, levels etc) to an image and you have a selection active at the time, then that selection will be automatically loaded into the layer mask that is attached to that adjustment.
For example, if I create a “regular” selection around the rock using the rectangular marquee tool, the marching ants will look like this:
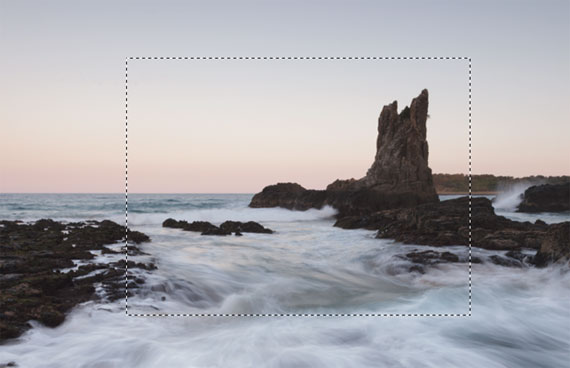
Creating a selection
Then if I add a curves adjustment layer, it will automatically start out with a layer mask that looks like this:
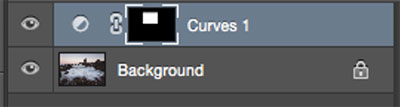
Layer Mask
And if I use that adjustment to darken the image, the layer mask will restrict the effect to inside of that rectangle…
So knowing this, let’s get started by creating a selection which is based on the brightness of the pixels in the image…
To do that, hold the command key (mac) or ctrl key (pc) and click once on the RGB thumbnail in the channels panel. This will load the brightness values of the RGB channel as a selection and you should see “marching ants” all over the image in the main window.
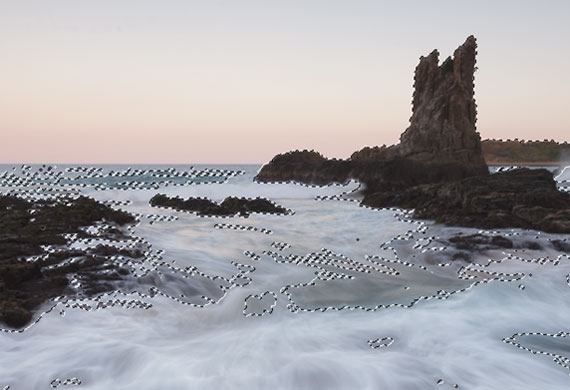
Selection Based on Brightness
Next, go back to the Layers panel (“Window > Layers” from the menu) then add a curves adjustment layer…
You should then see your new curves adjustment layer has been added with a “ready made” layer mask attached:
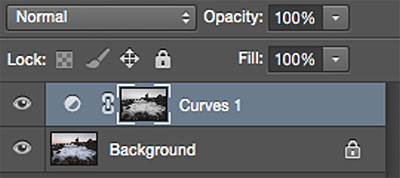
New Curves Adjustment Layer
The selection (which was based on the image brightness) has now been loaded directly into the curves’ layer mask.
Because of this, any adjustments you make to the curve will be applied to the image according to what the layer mask will allow to “show through”.
Remember, white = reveal, black = conceal.
And the brightest parts of the image (sky/water) are the whitest parts of the layer mask…
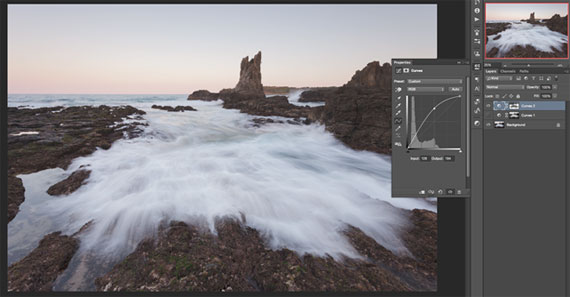
So open up the curves adjustment properties panel (double-click the curves thumbnail in the layers panel), then drag the curve downwards to create a darkening effect.
Then see how the brightest parts of the image are being darkened more than the darkest parts… i.e. the sky and water will be darkened more than the already-dark rocks… And with ZERO halos or dodgy brush marks! YAY!

Luminosity Mask
Congratulations – you’ve just created your first luminosity mask!
“But wait!” I hear you say…
“That’s great if I want to create a mask that allows me to adjust the brightest parts of my image… But what if I want to adjust only the darkest parts?”
Well, that would just take one extra step.
If you want to create a luminosity mask that affects only the darkest parts instead of the brightest parts of a shot, then you can follow the exact same steps as above… Then invert the layer mask…
To do that, click once on the layer mask in the layers panel, then hold command (on mac) / ctrl (PC) together with the letter “i” on the keyboard to invert the layer mask (or alternatively go to “image> adjustments > invert” in the menu)
This will give you a curves adjustment and layer mask that looks like this:
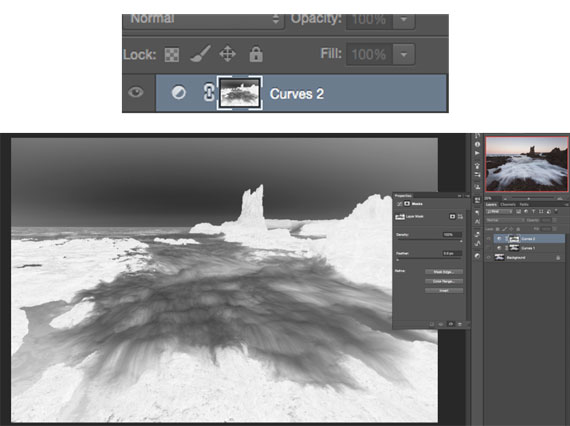
Curves adjustment and layer mask
And when you adjust the curve, it will affect the shadows more than the highlights, thanks to the inverted mask.
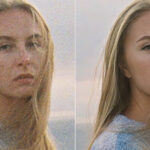
Which is great if you want to brighten the shadows without affecting the highlights:
Brighten shadows without affecting the highlights
This technique can be used in exactly the same way on any other type of adjustment layer, whether it’s curves, levels, saturation, exposure and so on…
Because the essence of this particular technique is that you’re using brightness levels of the image itself to create the layer mask and restrict where the adjustment is shown.
Want to saturate the highlights of an image without saturating the shadows?
Or increase the contrast in the shadows without increasing the contrast in the highlights?
Then just follow the exact same steps as the example we’ve just worked through but pick the appropriate adjustment layer instead of the curves adjustment that we used.
This is only scratching the surface of what Luminosity Masking can do for your photography.
And the great news is there’s an easy way to harness the power of these advanced techniques, without getting stuck in the weeds of all the complicated step by steps, with my…
Luminosity Masking Panel for Photoshop:
I created the Luminosity Masking Panel to make the complicated process of learning and using luminosity masking techniques quicker and easier than ever before!
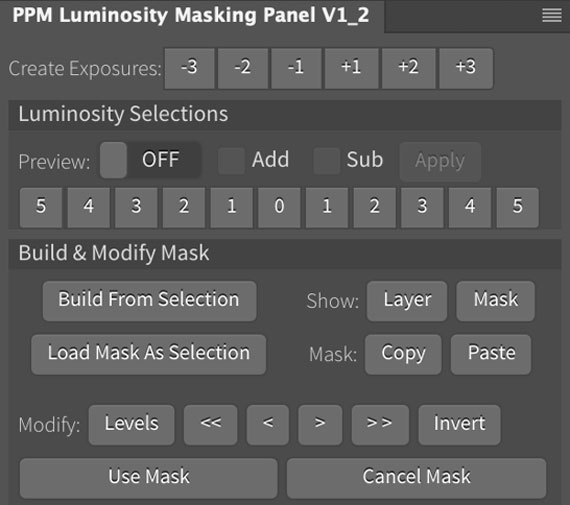
Luminosity Masking Panel
With the panel, luminosity masking is as easy as just a couple of clicks of a button, meaning you can spend less time trying to remember HOW to use the techniques, and more time just making it work for you.
See how it works: The Luminosity Masking Panel for Photoshop
Like This Article?
Don't Miss The Next One!
Join over 100,000 photographers of all experience levels who receive our free photography tips and articles to stay current:

Leave a Reply