Darlene Hildebrandt, a seasoned photographer, and Digital Photo Mentor, recently released a video tutorial on enhancing night photography using Luminar Neo. If you’ve dabbled in night photography and felt that your images lack a little punch, her tutorial will prove invaluable:
The Two Essential Tools: Hildebrandt’s method involves two primary tools in Luminar Neo – Color Harmony and Color Tool.
1. Color Harmony
The first tool to use on your night photos is the Color Harmony tool. The magic happens when you adjust the Hue slider, as the image’s tones shift along the color spectrum. This tool allows you to emphasize different elements of your photo depending on the hue chosen. For example, to highlight city lights, select a hue that brightens them while darkening the blues of the sky.
Color Harmony also includes the Split Color Warmth tool, which allows for separate modification of warm and cool colors. This means you can make the yellow and red lights even warmer, or adjust the blues of the sky and water to your liking. If colors become overly punchy, the Brilliance slider can help dial them back.
2. Color Tool
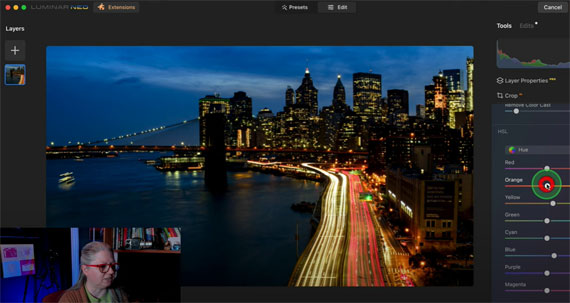
The second tool is the Color Tool, which is in the essentials section of Luminar Neo. It includes the HSL (Hue, Saturation, Luminance) panel. The first slider, “remove color cast,” can correct odd tints in your image and add a bit of contrast and darkness, which works in favor of night photos.
The HSL section allows for adjustments to brightness, color saturation, and hues. Want to emphasize the red lights or make the sky bluer? This is the tool for that.
Why Use Luminar Neo HSL Panel Instead of Lightroom Classic?
Hildebrandt explains that while Lightroom has a similar HSL panel, the adjustments you make there apply globally, meaning they affect the entire image. There’s no way to apply them only to a part of the image. In contrast, Luminar Neo allows more precision.
Saving the Settings as a Preset for Later Use
A key tip from Hildebrandt is to save your settings as a preset after editing an image. This allows you to apply the same edits with a single click to other photos with similar color tones.
Optional Third Tool: Sky Enhancer
Hildebrandt also recommends the Sky Enhancer tool in the essentials panel. This AI tool darkens the sky, adding depth to your night photos. But use this tool with caution – as the Sky Enhancer slider increases, so does the saturation of blue in the image.
Bonus Tip: Sky Replacement
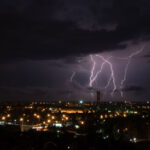
A bonus tip from Hildebrandt involves the use of the sky replacement feature in Luminar Neo. This can add dramatic effects like an aurora borealis or a stormy sky to your night photos, creating a surreal and beautiful scene.
The methods detailed by Hildebrandt allow for significant enhancements to night photography. By focusing on color adjustments and using Luminar Neo’s powerful features, you can create stunning nightscapes with a wow factor.
For those interested in in-depth Luminar Neo instruction, Hildebrandt offers a course available which is currently on sale for a short time.
Deal ending soon: The Luminar Neo Photo Editing Course at 30% Off
Like This Article?
Don't Miss The Next One!
Join over 100,000 photographers of all experience levels who receive our free photography tips and articles to stay current:


Leave a Reply