Some of the most breath-taking photographs taken have been of the night sky. Capturing the stars, moon and Milky Way give a sense of mystery and wonder. That said, without the proper preparation, night photography can be tricky. In this guide, you’ll learn the entire process of taking stunning photographs of stars in the night sky as well as common mistakes to avoid when getting started with astrophotography.
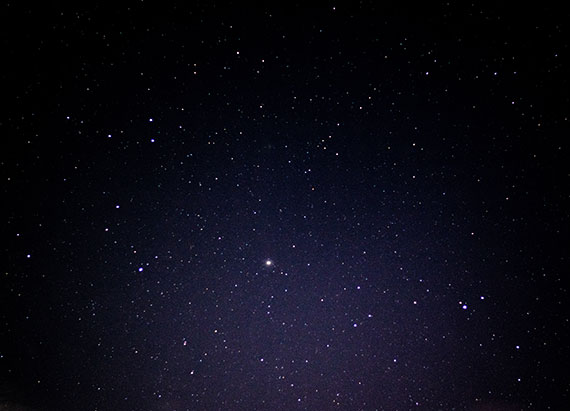
Stunning photograph of night sky – photo by Kyle Gregory Devaras
The Essential Kit Needed to Photograph Stars
There are some essential tools and equipment you’ll need to get the best shots at night. Here are the essentials:
A Professional Camera
You need a camera that you can manually adjust the aperture, exposure and ISO. It also needs to be a full-frame 35mm camera to help reduce the noise of high ISO images you will be capturing.
A Wide-Angle Lens
If you have a full-frame camera, a wide-angle lens between 14-20mm is best. A minimum aperture of f/2.8 is also recommended.
Intervalometer
You’ll normally have a 30-second exposure time without a timer. However, when photographing the stars, you may need long exposure of more than 30 seconds to stop the images blurring. In this case, you will need an intervalometer. You can first try shooting without one to see if you have any issues but it is best to use one.
Tripod
All night-time photography sessions need a sturdy, high-quality tripod. A cheap tripod will shake during the long exposure time needed to shoot the stars, leading to blurred photographs.
The Best Astrophotography Camera Settings
To get the best shots possible, it’s important to set up with the right camera settings for astrophotography. Here are some tips to get started:
Focus
It’s impossible to focus your camera on the stars because of how far away they are. Instead, you need to focus at infinity to get sharp images of stars in the night sky. Your camera may have an infinity symbol on it to show the approximate point of infinity focus. However, this doesn’t mean you’ll get a sharp photograph. Even with this setting, most cameras need to be manually adjusted to get the best focus. Start at infinity and then manually adjust as needed.
Color Balance
When you’re working with a dark sky and no light pollution from streetlights or other sources, the best Kelvin Value is between 4000K and 5000K.
Aperture
As mentioned, the best aperture setting is f/2.8. A wider aperture will detect more light but it will lose sharpness.
Focal Length
If you’re using a full frame camera, a focal length between 14 and 24mm is optimal. If you have a crop sensor camera, you will need to drop this down to between 10 and 20mm.
Shutter Speed
The shutter speed and exposure will depend on what lens you are using. However, between 10 and 40 seconds is good.
ISO Settings
The ISO levels should be set high to support the other exposure settings. Between 800 and 1600 should work well to bring out stars during long-exposure shots with no light pollution.
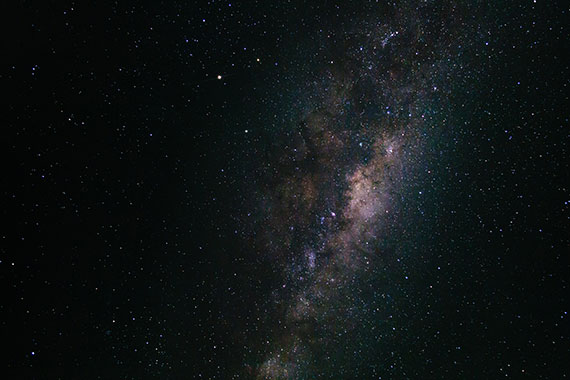
Focal length 20mm, aperture f/2.8, ISO 1600, shutter speed 15 seconds – photo by Nathan Anderson
Common Mistakes that Ruin Shots
There are a couple of common mistakes that will ruin any shot of the stars you get. Make sure you avoid these to get the best photographs:
1. Not Planning Your Astrophotography Session
It’s not as simple as walking outside and looking up. You need to know a little bit about the moon cycle and constellations to get a good shot. The easiest way to do this is to download an app which gives you information about locations of constellations. SkyView is a free android app which will show you what constellations are in your area as well as satellites, the moon, even the space station.
2. Not Factoring in the Weather
This seems obvious but it’s easy to plan an astrophotography session, get the dates perfect for the constellation you want to shoot, and then forget to check weather conditions. Rain or heavy cloud will ruin your shoot, so make sure to double check the weather conditions before heading out.
2. Using Autofocus
Autofocus will always give blurred star shots because of the vast distance between you and the sky. To avoid this, always set your camera to manual and adjust as needed. To get the focus right, take a test shot and then zoom in on a star using your display. If it is still out of focus, keep adjusting.
3. Using the LCD Screen to Judge Exposure
It’s difficult to tell if the exposure is right by eye. Instead, go into the settings and use the histogram to confirm the exposure is optimal. If it shows a peak and trough like a mountain range, the exposure is right. If it has a vertical drop off at the end, it needs adjusting.
The Quick Step by Step Guide for Beginners to Get Started
1. Choose a Subject
Begin by choosing a subject for your project. For example, will you be photographing the moon in a particular phase? The Milky Way? A specific constellation? Use free apps or the Google Sky Map to plan your session and figure out the best night to shoot.
2. Select Your Location
If you live in the city, the light pollution will ruin your chances of getting a clear shot. As such, you may need to drive outside of the city for the best shot. Around 50-100 miles away from major sources of light pollution will give the best conditions. If you’re unsure where to go, DarkSiteFinder is a good free tool to find the best locations near you.
When choosing your location also think about the composition. Do you want to include foreground objects such as buildings or trees in the shot? This will need to be planned in advance to find the best location.
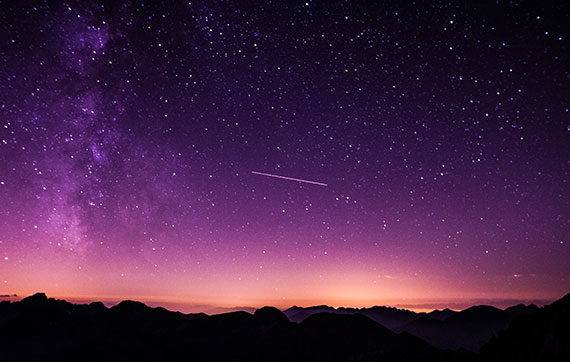
Composition using mountain range in foreground – photo by Vincentiu Solomon
3. Set Up Your Tripod
Begin by setting up your tripod on a flat, even surface. When setting up, use the renowned method of Ansel Adams to set up correctly:
• Point one leg of the tripod at the subject so you can stand between the other legs.
• The center post of the tripod needs to be vertical which you can confirm using the level.
• Use an L bracket instead of the standard mounting plate to keep your camera centered and anchored.
The more time you take making sure your tripod is set up professionally, the easier it will be to take great shots.
4. Consider the Rule of Thirds
This simple rule helps give balance to photographs. To follow it, divide the scene into thirds vertically and horizontally so you have nine equal squares. You can do this using the grid on your viewfinder. Once you have this set up, place points of interest in the intersections – this is where the eye is most drawn.
This can be a useful tool when shooting stars because simply shooting the night sky can be a little boring. Finding constellations to focus on, or using foreground composition which follows this rule, will give your photographs points of interest.
5. Take Your Pictures
Once you have everything set up, take five consecutive photos of the stars using the correct exposure and other camera settings shown above. Cover the lens and take a sixth photograph before moving to a new location. When editing, this will help you figure out which photographs belong to which series of shots. It can get a little confusing when shooting the stars, as many series will look similar.
Processing Techniques to Create Stunning Photographs
When looking at the raw images, you might be a little disappointed by the lack of color. Don’t worry, this is where processing and editing techniques come into play. Here is a simple method for editing your photographs using editing software.
1. Stack Your Images
Begin by stacking all images from the same series (this is why it’s important to take five consecutive photographs). There are many free plug-ins that allow you to this, Deep Sky Stacker, is an example.
Edit Curves and Levels
In Photoshop, open up the TIF file and edit the curves and levels. The image needs to be in 16 bit mode before you can do this, so if it’s at 32, make sure to change this in your settings before continuing.
When creating curves, make sure you don’t flatline the curve – that will mean a loss of data. You want to aim for a nice steep curve by bringing the white point down. You’ll notice the data bar in the levels settings gets thicker as you increase the curves.
Add Color
If you’re photographing the Milky Way or other scenes with color, you’ll want to adjust the color balance to make the colors more pronounced. To do this, subtly edit the blue, green and blue levels to make these more visible.
Make sure you don’t over-edit your photographs. It’s easy to make them look faded or pixelated with too much editing. If you’ve done the foundational work to take good shots, minimal editing will be needed to bring out the best in the photographs.
Color balance enhanced to show nebula – photo by Thom Schneider
Enjoy Taking Photographs of the Night Sky
That is the entire process of taking photographs of stars at night. Astrophotography does take time to master, so the more you can practice, the better your shots will become.
About the Author:
Lisa is an avid photographer with a passion for night photography. Using over a decade of experience, she created an in-depth night photography guide to help others take stunning photographs during night-time.
Like This Article?
Don't Miss The Next One!
Join over 100,000 photographers of all experience levels who receive our free photography tips and articles to stay current:


Great tips, Lisa! I agree with all the information you have mentioned in your article, especially the mistakes. In my case, I always used autofocus, which didn’t give me a good shot. Next time I will surely utilize your tips. Thanks for sharing