Night/astro/star/star-trail photography—whatever you want to call it, this is a genre which has become increasingly popular over the past couple of years (partly connected with the increase in sensitivity of reasonably-priced camera sensors over the same period). The irony being that it’s also one of the easiest forms of photography that yields some of the most impressive results if you get it right.
Given the chance for some downtime while traveling around the New Zealand wilderness in our “Jucy Casa” campervan, I reflected on the sheer volume of exactly the same questions which were asked by the people around us while shooting at Lake Tekapo. So, with that in mind, here’s “Paul’s Guide to Star Photography” in bite-sized chunks that are as easy to digest as a Jimmy’s Pie!
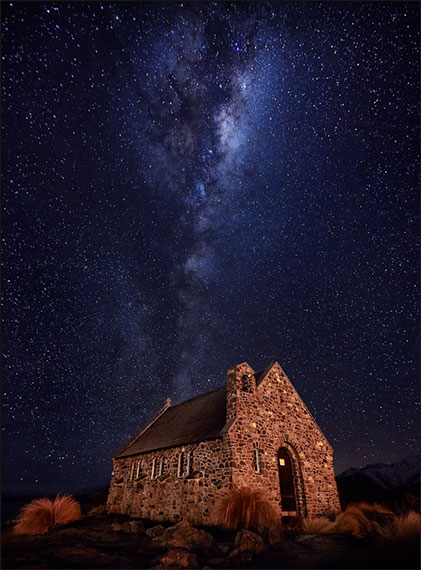
While Shepherds Watched
The above image is a single frame from the camera, no “Photoshop tricks” or playing, And here’s the funny thing: with the right tools, it was also really easy to capture. So, let’s get started.
Night Sky Photography Gear
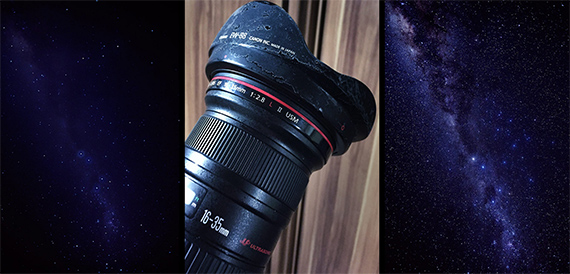
You’re going to need some specific camera equipment to do it justice. In order to capture a sharp, (relatively) noise-free, clear and vibrant image you do need some things in your kit bag:
- Lens with at least a wide open f/2.8 aperture, (if possible, even better than that)
- Wide-angle lens of 16mm or wider (35mm equivalent)
- Camera body with a full-frame sensor, if possible
- The capability to shoot at a minimum of ISO 1600 at night with low noise
- The ability to manually focus on infinity
- Manual shutter mode, with exposures of 25–30 seconds
- A red headlamp, dimmable
- A source of soft light in different colors if you want to light paint
From the above, you’ll see that some point-and-shoot cameras simply won’t cut it for this sort of shot. Also, don’t fall into the trap of thinking the more expensive equipment is better. For example, this isn’t a shot that my Phase One camera can actually take, so I switched back to my full-frame Canon with L lens instead. Some of the most popular lenses for this type of photography are also some of the cheapest —Samyang manufacturing one of those—where the preferred lens for many astrophotographers is actually around a third of the price of Canon’s L series equivalent—and arguably better suited!
Smartphone Apps for Astrophotography
We’ll go into more detail on the aspects above shortly, but I’m also going to add three tools to your phone as necessities for night (or sunrise/sunset) shooting. TPE is a good weather app (not Apple’s!), as is SkyGuide. Of course, there are loads of others out there that do similar things, but I’ve found these are the best for what I need. Together, they can give you information on exactly where the Milky Way is located at what time, and also when the moon is going to make an appearance. When you’re heading into the middle of the night to capture a lone church, a good weather forecast and GPS along with these tools can be the difference between a successful mission and failure—and we weren’t alone in that planning; there must have been 40+ people at the same spot we were trying to capture!
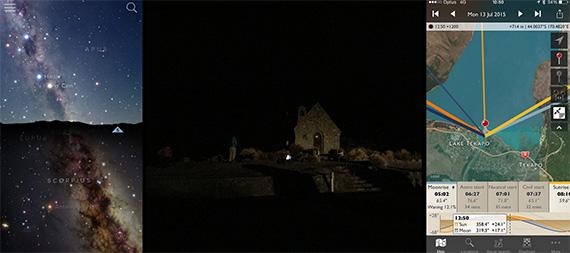
Tools
The moon is really important for this type of shooting, because we don’t want it! if the moon is out, it’s almost impossible to see, and capture, the stars. So, what are we looking for exactly with these apps?
Scouting a Location
We’re trying to find a spot with:
- An interesting foreground (to frame the stars)
- A clear sky with no clouds (preferably)
- No moon in the sky (so either a new moon or before moonrise/after moonset)
- As little light pollution as possible
On that basis, The Church of the Good Shepherd in Lake Tekapo, New Zealand, is what many consider to be a perfect location. We got lucky with the timing as although there was due to be a half-moon, it wasn’t expected to rise into the sky for 3–4 hours after we arrived to the clear winter sky. Bear in mind the stars move, as well as the moon, and if you’re looking to capture that all-important Milky Way up there, you’ll need to time it right! Of course, the no cloud thing isn’t always 100 percent essential; sometimes it’s good to add mood and atmosphere to a shot, such as the image below taken at Nugget Point Lighthouse near Kaka Point in the Catlins on New Zealand’s East Coast, but when trying to keep the focus on the stars and foreground, a clear sky is what we’re really looking for.
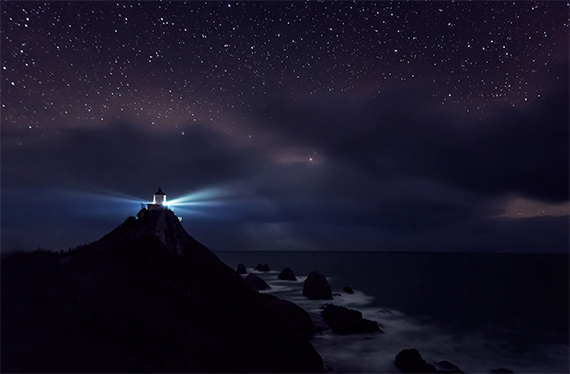
Nugget Point Lighthouse
So, that’s our prep. Now on to why the equipment specs are so critical and how to set up your shot.
Camera Settings
First, let’s look at the lens. That wide aperture is essential—you need a lens that can let in as much of the light coming from those tiny specs as possible. An f/4.5 or 5.6 simply isn’t going to cut it; you need it to be as open as possible, or you’ll be compensating with either an increased ISO or longer shutter time and anything more than 25–30 seconds will deliver star trails instead of points of light. Star trails are a great effect too, but not what we’re looking for here. Also, bear in mind that your lens is not at its sharpest when wide open. A 2.8 lens might actually be better at 3.2, so the wider (smaller number) you can get to start with, the better.
Next, let’s look at manual focus and zoom. Generally speaking, you want to get as much of the sky in as possible, so the wider the focal distance on the lens the better. Remember that as you approach the corners/edges, the motion in the stars will appear to increase and those parts of the image can become “soft”—not out of focus, but not perfect, so try to keep the main subject towards the middle of the frame. For focusing, you’re going to need to manually set your camera to infinity. Cameras generally need light to focus accurately, and for the sake of others around you, please don’t do what a coach-load of tourists managed to do on arrival at the church and all use their billion-watt torches to try to get their camera-phones to focus on the building! (You also don’t actually need to.)
Night vision is really important, taking 10 times longer to get accustomed to the night sky than it does to get used to bright light, and using a red head-torch will help prevent damaging that vision. So with your soft light, look over the lens and make sure your focus ring is set to the location of infinity (the sideways 8 shape). Do bear in mind that some lenses (such as my Canon 16-35L II) have a different point for infinity when using it at its widest setting (in red). Using the standard white line will give you an out of focus shot like below:
Out of Focus Infinity Issue
It can be challenging to compose a shot in pure darkness on the viewfinder (or live-view, for that matter), so a certain amount of this is shoot and correct. By that, I mean do your best to compose the shot through the viewfinder, take one, and then try to re-compose if needed. Your camera at ISO 1600 for 25 seconds is far more sensitive than your eyes, so pointing in the right direction to capture the core over your chosen foreground will give you an immediate “wow” on the preview screen. If you have it, turn on both “High ISO Noise Reduction” as well as “Long Exposure Noise Reduction.” The result of this will mean for every 25 seconds the shutter is open, the camera will take another “dark curtain” (pure black) image of the same length of time afterward to establish which parts are sensor noise and give you a much cleaner image when it’s done processing.
Ideally, you’re looking for a shot on ISO 1600–2000, around f/2.8 for 25 seconds.
Some cameras (such as Canon’s 6D and Sony’s A7R) have an amazing ISO range which can allow you to shoot for less time (meaning less movement in the sky) as well as at higher ISO levels with no noise, but the settings above are a guide for the minimum on most current cameras.
Light Painting
Now what about that foreground? I mean, it’s great having no light pollution, but I really want the church to be visible and a focus in the final image. Well, here’s where light painting comes into play.
First things first, do not get our your “night-sun” billion-watt torch for this! Remember, you’ve set your camera up to capture the tiny light details in the stars, and any strong light is simply going to blow your image as well as everyone else’s. I use an app on my iPhone which allows me to turn the entire screen into one color, at a specific brightness. This means I can “wave” soft light of any temperature at the foreground. During your 25 second exposure, a few throws of this light in different directions over the subject will illuminate it just enough to bring out the detail you need. Of course, some light sources are unavoidable; car headlights pulling into the parking lot was a favorite of ours! There’s really nothing you can do about it (and people need their headlights at night) so it’s just a case of timing your shot in between light movements around you.
Dealing with Cold Weather
So we’re now outside shooting in the winter, with all our settings correctly dialed in and still, we get a blurry picture?! Well, I bet I can guess what it is…frost. Many camera bodies and lenses are made of metal. Metal, in the winter, gets very cold—and so does glass. That’s fine, unless you’re shooting by a lake or large area of moisture. And guess what? That happens to be the location of some of the least light polluted scenes in the world. Oops, we have a problem!
Frost
No worries though, it’s fixable; just don’t breathe on your fogged up lens! The moisture in your breath will make it worse.
Instead, put a (hopefully warm!) finger inside a clean lens cloth and slowly use the tiny bit of heat to melt the ice around the front element while the cloth will prevent scratches. This is also where weatherproof cameras come in to play, along with carbon fiber tripods (which don’t freeze as easily) and memory cards such as SanDisk’s Extreme Pro series which work across a massive temperature range.
Of course, if you’re shooting in the summer you won’t have the issue of freezing equipment (be careful with the opposite issue of heat!) but do be aware of the environment in which you’re expecting your kit to perform. I’ve even seen hand-warmers taped directly to camera bodies for this—generally not a good idea as they get too hot, but you can see the lengths some go to to avoid the freeze-up.
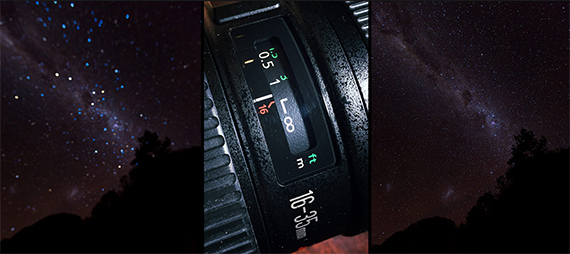
And that’s it! Click away, capture as much of the night sky as possible and review on the screen after every shot. It’s important to zoom in on any previews to make sure your focus is still accurate as things can turn and move while changing settings. Once you’ve got that great shot, it’s also time to experiment such as different colors of light painting or using any zoom on your lens to generate a “warp” toward the stars in-camera. (A great idea I borrowed from my friend, Wayne!) Take a look at the below images; the one on the left is a straight up shot, the one on the right is a single frame too, but with the zoom used for around half of the exposure. :-)
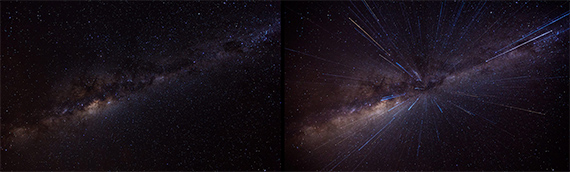
Milky Way Galaxy
And that’s it! Simple, really, and so very effective. I see and hear some photographers trying to turn star photography into a dark mystical art when really it’s one of the simplest things to capture once you have the right settings and are standing in a good place. Of course, they don’t want you to know that, but why not give it a try? You might find it’s a very easy way of creating some amazing images with the kit you already have. Having a mobile base was key for us doing this type of photography, allowing us to run back into the warm in remote locations when needed, but often, you can get some amazing night sky views from your own backyard!
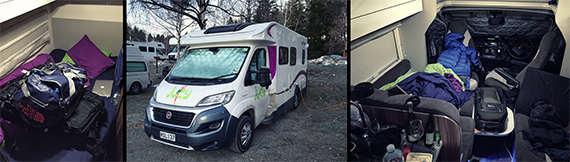
Caravan Touring
And as always, to finish on, here are Paul’s “bonus top tips”—essential to life?
- Beans on toast are a great thing to wake up to in the morning after freezing cold star photography.
- In New Zealand, Jimmy’s Pies have an incredible way of warming you up at night.
- While they may look stupid, my North Face “sleeping bag boots” win over anything else for warmth!
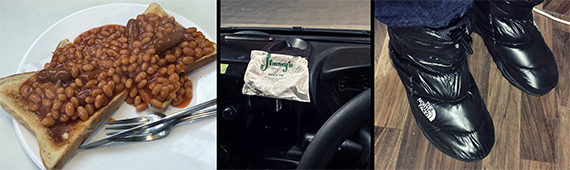
Essentials for Night Sky Shooting
Have fun! :-)
About the Author
Paul Reiffer is an award-winning landscape and cityscape photographer, and a fellow of the British Institute of Professional Photography. He shoots worldwide for some of the most recognized brands in the industry and offers hands-on workshops for all levels of photographer. For more info: http://www.paulreiffer.com
Like This Article?
Don't Miss The Next One!
Join over 100,000 photographers of all experience levels who receive our free photography tips and articles to stay current:


Leave a Reply