Street photography simultaneously tests your hand-eye coordination, your ability to see and frame interesting moments as they quickly unfold before you, your ability to see light, your technical abilities with your camera, and your ability to be comfortable capturing strangers.
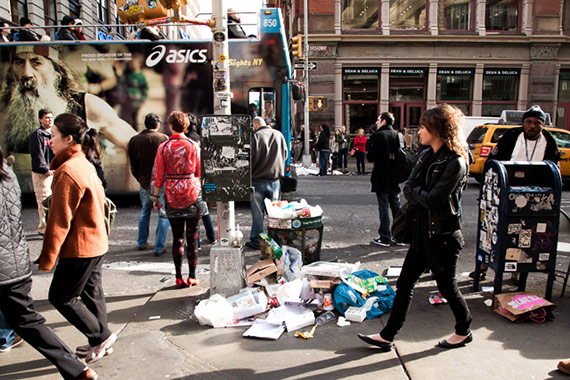
Prince and Broadway, 1/320 at f/8, ISO 800 (24mm)
It is so much to do at the same time, let alone to think about an image conceptually.
While there is no substitute for experience, the goal of this article is to help get your technical abilities and camera settings up to par in order to make things so much easier for you. When you get good at these skills, with some practice, it will almost feel as if the camera isn’t there. When done well, it feels like it is just your eyes and the scene in front of you.
However, to make that happen can require some specific ways of shooting.
1. Camera Settings and Shutter Speed Priority
I have noticed when teaching that way too many people shoot in Aperture Priority mode in every single circumstance. Aperture priority mode is a great way to shoot for things like landscapes, architecture, when you want a shallow depth of field, or for portraiture. If you’re good enough with either Aperture, Shutter, or Manual mode you can use them for any situation. However, for street photography, I suggest that you consider shooting in Shutter Priority Mode. The toughest thing to do is to freeze motion in a scene and to make the important elements sharp, and you need to have the right shutter speed settings to do this.
To freeze motion on the streets, my go-to setting is Shutter Priority at 1/320 of a second. If it is very bright out I will go to 1/500, and in darker situations I will go down to 1/160.
Manual settings can work, but I prefer to let the camera do the work to set the corresponding aperture. While you want to have control over the settings of your camera, you do not want to have to change them every single time you change your direction. If you are pointed into the sun one second and into the shady side of the street another, it can become a nuisance to change the settings each time. However, if you are in a situation with very consistent lighting, manual can be a great mode to use.
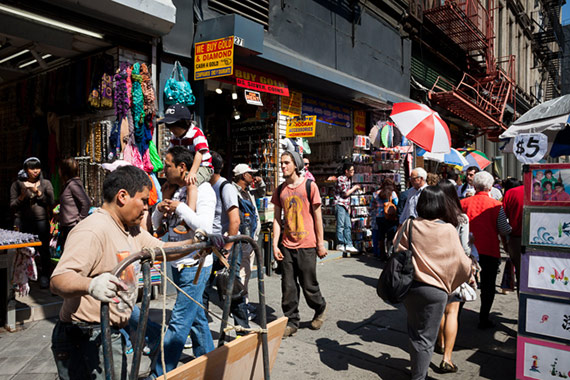
Canal Street, Chinatown. 1/400 at f/16, ISO 800 (28mm)
2. High ISO
I also prefer to photograph with a high ISO for street photography. There is a common misconception that you need to photograph with low ISOs, when in fact, shooting with a high ISO will often yield a photo with better technical qualities, besides the added grain.
Getting the focus correct and freezing fast moving scenes is extremely tough, and shooting with a high ISO will allow you to photograph with a faster shutter speed and a larger aperture, from f/8 all the way to f/16, creating a larger range of sharpness in an image. Should you miss the focus a bit on the main subject or have multiple subjects at different depths, there is a better chance that they will still come out acceptably sharp. This can be especially important with zone-focusing, which will be talked about below.
I generally alter my ISO settings between 400 and 3200, with 800 and 1600 being the most used. Newer digital cameras tend to create images with fantastic grain at higher ISOs, so for a lot of cameras this will not be a worry. For older digital models this might be too high, so test your camera at these settings. This way of shooting is not for landscapes, scenes without any moving subjects, or for any tripod or studio work where you have a lot more time to set up your scene and get the focus perfect. This is for street photography.
You will quickly see that your images, while grainier, will be crisper and sharper and will look better.

1/400 at f/5.6, ISO 800 (35mm equivalent) – Fuji X100S
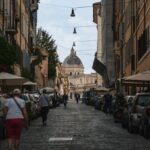
3. Use a Wide-Angle, Prime Lens
It can feel more comfortable to shoot street photography with a zoom lens from a distance and there are some photographers who do this well. However, I implore you to try street photography with a wide-angle prime lens. You might not go back to that zoom.
A wide-angle lens will open up the scene since you will have to capture people from a closer distance. It will allow you to capture more of the surrounding area itself, while having a prominent subject large and in the foreground. When using a wide-angle lens it almost feels like the viewer is immersed in the scene and not separated from it at a distance.
In addition, using a wide-angle perspective will allow more of the scene to be sharp and when mixed with a smaller aperture (f/8 to f/16), will allow for a very large range of sharpness in the scene.
The final reason to use a wide-angle prime lens is that they are often lighter and easier to maneuver. This will allow you to photograph more freely. Since the camera will be smaller without a heavy zoom lens, it will be easier to get closer. Also, over time you will get so used to that focal length that you will begin to see the potential framing before you even start to frame the scene and look through the viewfinder. Having to alter the zoom before taking a shot can get in the way of spontaneous shooting.
My preferred wide-angle lenses are 35mm and 28mm on a full frame. That would be close to a 23mm or 20mm on an APS-C sensor camera.

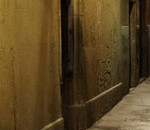
Camera zone focused at a couple feet away. 1/250 at f/5, ISO 1600 (35mm)
4. Zone Focus
Zone focusing involves turning your camera to manual focusing, setting it the focus point to a specific focus distance (I often prefer 10 or 8 feet away) and then photographing your subjects around that distance from the camera.
This is done best in bright areas where you can use a small aperture, but it can be done in darker situations if you get good at it. If you are photographing on a bright day with a 28mm lens at f/16 and your focusing is set to 10 feet away, not only will people at 10 feet be tack sharp, but everything from 4 feet away to the background will be very sharp. This makes photographing a breeze. With zone focusing and a prime lens all you have to do is see something, get in place, frame, and click. If you like to hip shoot (shoot without looking through the viewfinder) then this is the best way to do it since you can still get the focus correct. When the light gets lower and you have to use larger apertures, such as f/5.6 or even f/2.8, it becomes much harder to zone focus, however with practice you can still do this well.
Also, don’t forget that you are just a switch away from turning the autofocus back on. When I zone focus, I will still turn the autofocus on quickly when I need to, which happens fairly frequently.
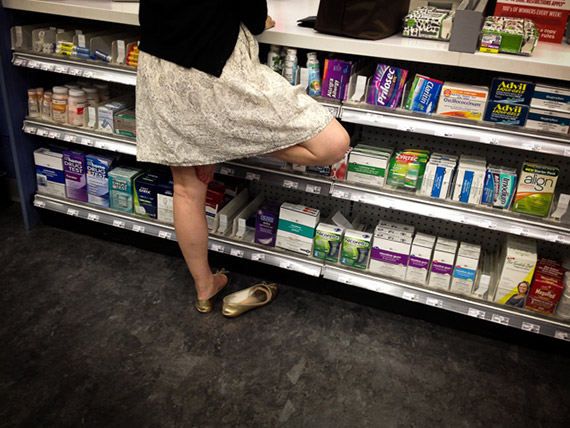
Dancer, Pharmacy. Shot with iPhone.
5. Try a Smaller, Lighter Camera
You can do this type of photography very, very with well with a DSLR and a prime lens. However, there is no question that a smaller camera is an advantage. There is nothing like street photography with a smaller camera, and there are many fantastic lines of smaller cameras to try these days, both mirrorless and micro 4/3.
I use and love the Fuji X100 line (and the entire line of smaller Fuji cameras is good), but Ricoh, Sony, Olympus, and of course Leica (if you can afford it) all make incredible smaller cameras that are a joy to use and make it easy to take everywhere. What is the point of having a great SLR if you don’t enjoy taking it with you on a daily basis? Even an iPhone can work as long as it gets you to photograph consistently.
So put on a 35mm prime lens, set your camera around a shutter speed of 1/320 at ISO 800 or 1600, turn it to manual focusing at 10 or 8 feet away, and forget that it is even there.
About the Author:
James Maher is the author of Essentials of Street Photography, which covers everything about the genre even down to specific post processing techniques that can bring the best out of street scenes.
Like This Article?
Don't Miss The Next One!
Join over 100,000 photographers of all experience levels who receive our free photography tips and articles to stay current:


The best advice I’ve ever read, and everyone should read to it. Take no notice of what others say. Carry on as usual!
My style is really different. And I think more challenging. My default aperture is f/2. I almost never go higher than f/4 on the street, but it depends a bit on the lens I use. I almost always work in aperture priority mode, sometimes in full manual and hardly ever on shutterspeed priority; I can influence my shutter speeds easy enough with my aperture and using auto-ISO also really helps a lot.
This way of working asks more of your technical skills, but I think this is worth it since it produces pictures with a much more clear focus on your subject.
Favorite lenses: my number one is by far the 23/1.4 on one of my Fujifilm X series cameras. I often have a second camera with the brilliant 56/1.2 attached to it, just for when the situation is better suited for a longer focal length. For really lightweight walks, I use either the 35/1.4 or 27/2.8 pancake.
I’ll proceed reading some other articles on your site!
I appreiciate you for your guidance. I am an event and wedding photographer. Your views are valuable to me to learn street photography. I will try to do and then let you know.