When creating HDR images one must be concerned with the HDR look. But what exactly is the HDR look? If one wants to be technical then the look is defined as a tone mapped look; an image that is the product of the merging of three or more bracketed exposures that is the result of tone mapping and not the merger alone.

photo by Kuba Bożanowski
So what! In reality, the HDR look is a creative look, the tone mapping that produces an image that resembles a traditional photograph but no longer looks like a traditional photograph. Colors are richer, more saturated. Edges are better defined and detail is clear across a wide tonal range. High levels of localized contrast along side richly detailed areas of shadow luminosity where tonal barriers are crossed to the point of surreal presentation.
Now one is coming close to a definition of the HDR look. It is recognizable if not definable; much like the definition of pornography when someone said, “I can’t quite define it but I know it when I see it.” the HDR image is clearly recognizable by all who see it.
Tone mapping software, such as Photomatix Pro or Aurora, offers one a wide range of creative control. One may use controls to keep the image looking more natural, more realistic look, much like a single image shot or one may use controls to achieve what some have described as painterly, cartoonish, or surrealistic. In my own work, I tend toward creating the more surreal look which often prompts people to ask if I enhanced the colors. In fact, the rich saturation I achieve is the result of the HDR process and nothing more than that.

photo by Jacob Surland
That being said, one must also realize that tone mapped images are rarely perfect, hence the need for a powerful image processor such as Photoshop.
Tone mapped images may look flat, may lack overall contrast, and often suffer from ghosting, halos and other artifacts. Depending on the amount of a surreal look one wants to achieve, the first step in adjusting the final image file is to use curves to enhance contrast. The S-curve that appears over the histogram in Photomatix is a simple adjustment that adds contrast to a flat image. One must be careful to not go overboard in making curve adjustments. I like to do curves adjustments on a separate layer so I can also take advantage of masking, blending and opacity adjustments separately. The object of the curve adjustment is to preserve highlights and shadow detail while boosting the contrast of the midtones.
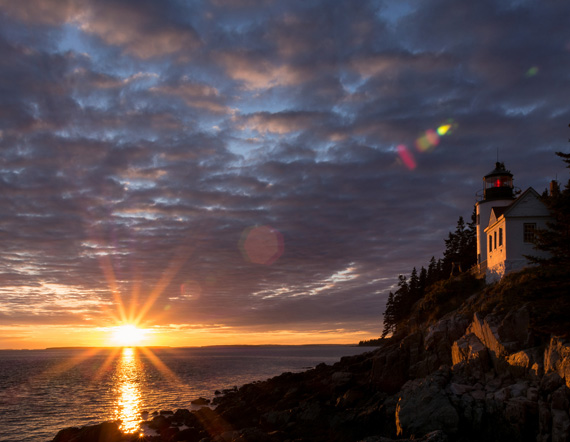
photo by Peter Lee
You will notice a significant improvement in the appearance of your tone mapped image with the application of just a slight S-curve adjustment. There are other ways to creatively approach your HDR imagery. But I will save some of those for a later post.
About the Author:
Roger Passman is an award winning professional photographer located in Northern Illinois (rogerpassmanphotography dot net). He often leads creative photo workshops designed for beginning through intermediate amateur photographers.
Like This Article?
Don't Miss The Next One!
Join over 100,000 photographers of all experience levels who receive our free photography tips and articles to stay current:


This is my definition of HDR: A final image which is very close to what the eye actually saw. No more, no less. About the surreal, this is purely the result of being carried way during the tone mapping. Still, I suppose its legitimate to have such fun; so long as the shot is yours, and is not awaited by a serious client who is paying big money.
“Colors [sic] are richer, more saturated”
Not always.
“where tonal barriers are crossed to the point of surreal presentation.”
In 10% of good HDRs and 99% of bad HDRs. Speaking of which, you’ve managed to pick two very poor examples of HDR, especially that second shot; over-saturated and poorly composed. I’m sorry to say that it’s articles like this that give HDR a bad name.