Dodging and burning is an old darkroom technique, and it’s simply lightening or darkening certain areas of a photograph while leaving the other areas as they are. In the digital age, we still use dodge and burn to lighten and darken, but we use editing software to do it instead of controlling light in the darkroom.
Luminar’s Dodge & Burn tool is very simple to use; you don’t need to remember whether dodge is lighten or burn is darken, unlike some other image editors.
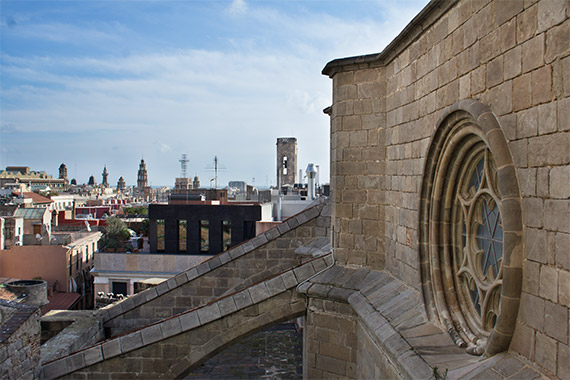
For this article, I’m using a skyline of Barcelona that was taken around midday. There are areas of deep shadow, and the sky is too light in places.You can use dodge and burn on any type of photograph, and if you just want to practice you can use Luminar’s handy sample image.
Related reminder: only a few days left to Pre-Order the New Luminar Neo Ecosystem
Note: you can use the coupon code picturecorrect20 for an additional 20% off
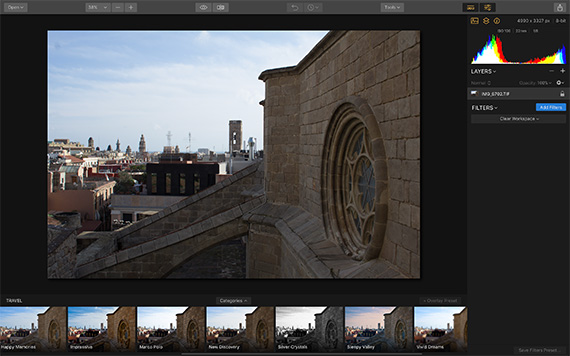
Barcelona Skyline
To get the best out of the Dodge & Burn tool, you should have already made your adjustments such as exposure, contrast, color, adding an overlay etc. Dodge and burn should be one of the final steps in editing an image. Think of it as adding the finishing touches. The image I’m using today has been deliberately left unedited so you can see the dramatic changes you can get just by using the Dodge & Burn, too.
Upload your image, then click the Add Filter button on the right-hand side of the screen. A list of filters will appear.
Youll find the Dodge & Burn tool in the Professional category of filters. Don’t be put off by it being a professional tool; it’s very easy to use even if you’ve never done dodging and burning before.
Click on the Start Painting button:
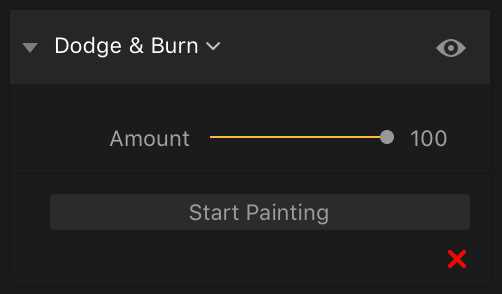
Start Painting
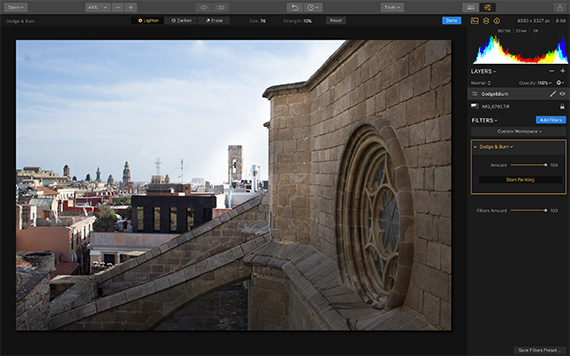
A bar will appear across the top of the screen with the dodge & burn options:
Bar
You can change from one to the other just by clicking the buttons. Lighten and darken will give you a brush that will lighten or darken the parts of your image that you paint on. Erase will rub out the changed areas, which is great if you make a mistake, and Reset will completely undo all of the painting you have done up to that point.
The Size and Strength options are to control the brush. You can adjust the size of your brush tip by changing the slider under Size, but there’s a handy keyboard shortcut by using the bracket ( ) keys to make your brush larger or smaller.
The strength option is set at 50 percent by default, but I find that’s too strong, and can make your adjustments look unnatural. I always move the Strength slider down to between five and ten percent to start with. If that’s not enough, I will then move it up by stages until I have the perfect strength for that image. Each photo is different, so while some may need a lot of adjusting, others only need a light touch.
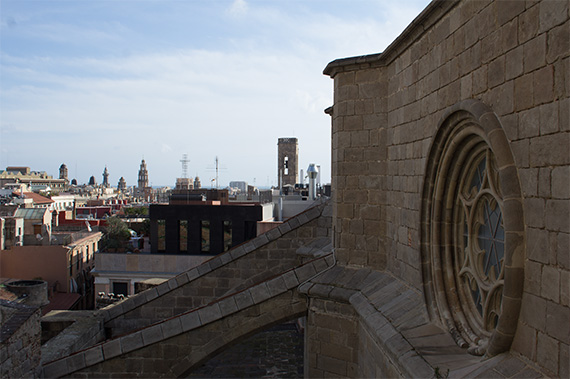
The shadow sides of the buildings in this image could do with lightening up. Once I had set up the strength and size of my brush, I simply brushed over the areas on the image that needed lightening. Luminar has a built-in sophisticated masking system, so it will blend the edges of your brush strokes for a natural look.
Lightening
I darkened the sky and the buildings that were in direct sunlight using the Darken tool. This is great if you have areas of your image that are a bit washed-out or slightly overexposed. If you have totally blown highlights, there will be no detail left in them to recover by darkening, so it’s not worth doing on really overexposed images.
It’s best to build up your brushwork gradually, and every now and then stop and take a look at the whole image to make sure you like all the changes. You can also toggle between Before and After views by using the eye icon along the top menu bar. This will allow you to see how far you have come from the original image.
This is the image before and after dodging and burning:
Before
After
You can see the dramatic difference in both the buildings and the sky, and it looks very natural. Dodging and burning really helps to finish off an image, and can draw your viewer’s eye towards certain parts of the image that you want to emphasize.
Try it Yourself:
This fall marks one of the most exciting leaps forward in photo editing. With the 2025 Fall Upgrade, Luminar Neo expands across every major platform — now available on iOS, Android, and ChromeOS — and lays the foundation for the Luminar Ecosystem (pre-order offer ending soon).

Skylum is delivering on a vision many photographers have long dreamed of: freedom to create anywhere, share everywhere, and let inspiration flow without friction. Try the coupon code picturecorrect20 for an additional 20% off
Only a few days left: Luminar Ecosystem Pre-order Sale
Like This Article?
Don't Miss The Next One!
Join over 100,000 photographers of all experience levels who receive our free photography tips and articles to stay current:


Leave a Reply