Travel photos are always exciting, bringing back memories of your journeys and the people you met. But have you ever looked at them when you got home and wished that the colors were more vibrant and exotic?
Today we are going to try to accomplish that using Creative LUTs and Looks in Luminar 3. I’m going to take you through the steps to give your travel images that extra bit of zing and color. Let’s get started!
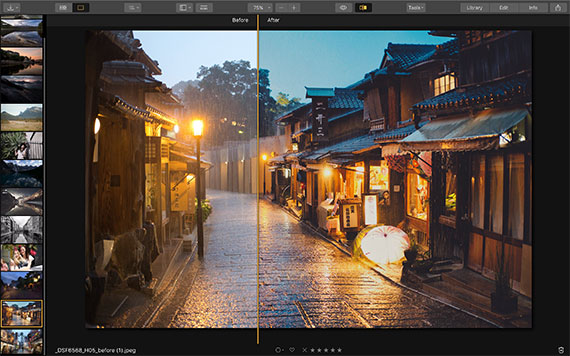
Here’s the first image:
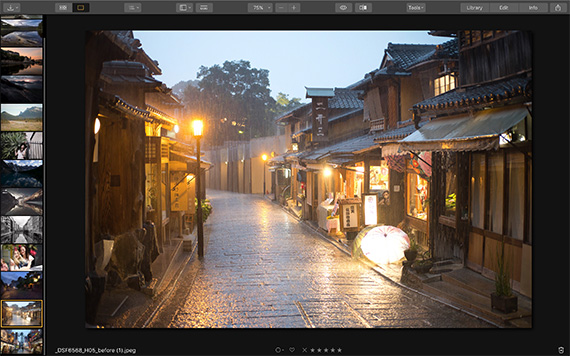
It needs a bit of basic adjusting before we can add a LUT to it, as LUTs won’t work to their full potential if you haven’t made adjustments first (such as exposure, shadows, etc.). This photo needs the highlights cooled down a bit and perhaps an exposure adjustment.
I used the Accent AI filter at 40 percent and reduced exposure and highlights. The highlights on this image are too overexposed to rescue in some places but the rest are looking good.
Find the LUT Mapping filter by going to the Add Filters icon on the right-hand side of the screen:
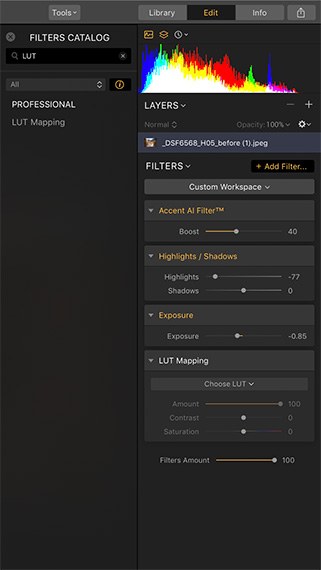
LUT Mapping
Click on the drop-down arrow on LUT Mapping, and you will see a selection of LUTs to choose from:
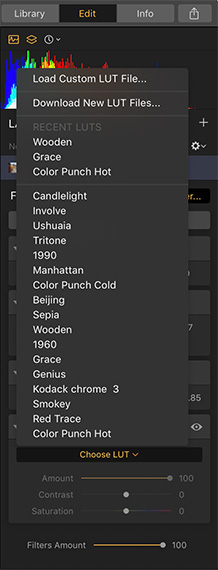
LUT Choices
You can then pick a LUT, and it will automatically apply it to your image. You can adjust the amount, contrast and saturation of the LUT to suit your photo.
At the top of the menu, you’ll notice there are options to download new LUT files and to load custom LUT files. Luminar 3 has a range of free and paid for LUTs to download in addition to the ones that are built in, and adding new ones is simplicity itself. Simply follow the instructions when you download the LUTs.
As you move your cursor over the LUT options, your image will change on the screen to show you what it will look like with that particular LUT applied, so you don’t have to guess before you apply it.
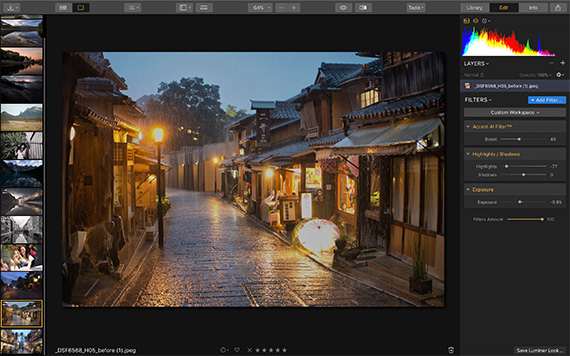
I chose the Beijing LUT and adjusted the strength, contrast, and saturation in the sliders below LUT Mapping:
As you can see, the LUT has added a depth and vibrancy of color to the image, as well as warming the tones up.
You can also go on to add extra filters to your image if you wish, and you can save the adjustments you’ve made for the future by clicking on the Save Luminar Look button at the bottom of the screen.
Using Creative Looks
Another way to make your travel images pop is to use the Luminar Looks. You’ll find the Looks icon up on the top menu bar of Luminar 3, and it’s three squares in a row:
![]()
It will turn orange when you click it, like in the screenshot above, and a film strip of Looks will open up beneath your image:
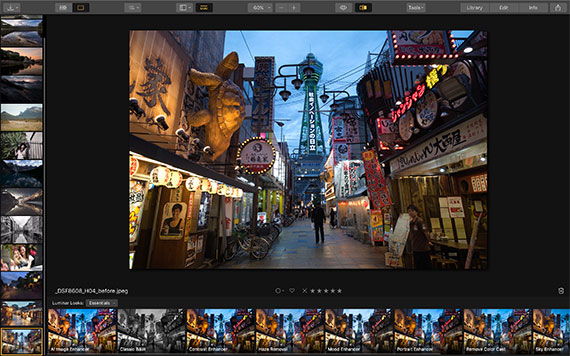
There are different categories of Looks for you to choose from. Click the drop-down next to Luminar Looks on the bottom of the screen above the film strip, and you will see different collections:

There is every type of Look in these collections you could possibly need, from Street through to Aerial. And there’s an option to get even more Luminar Looks.
Let’s choose a couple of different Looks for this travel image.
I chose the Street collection Matte look for the first one, as it has such vibrant colors and contrast:
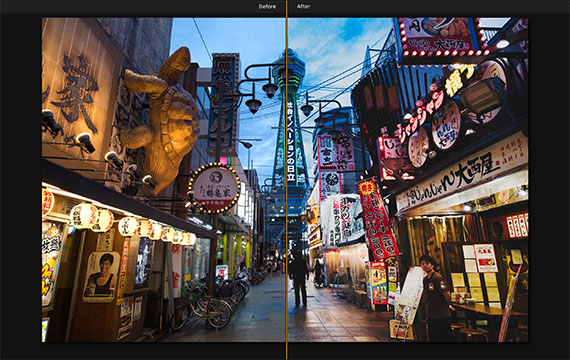
I also reduced the highlights in the Highlights/Shadows filter to make a better exposure.
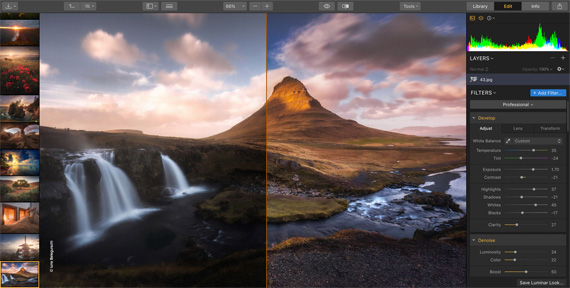
For the next look, I chose the Dramatic collection’s Krushed. Here’s the before and after split:
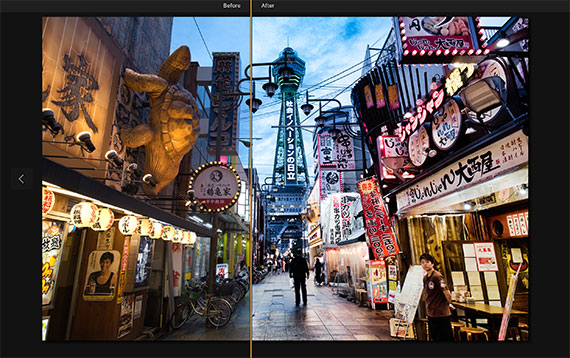
Again, I used Add Filters to adjust the highlights and boost the vibrance a bit.
And there you have it!
Final Thoughts
Creative Looks and LUTs can make your travel images stand out from the crowd. And they don’t require hours of complicated manual adjustments, layers, and masks. Why not try experimenting with Looks and LUTs to add the finishing touches to your masterpieces?
Luminar Spring Sale Ending Soon:
The new version of Luminar is currently on sale to celebrate the update and the Spring season.
New: Luminar 3 with Accent AI
P.S. you can get $10 off if you use the coupon code picturecorrect at checkout.
Offer ending soon: Luminar 3 with Accent AI Spring Offer
Like This Article?
Don't Miss The Next One!
Join over 100,000 photographers of all experience levels who receive our free photography tips and articles to stay current:


Leave a Reply