Here’s a Lightroom trick that’s surprisingly useful—and one many photographers never discover. It’s hidden behind a simple keyboard shortcut, but once you know it’s there, it can completely change the way you sharpen your photos. Even better, it helps solve one of the most common sharpening mistakes: adding detail to parts of the image that shouldn’t be sharpened at all.
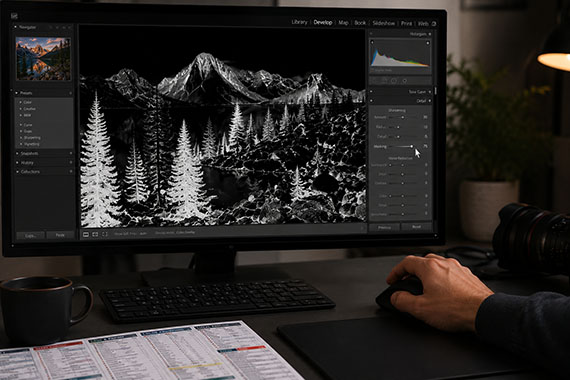
📸 The Alt/Option Masking Trick
When you’re sharpening a photo in Lightroom or Camera Raw, you usually don’t want to sharpen everything.
Sharpening smooth skies, blurred backgrounds, and out-of-focus areas can exaggerate noise and create an overly processed look.
Instead, go to Detail → Sharpening → Masking.
Now hold:
Alt on Windows
Option on Mac
…while dragging the Masking slider.
Your image temporarily turns black and white.
White areas = sharpening applied
Black areas = sharpening protected
For landscapes, try pushing Masking fairly high so sharpening concentrates on edges, rocks, buildings, trees, and fine details—while leaving smooth skies alone.
For portraits, this is especially useful for keeping sharpening away from skin while emphasizing eyes, eyelashes, hair, and clothing.
It’s one of those tiny editing techniques that can make your finished photographs look noticeably cleaner.
Like This Article?
Don't Miss The Next One!
Join over 100,000 photographers of all experience levels who receive our free photography tips and articles to stay current:



Leave a Reply