Knowing how to properly edit your photos is a skill that every photographer must have. Photographer Jamie Windsor discusses six things that you should be doing when editing photos:
1. Crop
While getting your composition correct in-camera is preferred, it may not be possible to achieve every time. Crop your images so that the image appears concise and free from unnecessary and distracting elements.
“Photography is about telling stories with images. Do whatever you need to make that image concise and resonant. The content of your image is more important than the technical quality of it.”

Image of groom before cropping

More emphasis is on the groom after cropping
Try out different cropping overlays in Lightroom and Photoshop (e.g. rule of thirds, diagonals, golden ratio, golden spiral) to see which best suits your image.
“Experimenting with cropping of shots in post-production will help you learn to frame your shots better at the time of taking them.”
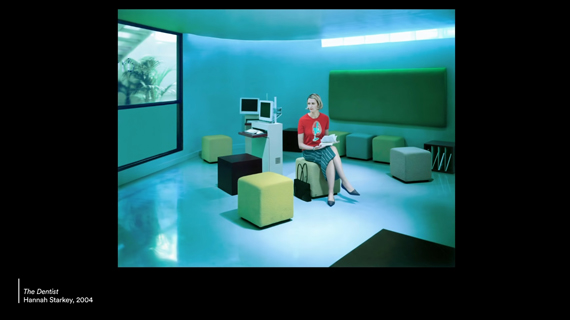
2. Adjust White Balance
While we often use white balance to ensure accurate representation of colors, it can be used creatively to give a certain look and feel to the image.
“Before you do any other editing, take your time to get your white balance absolutely as you want it.”
Use the warm white balance setting for a peaceful, content, and warm feeling. On the other hand, use the cooler white balance setting for an uneasy or sad feeling. Spend some time playing around with different white balance settings and see what works best.
3. Dodge and Burn
Dodging highlights certain areas of an image locally. Burning darkens the selected areas. Using this technique is a great way to emphasize elements of an image. This technique also lets the subject pop while adding a moody effect.
As Windsor demonstrates, the most basic application can be done by using the Radial filter in Lightroom or Photoshop. Using this filter, you can add greater emphasis on the subject by altering exposure inside and outside the selected area. Another way to do it is to use the Brush tool to paint on the subject directly.
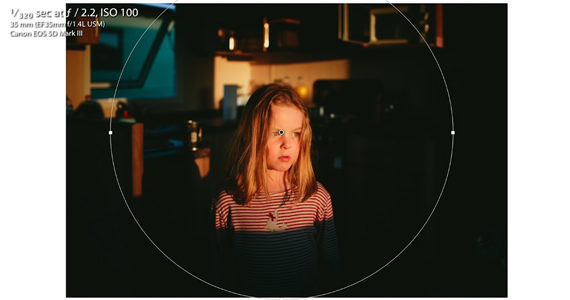
Using the radial filter to highlight the subject and darken the surrounding
4. Edit in 16-bit
Bit depth determines the amount of color information stored in an image. When uploaded to the web, the files are converted to 8-bit for compatibility. But, it’s a good idea to edit your images in 16-bit so that you don’t lose much color information in the editing process, thereby eliminating chances of banding.
In Photoshop, go to Image > Mode > 16 Bits/Channel to work with a greater number of colors when editing.
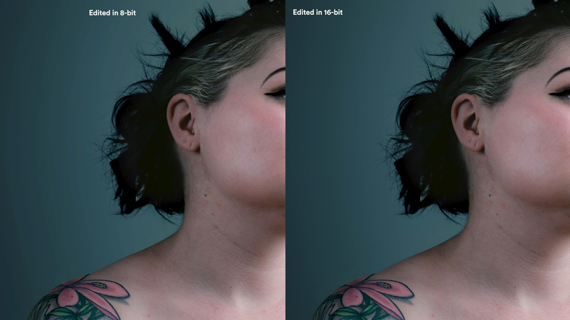
Notice the subtle banding in the background of the 8-bit image.
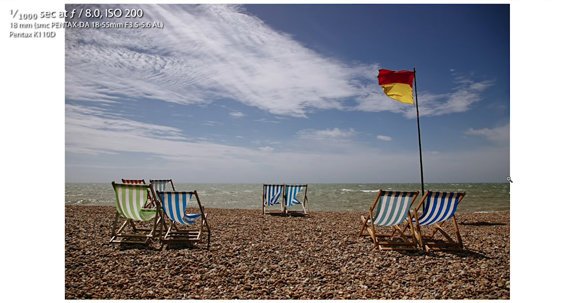
5. Level and Straighten Your Photos
It sounds like an easy fix but you’d be surprised to see just how many images out there are crooked and tilted. If the tilt adds value to your story, there’s no need to fix it. But if you’re photographing the horizon, it’s great to have it straightened. And in the case of buildings, you’l want straight lines and right angles.
Use the Angle tool to easily fix the tilted horizon in Lightroom. Similarly, use the different tools in the Transform section to fix perspective distortion.
6. Take a Break
While this step doesn’t have any direct involvement in editing the images, make sure that you make it part of your workflow. While you concentrate on editing images, there may be certain things that you miss or overdo. Before you finalize the edits, take a break from looking at the monitor, come back, and see if everything looks good. If you feel that you might have overdone it, try again. Often, a subtle approach is best.
Keep in mind not to overlook these things when editing your images. What other post-processing tips do you have to share?
Like This Article?
Don't Miss The Next One!
Join over 100,000 photographers of all experience levels who receive our free photography tips and articles to stay current:


I really love the name of your site and this was so helpful, SUNNY SHRESTHA!! One of the most in-depth but easy to understand articles on photo editing steps, I’ve read lately.