Music photography is one of the best jobs in the world for someone who loves music. Imagine being at the front of a concert watching your favourite artist while being paid for it. Photographing live music is one of the most rewarding jobs there is, and the energy you get from the music and the ambiance, and the reward of capturing a moment in time, is something that can’t be explained until you experience it.
This article is for the photographers who want to get involved with music and concert photography but don’t know where to start.
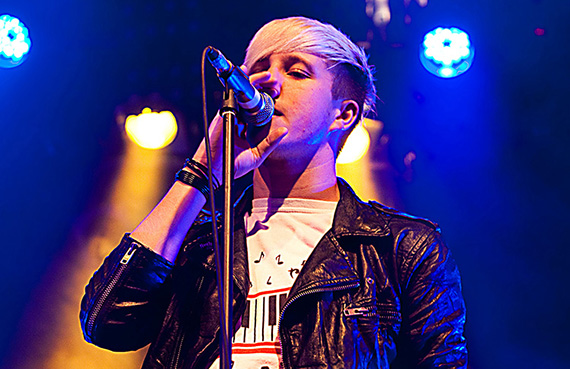
Photo by James Mathews
Basic Music Photography Kit
Not everyone can afford the latest camera equipment, but that’s OK. To photograph concerts, you don’t need to have the best equipment in the world—at least when you’re getting started.
I began my photography journey many years ago with a Canon 1000D and an 18-55mm kit lens, and if you have used a kit lens you will know they struggle in low-light conditions such as music venues. A kit lens cuts your starting costs down, but I wouldn’t recommend it—it’s too difficult to capture sharp images in dark settings.
When most people think of concert photography they think of photographers in stadiums and huge venues with impressive lighting rigs, but when you first start as a music photographer, you will be shooting gigs in small dark venues.
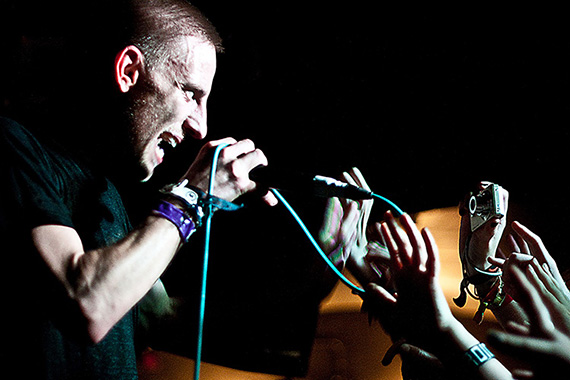
Photo by James Mathews
You may be thinking that you can just pop up your flash and start firing it off—but there are two problems with that.
The first is that your photos, taken with a regular flash, will often look terrible. They will lack depth and will show shadows in all of the wrong places. You would get much better pictures by using a portable Speedlight flash, but this brings us to the second problem: most venues and artists won’t allow you to use flash photography, as it’s very distracting. Often security or the venue manager will tell you this before a show.
To get around this problem, you are going to need a DSLR camera and lens that are “fast”.
A fast lens is something you will hear often if you hang around enough photographers and photography forums. It refers to any lens with a large aperture. The larger the aperture, the faster the lens and the lower the f-number. For example, the kit lens mentioned above was an f/3.5-5.6, which is considered a slow lens.
Fast lenses are expensive, which is problematic for newcomers to photography. However, Canon, Nikon, Sony and many of the other camera manufacturers produce a relatively inexpensive 50mm f/1.8 lens that is perfect for concert photography—it’s cheap and lets a lot of light in.
As you become a more seasoned concert photographer, you may want to add a 24-70mm f/2.8 lens to your arsenal, as you will generally be farther away from artists when you shoot bigger shows.
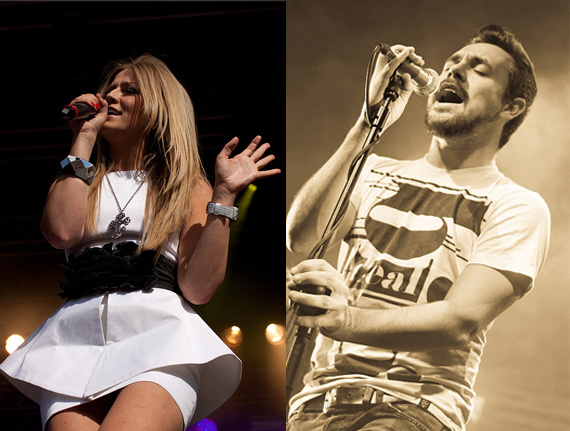
Photos by James Mathews
Choosing a camera is going to be a personal choice of yours and there’s no right or wrong answer. Personally, I prefer Canon cameras, but you may have a preference for Nikon or Sony.
Other Music Photography Must-Haves
When photographing concerts, a lot of your time is going to be spent in transit. Because of this, you should invest in a good camera bag that will keep your camera equipment safe. I’d also recommend choosing a bag that doesn’t look like a typical camera bag, so you mitigate the odds of someone trying to steal your gear.
Inside your camera bag, you should have a few spare batteries and memory cards, as it’s very easy to use up both in a short period. A nice bit of kit is a battery grip that makes it easier when shooting vertically and expands your battery life. But if you’re on a budget, you don’t strictly need one.
Getting Access to Shows
The saying “everyone starts somewhere” is very true, especially in music photography. I can’t count the number of bands I have photographed that had fewer than 10 people in the crowd. But don’t let that discourage you.
Take your time in these small venues to learn the craft of photography and use it to build up connections with other photographers and bands. This could lead to paid work in the future.
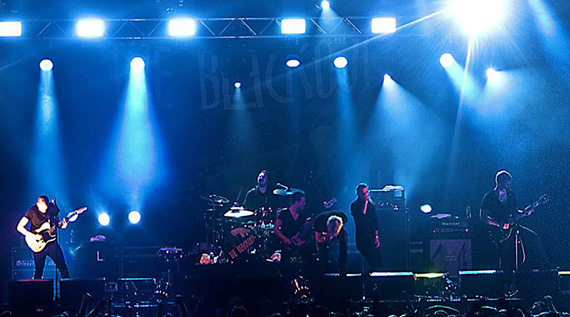
Photo by James Mathews
To get access to venues all you need to do is contact the venue and ask them can you shoot their show. Often they will ask if the pictures are going to be used anywhere and if you have a website you can send them there.
As a new photographer without a portfolio, you will need to pay the venue for entry and they will let you access the photo pit. As you photograph more shows and expand your portfolio, you pay less often and get given passes to shows.
You can email venues and bands in advance to get a pass in return for some of your photos, but as you become more seasoned in your craft, you shouldn’t give your images away for free like that.
Here’s a great tip I can share with you that has worked well over the years: if you want to photograph a well-known artist, but you’re just starting out, try contacting the supporting acts. They’re far more likely to get you a photo pass, as it gives them exposure while you get to stay and photograph the larger artists later on.
If a venue or artist doesn’t respond by email, make sure to contact them on their social media channels. Their manager will often run these and can be very responsive to press requests.
Music Photography Tips
As mentioned above, a fast lens is vital for music photography, as you’re going to need as much light entering your lens as possible to shoot at the quickest shutter speeds and capture sharp images.
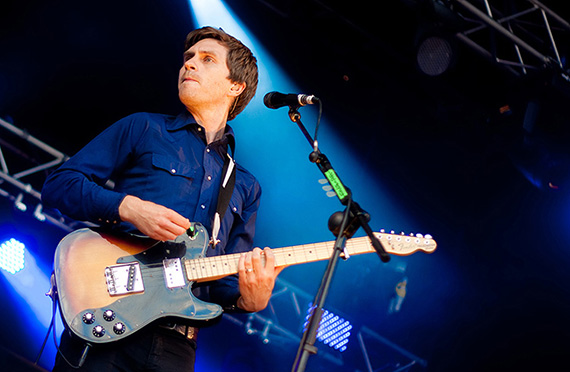
Photo by James Mathews
You should play around with your camera settings and experiment to see what works well for you and gain your style. With that said, when you first start, all the options on your camera can seem confusing.
If I forgot everything I knew about photography and had to start again tomorrow, I would increase the ISO level on my camera to the point where my photos are not grainy (maximum ISO 800 on entry-level DSLRs) and set the camera to shoot in aperture priority mode (f/1.8 on the 50mm) and go from there.
The settings above will allow the camera to choose its shutter speed to capture any image.
Trying to shoot in manual mode as a beginner, in my opinion, is going to cause too much frustration, since lighting conditions change so quickly during concerts. Start somewhere simple, but not fully automatic.
Shooting in full auto allows the camera to do all of the thinking for you, and doesn’t allow you to think and progress as a photographer.

Photo by James Mathews
As a beginner, you are going to overexpose and underexpose your photos. The best way of fixing this is by shooting your photos in RAW format. This way, you have more control over the exposure in post-production, but note that it will take up more space on your memory card—so bring along spares.
Building your Brand
If you want to get paid as a photographer, you need to build your brand. I’ve had companies such as Getty reach out to me in the past to shoot shows for them because they have seen my images online.
My recommendation would be to set up your social media accounts as soon as you have photographed a few shows. Don’t add all of your photos on them—that looks amateurish—but select the best images you have and upload them.
If your time is limited and you can’t manage all the social media channels out there, I would pick one and stick with it. Instagram is an obvious choice for photographers, and once you build up a following, you will get artists and their managers reaching out to you to cover their shows.
Embracing Chaos
If you find it hard to cope when everything around you is happening at a million miles an hour, concert photography is going to be difficult. My recommendation: embrace the chaos.
You will make mistakes, both as a beginner and once you become more experienced. That’s just part of the job. I’ve run out of battery mid-shoot, and I once filled a memory card without a spare so I ended up standing around for the next several minute pretending to take photos.
My advice would be not to panic, and just to go with the flow. If you miss a vital shot, it’s not the end of the world. Take this opportunity to learn from your mistakes so you can become a better photographer.
About the Author:
When James Mathews isn’t photographing artists you can find him at bouncecolor.com where he helps other photographers and videographers edit their content quickly and professionally through preset assets.
Like This Article?
Don't Miss The Next One!
Join over 100,000 photographers of all experience levels who receive our free photography tips and articles to stay current:


Leave a Reply