When you photograph the sky during night time, you may be surprised at what you can capture with an extended shutter speed. With the correct gear and long exposure photography technique, you can collect enough light on your sensor to clearly make out the milky way in the night sky.
It’s astonishing to see how much information a camera can record. It allows us to have a glimpse of the deep sky without the use of highly sophisticated equipment. There are however certain considerations you need to make to ensure that you capture a decent looking milky way photograph. And that includes using the right gear and the right camera settings to get the job done.
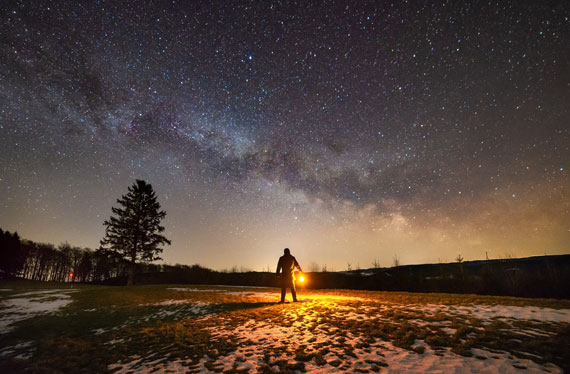
Photo captured by Evgeni Tcherkasski; ISO 3200, f/2.8, 14mm, 25 seconds.
Gear for Milky Way Photography
Camera: If you have an option, then go with a full frame camera as they typically have better high ISO performance. However any camera where you can set the shutter speed manually and focus manually may be able to do the trick. Many entry level cameras are able to do to this, and even some smartphones offer manual exposure settings now too.
Lens: Photographing the milky way means capturing the hundreds and thousands of stars of our galaxy in a single frame. It simply means that you’ll be working with a wide angle lens for the purpose. If you’re using a full frame camera, use something wider than 35mm, and in case of an APS-C camera, use something wider than 24mm.
Tripod: Milky way photography requires that you expose the sensor for a prolonged period of time. A good sturdy tripod is thus mandatory.
Remote shutter release or self-timer feature: Any type of shake becomes prominent in long exposure photography; even the ones caused when pressing the shutter release button. Using a remote shutter release or self-timer, you can trigger the shutter release without having to even touch the camera. This reduces camera shake and lands you sharper images.
Light pollution filters: While it is best to photograph the milky way in perfect dark conditions, finding such locations can be very difficult. If the location that you’re shooting from has some amount of light pollution from the city lights, you can use light pollution filters that help to ignore the city light and create images with better contrast.
App to locate the milky way: Photopills, Sun Surveyor, and Skyguide are popular options.
Besides these camera gears, don’t forget to pack a flashlight with you. As you’ll be working in pretty dark conditions, you will need them for moving around, and even for changing the camera settings.
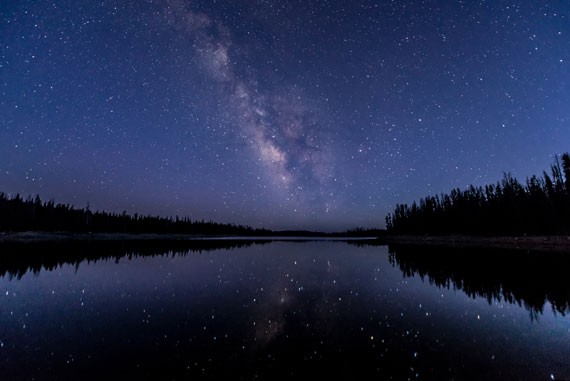
Photo captured by Jackson Hendry; ISO 1600, f/2.8, 14mm, 20 seconds.
Camera Settings for Milky Way Photography
Aperture: You’d want as much light entering the camera as possible owing to the low light condition. Set your lens to the widest aperture setting possible. Depending on the lens you’re using it may be f/1.8, f/2.8, f/4, f/5.6 etc or whatever your widest aperture setting is.
Focusing: Set your lens to manual focus mode and focus on a bright star manually. The live view feature on many cameras can help magnify into the scene or you can set your lens to approximately the infinity marker. Once done, leave it there. You can even tape the focus ring to avoid accidentally changing it later.
Shutter speed: Longer shutter speeds will result in greater amount of light passing to the sensor. That’s great for low light photos, right? Right, but there’s a catch. Since the earth is moving relative to the stars, very long shutter speed will result in star trails. And you don’t want that when shooting the milky way.
A general rule of thumb to determine the longest shutter speed you can use without getting star trails is to divide the number 500 with the full frame equivalent of the focal length that you’re using. So, if you’re using a 24mm lens, the longest you can go without getting star trails is:
500 / 24 = 20.8s
In this case, you’ll thus need to have the shutter speed 20 seconds or shorter to avoid star trails.
ISO: Tweak your ISO based on the intensity of the milky way you’re able to capture using the widest aperture and the longest shutter speed. While lower ISO is better for less noise, for milky way photography, you may need to bump it to around 1600-6400 depending on the conditions. Start with a lower ISO setting and if your result is too dark keep increasing it.
Like This Article?
Don't Miss The Next One!
Join over 100,000 photographers of all experience levels who receive our free photography tips and articles to stay current:


Leave a Reply