Hummingbirds are amazing little birds. They’re the only birds that can fly backwards. They can also fly upside down and sideways. They have beautiful iridescent colors and are almost irresistible to photographers. However, they can be a challenge to photograph. This is article is meant as a guide for beginners when taking pictures of these speedy little birds.

Photo by Bryan Hanson; ISO 2000, f/8, 1/500s
- First of all, you need to know where to find the hummingbirds. If you don’t already have a hummingbird feeder, I would recommend that you buy one. Hummingbirds are very highly attracted to tubular type flowers but may do a “fly by” on different varieties. However, because there is not as much “food” in each flower, they will be darting quickly from flower to flower. If you have a feeder, they will stay in one location much longer. They will get used to that feeder having food all the time and will come and go all day.
- Now you need to position yourself in the right location for the best pictures. Hummingbirds, like any other bird, frighten off easily, but I have found that if you’re very still and wait for a few minutes, they will return to the feeder. I prefer to take pictures of hummingbirds in bright sun. Their feathers have an iridescent color, which just glows in bright sun. Position yourself where you can take pictures while the sun is shining directly on the bird. How close you can get to the birds depends on the type of lens you use. Standing very still, I have had them come within inches of me while I was refilling the feeder.
- There are several pieces of equipment that you’ll need. I would recommend using a zoom or telephoto lens so you can get a good close-up shot without disturbing the birds too much. The farther away you are, the more comfortable they’ll be. I would also recommend using a tripod or monopod. If you don’t have a tripod and your lens has an image stabilizer on it, be sure it’s turned on. You want your picture to be as sharp as possible in case you want to crop it. Using your built-in flash will help to freeze the motion of the wings, however, a hot shoe flash will usually do a better job as they tend to be faster. I personally like to see a little blur of the wings to show motion; to me it’s just a little more interesting.
- Use the auto-focus, AF, setting on your camera. This allows the camera to refocus on the hummingbird as it darts around. This is harder than it sounds, as they’re so fast. Keep an eye on where the bird tends to hover while waiting for another drink. It’s also helpful to use the center AF point for focusing. Try to keep that center point on your subject as much as possible.
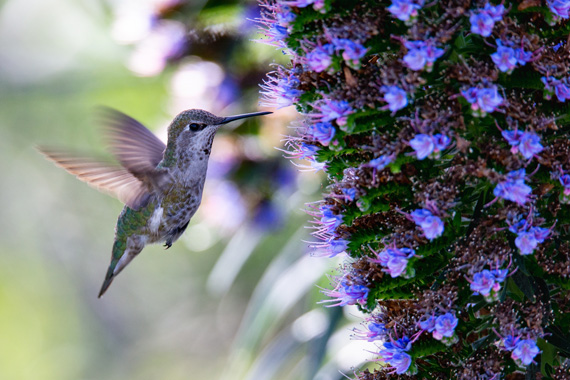
Photo by Anchor Lee; ISO 800, f/5.6, 1/500s
- You will also need to use a fast shutter speed, and if in shady light conditions, a higher ISO setting. I recommend a shutter speed of about 1/500 of a second and an ISO that gets you there. If you go too high on either setting in a low light situation, you’re going to get too much “noise” and your picture will look grainy.
- One of the most important things you are going to do to be successful while photographing hummingbirds is to take a lot of pictures! These little speed demons are so fast; you’re going to have to take a lot of pictures to get a few good ones. I have taken as many as 100 pictures, to get 2 or 3 really good shots. Set your camera up so it will take pictures in “bursts.”You can hold down the shutter button and it will take 4-5 pictures, one right after the other.
Hummingbirds are beautiful and amazing creatures. Hummingbird photography is definitely going to be a bit of a challenge, but well worth the effort when you get those one or two great shots.
About the Author:
Sheila Brown (shopbeautifulnaturepictures) is an experienced photographer who enjoys writing articles to share her experiences and her passion for nature photography.
For further training on photographing hummingbirds, here is a helpful video tutorial:
You may not be successful on your first attempt, but don’t give up; with a little time and patience you will succeed!
Like This Article?
Don't Miss The Next One!
Join over 100,000 photographers of all experience levels who receive our free photography tips and articles to stay current:


“If you don’t have a tripod and your lens has an image stabilizer on it, be sure it’s turned on.” The way I understand the sentence is that if you are not using a tripod then you want “stabilization on” as you are hand holding the camera. Are you missing the word “don’t” in the sentence?
Hi Ben, these are the absolute best images of our little friends, the hummingbird! I thought I knew as much as a newbie would know, wow was I wrong. This tutorial is super, you explain the set up, and the reason for which action you prescribe with very easy to follow instructions. Thank you for sharing your knowledge, and thank you for your sincere advise on caring for the Hummers as we attempt to capture an image! You are my hero hummingbird photog!
Thanks again, God Bless!!
About the IS and the tripod, follow the manual. For example, the Canon EOS Rebel T4i manual says :
“When using a tripod, you can still shoot with the IS switch set to with no problem. However, to save battery power, setting the IS switch to is recommended.” (pag. 41, “About the Lens Image Stabilizer”, notes)
“You da man, Ben!”
Thanks …
Nevada Chuck. You are correct. Do not use the stabilizer on a tripod.
hahaha in the video, not the person I would have expected to be a humming bird photographer! :)
In the fourth paragraph the article recommends the use of a tripod, and in the next sentence advises that if the lens or camera has built-in stabilization, to turn it on. This is contrary to most experts and manufacturers’ advice, which is to not use stabilizxation if the camera is on a tripod.
Any response?