When working with flash, the first thing you do is ensure that no light except the flash affects the image. This is essential for you to have full control over light and to avoid undesirable results that often come from mixing types of light. However, with planning, you can still get great results even with mixed light. Photographer Gavin Hoey from Adorama shows you how he works with flash and LED light bulbs:
The main challenges of working with multiple light sources are balancing exposure and tackling different color temperatures. In Hoey’s case, he has multiple LED bulbs and a flash to work with.
“My theory is always, if the ambient light is good enough, use that.”
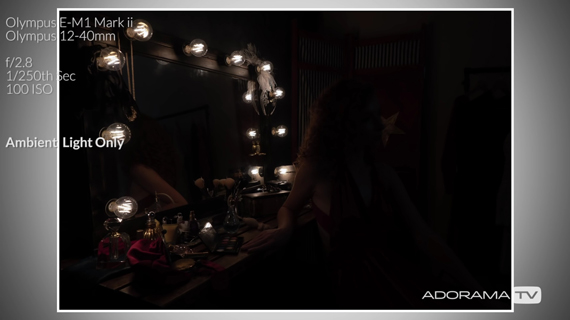
The LED bulbs act as the ambient light source, so Hoey goes on to take the photo only using the LED bulbs first.
Shooting With LED Bulbs Only
Since Hoey has around 10 LED light bulbs around the mirror, they give off a decent amount of light. Before turning the flash on, he photographs the model with just the LED light. He has the model facing the light.
As you can see, there’s no control over the spread of LED bulbs. As a result, they are all over the studio which causes distracting reflections to show up in the mirror. Also, the model can only face the mirror. As soon as she turns away from the light source, there’s nothing to fill in the shadows.
In order to overcome these challenges, Hoey introduces flash to the setup.
Shooting with LED Bulbs and Flash
“If I were shooting on location, I’d try and work out the ambient exposure, underexpose a little bit, and then fill with flash.”
The principle remains the same in this case, but now the LED bulbs are the source for the ambient light. At f/2.8, ISO 100, and 1/250 second, here’s how the image comes out:
There is a good amount of detail on the inside of the light bulbs and some details of the surrounding area.
Another important aspect to consider when working with mixed light is color temperature. LED bulbs have a color temperature of about 2700K. This means that if you set the white balance in your camera to 2700K and photograph the bulbs, they’ll appear white.
For a warmer tone, you can set the white balance higher. Hoey sets it to 4700K.
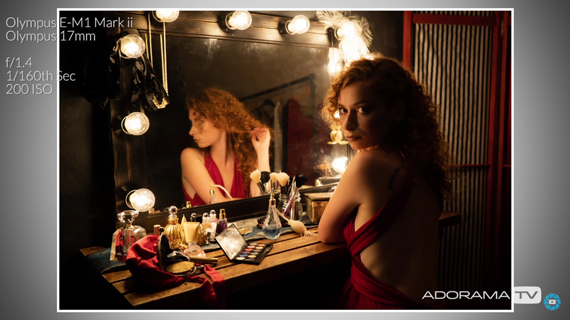
With the ambient exposure and color tone sorted out, Hoey sets up the flash. He uses the Flashpoint Xplor 400 inside a long and thin strip box to control the spread of light. As he has his ambient light set up at f/2.8, he sets the metering for the flash too at f/2.8 using a light meter. Now, even with the model turned opposite the LED bulbs, the exposure comes out just fine.
One obvious issue that you can see in the image is the color tone. The model appears blueish and the skin tones don’t match. This is because the flash produces light at around 5600K while Hoey has his white balance set at 4700K. This makes the light from the flash appear blue.
“I could just increase my white balance to match the flash, but then the bulbs would become even more orange in color.”
In order to overcome the problem, Hoey uses an orange gel in front of the flash so that the output appears warmer.
The photos definitely look great with the model turned toward the flash. But what if you want to take photos with the model turned toward the mirror? In that case, you’ll need to have a little workaround.
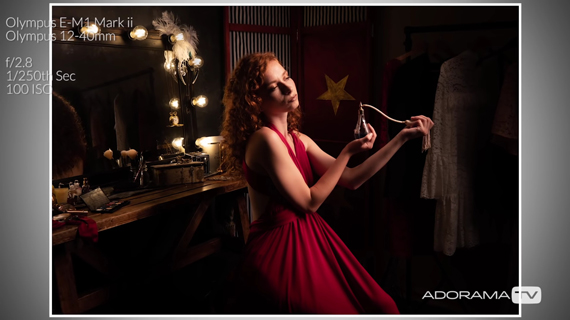
Hoey demonstrates with an Xplor 200 with a snoot. The snoot also has the orange gel for color balance. Using the snoot, you can direct light toward the mirror and light the subject in the process. You’ll need to be precise when doing this and may need to give it a few tries.
“The basic principle is exactly the same as before. Work out the exposure for the ambience, and then add in the flash.”
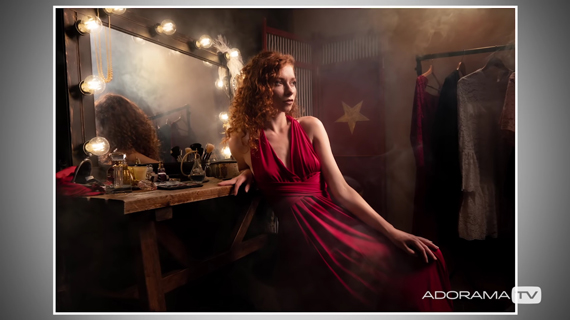
And finally, to add a finishing touch to the shoot, Hoey adds in a bit of smoke.
If you’ve been facing challenges when working with multiple light sources and different color temperatures, definitely try these tips out.
Like This Article?
Don't Miss The Next One!
Join over 100,000 photographers of all experience levels who receive our free photography tips and articles to stay current:


Leave a Reply