Panoramas can be difficult to shoot without knowing the process behind their creation. Here is a step-by-step guide to help you create beautiful panorama images using Adobe Lightroom. This guide will help you both shoot the individual panorama photographs themselves and merge them afterwards in post-production.
Step 1: Photograph the Panorama in Individual Frames
The first step is to photograph multiple sets of frames that will comprise the final panorama. I recommend starting with at least three frames; however, you can photograph more if you wish.
Mount your camera and lens on a secure tripod. A tripod is extremely helpful for perfect panoramas, as it’s the best way to line up the frames exactly. If you cannot use a tripod or monopod, make sure to hold your camera as steady as possible.
Once you’re set up, the next step is composition. Panoramas do not have to include everything before your eyes—you should only include elements that work with your composition. Exclude any elements that seem distracting, just as you would in any other photograph.
Next, adjust your desired exposure. You can use a live view for this. Make sure you have consistent exposure across all the frames by panning the camera left and right to ensure the same exposure works consistently, regardless of where your light source is.
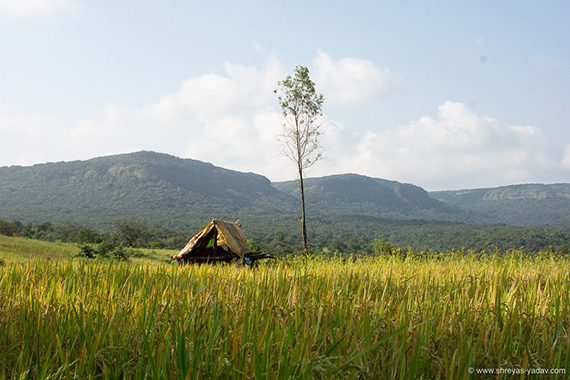
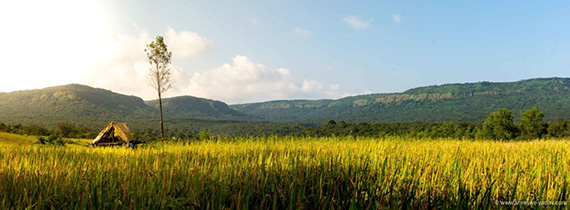
In the example image below, I decided to include a hut as the main element. The primary focus is on the small hut. The mountains in the background give grandness to the landscape.
Once you’re all set, start photographing the image from the lefthand side. Then move your camera horizontally to the right and photograph the second frame.
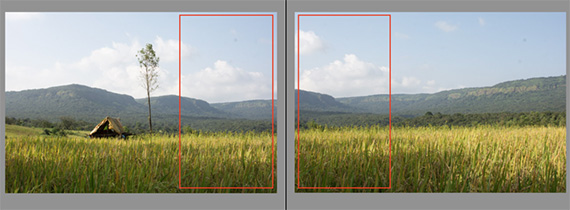
It’s very important that some of the elements from the first and second frames overlap with each other. Refer to the below image: I tried to overlap the right part of the first frame and the second frame. If you are using a tripod, it is easy and convenient.
After snapping the second frame, move your camera to the right again and photograph the third frame.
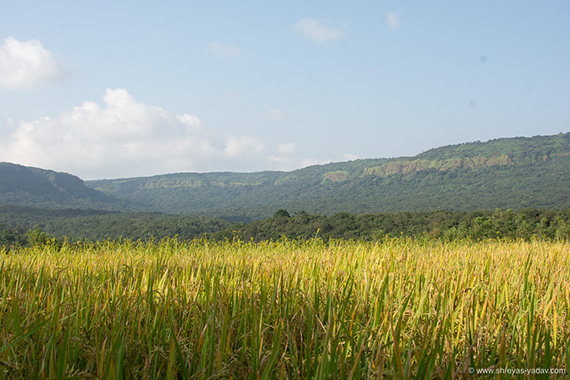
Below are my three example frames. In the first, you can see the hut and the tree. In the second and third images, I’ve included mountains and grasslands. I captured all three with a Nikon D7100, a Nikon 35 f/1.8 lens and a tripod.

Now that we have three frames ready, it’s time to merge the images in Adobe Lightroom.
How to Merge Images in Adobe Lightroom
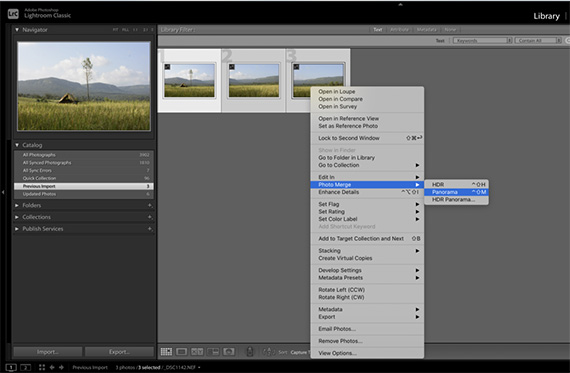
Open an Adobe Lightroom and import your selected frames.
Select all the frames and right click. Select Photo > Photo Merge > Panorama.
After that, a preview of your merge will open, as seen here:
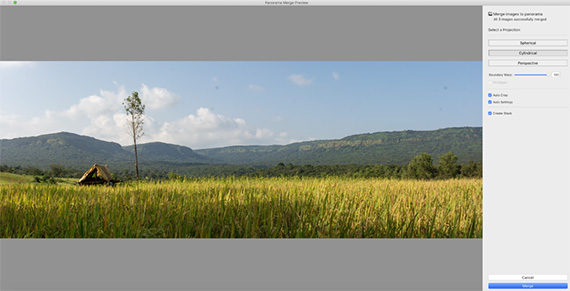
Start by selecting a projection. I have selected a cylindrical projection. You can preview how spherical and perspective change your result as well. For landscape images, I find cylindrical works best.
Next, select the Auto Crop option and Create Stack box. With the Create Stack option enabled, you can have a merged image along with individual frames.
Use the slider Boundary Warp and see the effect of Boundary Warp. I have selected 100% for this image. Boundary Warp will help preserve the details in the merged image at the corners.
Finally, click the Merge button.
Lightroom will take a few seconds to merge your images and create a panorama.

Lightroom will eventually merge the frames, like so:

Now you can edit your merged panorama in Adobe Lightroom or Photoshop. I used Adobe Lightroom to post-process my image.
Mainly I focused on spot removal, black and white points, vibrance, distortion correction, curves and targeted adjustments for the sky, farm and hut.
Here is my final image. Notice how the color is much stronger, and the three frames have merged intoa single, beautiful panorama image:
The Panorama option in Adobe Lightroom is a simple, effective way to create beautiful panoramic images. You will find this technique especially helpful for landscape images when you lack a wide-angle lens.
Final Note
The steps I’ve outlined above will help you get started with standard panorama images. However, I encourage you to explore different kinds of images in different settings, as well as vertical panoramas. Also, you can photograph panorama images with multiple exposures (HDR panoramas). But I’ll cover those techniques in another article!
About the Author:
Shreyas S. Yadav is an engineer and photographer of wildlife and nature. He is also a writer and lifelong adventure explorer. Through his writings, he teaches about digital post-processing and nature photography. Shreyas shares field techniques about nature photography, post-processing and wildlife photo stories on his website.
Like This Article?
Don't Miss The Next One!
Join over 100,000 photographers of all experience levels who receive our free photography tips and articles to stay current:


Leave a Reply