A basic three point lighting setup is really all the light that you’d ever need, even if you’re shooting commercially. And even if there’s no ambient light to work with. In this video, photographer Vanessa Joy sets up a basic three point lighting setup in the most challenging of environments: a basement. This is a case in the point that you can accomplish any challenging photo shoot if you know how to use your lighting tools:
Joy demonstrates this technique while shooting editorial images for a high profile wedding magazine. The whole shoot took place in the basement of an old bank, so there was no ambient light to play around with.
Main Light
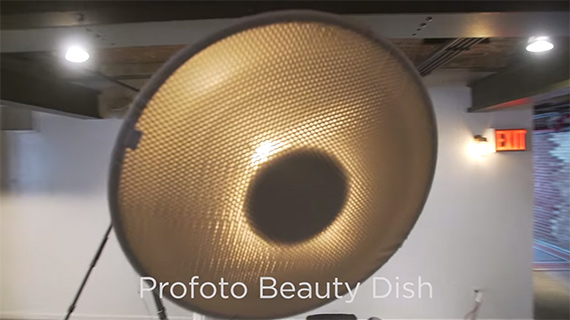
The lighting gear of choice in this case is the Profoto D1. Three of these were brought in for a basic three light setup. One of the lights was set up with a gridded beauty dish to highlight the bride’s face. Joy initially set the power to its lowest setting and then worked her way up.
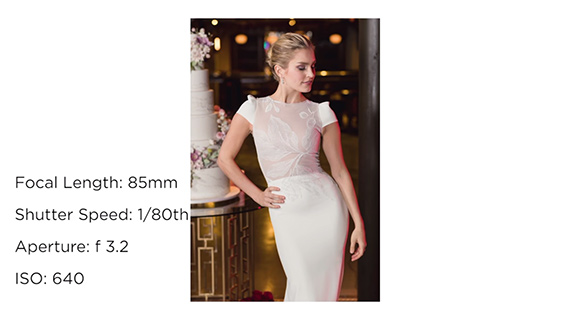
The positioning of the light is important. This light was positioned to the left and aimed directly at the model’s face. It was also placed a bit higher for a more glamorous look.
Fill Light
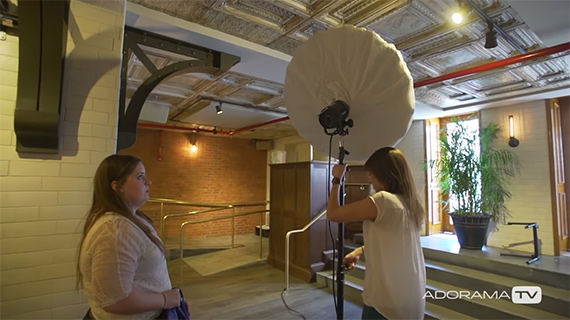
The second light was set up with an umbrella for lighting up the entire scene. The light itself was positioned to camera right and ensured that the light filled up the entire scene. The idea was to fill in whatever shadows there were in the scene.
Rim Light
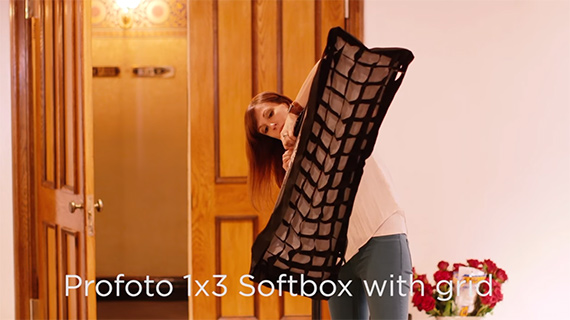
The final light of the setup was a 1 x 3 foot soft box with a grid to ensure that the subject had a bit of rim light. A red gel was used with the rim light to ensure that the light matched the overall theme. The rim light was positioned behind the subject to create the best look.
Camera Settings
Joy chose her camera settings as if she were going to shoot in ambient lighting. The amount of ambient light was very little. That meant a higher than normal ISO setting. At the higher ISO she faced a bit of noise issue (despite the fact that she was a Canon 1D X). Some amount of noise correction, as a result, was inevitable.
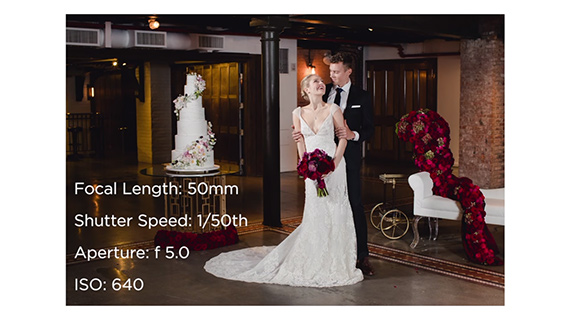
The aperture was set at around the mid-level. The intention was to open up the scene and ensure that much of it was in focus and the details visible.
Once the ambient exposure was measured and the settings were dialed in, she started adding the other lights.
Overall, Joy suggests that you approach such a lighting with a bit of patience and time.
Like This Article?
Don't Miss The Next One!
Join over 100,000 photographers of all experience levels who receive our free photography tips and articles to stay current:


Leave a Reply