One of the most useful features in Luminar 2018 is the LUT Mapping filter. It may seem innocuous, but it is a potent tool for quickly adding a “look” to your images without having to do a lot of work. By using the LUT mapping filter, you can achieve a variety of effects, from simply adding impact to your images to creating vintage film looks, to cinematic styles and more. You can accomplish all of this through the use of LUT files, of which there are hundreds available to download on the internet.
What are LUTs?
If you’re unfamiliar with the term, you may be wondering just what a LUT file is? The word “LUT” stands for “Look Up Table”. A LUT is a small file which can be used in software such as Luminar to alter the color and appearance of an image. As the name implies, a LUT consists of a table of color and brightness source and destination values.
In other words, the LUT file tells your software to make a particular shade of light blue, for example, become a shade of purple and so on. In some respects, they are similar to traditional presets or color profiles but have a much wider range of usage. In fact, LUTS can have the same effect as combining multiple and complex color adjustments into one single file. You can then apply this data to an image, and it will change the color and tone curve of the image based on the values in the LUT file.
LUTs in Luminar
So what does this mean in practical terms for Luminar users? You can use LUTs in Luminar for a variety of purposes when it comes to color grading. You can also combine multiple LUTs using either masks, layers or even blend modes. You can use them to add a color profile to RAW files or to create a stylized effect. To better explain this, here are some examples.
Example 1: Using a LUT as a Color Profile with a RAW File
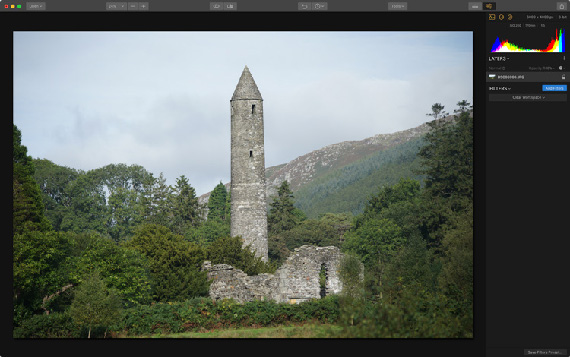
When you load a RAW file into Luminar, it may look a little flat at first. This is because it won’t have the same tone curve and color profile that would be applied to the image in the camera if you had shot JPEG. You could address this by using the various tools inside Luminar, such as adding a curves filter, tweaking the contrast and saturation, and so on. Or, you can use a LUT.
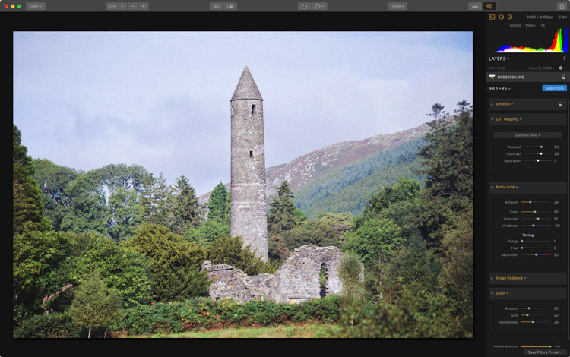
For this example, we have loaded a RAW file into Luminar. You can see from the screenshot above that the image is looking a little flat and lacking in contrast. We can fix this by using a LUT. Just add a LUT mapping filter from the Filters list, and then load the LUT file you want to use. In this case, we’re using a custom LUT file created for this purpose in Photoshop. This was designed to add a little contrast and color. Here is the same image with nothing else applied to it other than a LUT file.
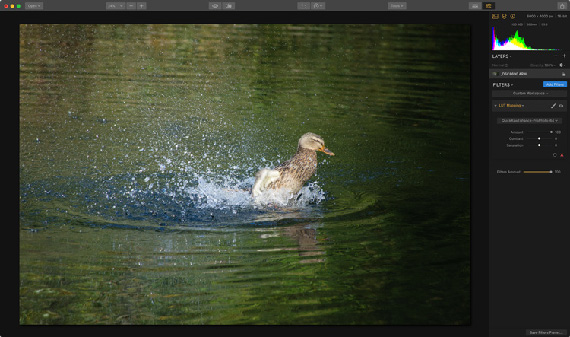
Example 2: Creating a Vintage Film Effect
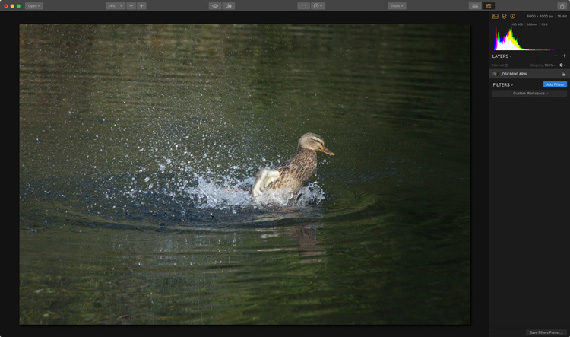
In this second example, we will work with a JPEG file that is straight out of a camera. In this case, we want to create a stylized look, which will be inspired by the “vintage film” style. To achieve this, we will look at combining the LUT Mapping filter with some other adjustments to create a faded film effect.
First, here’s the original image before we do any tweaking:
The first thing we will do is add a LUT. Applied at 100 percent, the effect is too strong, so we will reduce it by dropping the amount slider down to 65 percent. A tweak to the contrast will also help.
To further create the film look, we will add a few more filters. In order to enhance the faded film style, we will add the “Matte Look” filter. Then, to add some film like softness, add an Image Radiance filter, and increase the amount slightly. Finally, you can add the Grain filter to add that all-important film grain.
Example 3: Creating a Black and White Look with LUTs
One of the things that you can use LUTs for is creating a black and white effect. While LUTs are often associated with stylized color effects, because they can control brightness levels as well as what colors will create what shade of grey, you can use them to produce a range of black and white styles. With a suitable LUT, you can create some really nice Monochrome images. The LUT, of course, should be a black and white LUT to begin with.
Here is an image, before adding any effects.

To create a rich black and white image, we don’t need to do anything more than adding a LUT designed specifically for black and white.
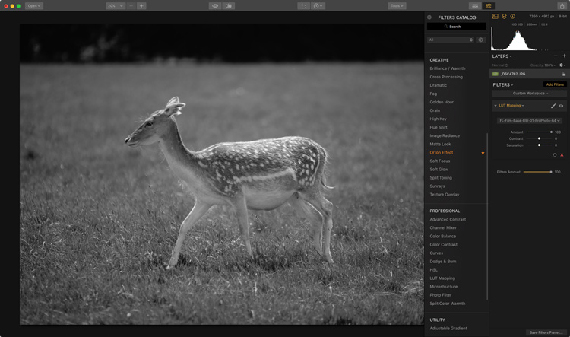
The result above is purely from adding a LUT file. You could enhance this more by adding some additional filters, such as an Image Radiance filter for glow, and of course grain, but even on its own it creates a nice image.
These are just a very small few examples of the types of effect that you can achieve by using LUTs. In this article, I’ve just scratched the surface. The variety of looks that you can create is only limited by the variety of LUT files that you have access to. Of course, the important thing is to use your own creativity and to use LUTs as part of your overall artistic vision. They can provide a great starting point though, and used creatively they can be a valuable part of your workflow in Luminar.
Learn more: The Luminar Photo Editor
Like This Article?
Don't Miss The Next One!
Join over 100,000 photographers of all experience levels who receive our free photography tips and articles to stay current:


Leave a Reply