A composite image, or simply a composite, is an image created from multiple photos that are blended together. This technique can be used for different types of photography. In real estate and architectural photography, doing composites can be a handy trick.
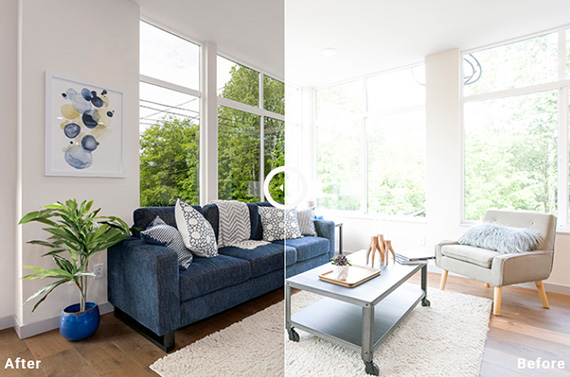
Before/After Composite
Composites in Real Estate Photography
Composites for real estate and architectural photography are usually used for interior shots. Others use this strategy to composite flash and ambient shots into a single photo.
What professional real estate photographers would do is to take varying flash shots of a room or exterior. This works best for areas that are too dark, like interiors. If you’re shooting the exterior during a darker time of day, this trick will also work for you.
How to Shoot for a Composite
When you’re taking photos of a project, whether it’s interior or exterior, make sure that you have taken an ample amount of different images to make your composite. Make sure that you’ve lit the different areas enough with a flash. Figure out the areas and places that need to be lit up and highlighted. Having an ambient light shot will also be a great base for your composite. For an interior, having three to five frames can be enough for a composite. Larger spaces might require even more frames.
Creating a Composite in Photoshop
Once you have the necessary shots, it’s time to do the work in Photoshop. Doing composites in Photoshop is one of the basic tricks that you have to learn as a real estate photographer.
Here are the steps that you can take to make a composite in Photoshop for real estate images:
1. Import photos in Photoshop.
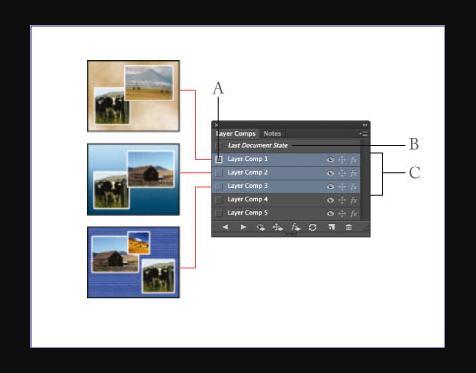
Get your images ready for Photoshop. Go to File menu, choose Scripts, and click on Load Files into Stack. Choose the frames that will make up your composite. This will put your images into different layers.
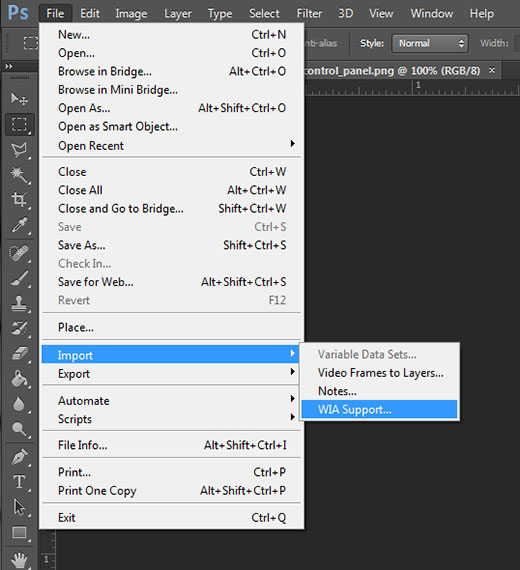
Import
2. Auto-align the layers.
Shift-click on the layers. Go to the Edit menu and click on Auto-Align Layers. Choose Auto and let Photoshop align the images for you.
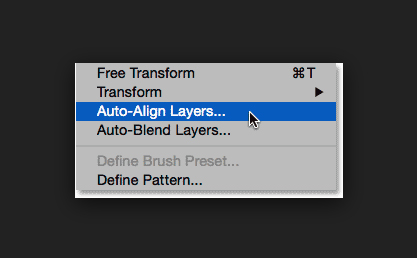
Auto-Align
3. Hide the other layers.
Put on a layer mask and hide the other layers except for your base ambient light layer. To do so, click on the specific layer then hold down the Alt or Option key and click the layer mask button. This will put a mask on the respective layers.
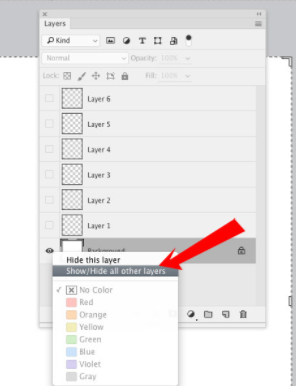
Hide All Other Layers
4. Start compositing one layer.
To add in the lighting of one layer to the base photo, click on the Brush tool and soften the flow to around five or ten percent. Paint white on the layer mask of the specific layer that you want to show on the base layer. The light will start to change as part of the top layer merges with the base. Make sure that you exclude those parts of the layer that shouldn’t be on the output. Once you’re happy with the first layer, move to the next layer and repeat the same process of painting white over the layer mask.
Composite Layers
5. Gradient a layer.
This is an optional step that adds depth and dimension to the photo. Just click the Gradient tool and drag it across the photo in the direction that you want the light to show up. Make the necessary adjustments to make the gradient as realistic as possible.
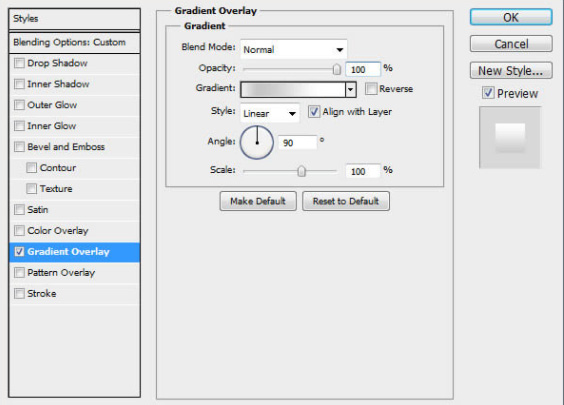
Gradient a Layer
6. Flatten image.
Once you have the ideal output that you want, merge the layers. Go to the Layer menu and click on Merge Visible. Now you have your final composite photo.
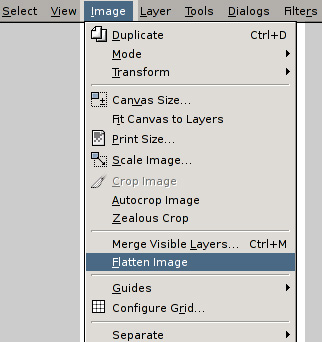
Flatten Image
7. Lens correction.
This step is optional. Go to the Filter menu, click on the Lens Correction filter, and make the proper adjustment to align the image. You may want to check the lines of the image, like the tiles, corners of the cabinets or furniture, or the edges of the walls for alignment.
8. Final touches.
Make sure that the colors and tones of the image are correct before finishing up. If you’re already happy with the image, then it’s ready to be sent to the client.
Like This Article?
Don't Miss The Next One!
Join over 100,000 photographers of all experience levels who receive our free photography tips and articles to stay current:


Leave a Reply