Most photographers notice it at some point…You take a shot, review it on the back of your camera—and suddenly parts of the image start flashing or “blinking.”
It looks like something is wrong. So most people ignore it.
That’s a mistake.
Quick note: Our Camera Cheat Sheets are currently part of the 📸 April Aperture Sale today—a great time to grab them if you want quick, in-the-field settings and exposure guidance.

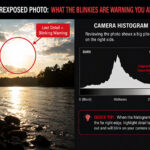
What the “Blinking Highlight” Warning Actually Is
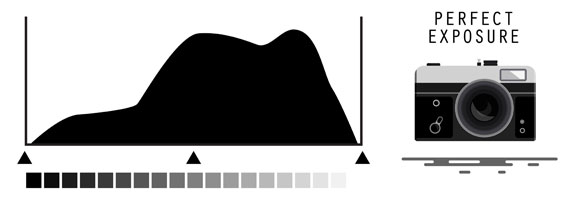
That blinking effect is called the highlight warning (often nicknamed “blinkies”).
When it’s turned on in your camera settings, any area that’s overexposed (pure white with no detail) will flash during playback.
In other words:
Your camera is telling you: “This part of your photo is gone.”
No texture.
No detail.
No recovery.
Why Most Photographers Ignore It
At first, it feels overly sensitive.
- Bright clouds blink
- Reflections blink
- White shirts blink
So it’s easy to assume:
“That’s normal… I’ll fix it later.”
But here’s the problem:
You can’t fix blown highlights in editing.
Once detail is clipped, it’s permanently lost—even if everything else in your image looks fine.
The Real Danger: Hidden Overexposure
What makes this tricky is that your photo might look perfectly fine on the LCD.
That’s because:
- Camera screens are small
- Brightness can be misleading
- JPEG previews don’t tell the full story
So while the image looks good…
the blinking highlights are quietly warning you that you’re losing detail.

How to Use It to Avoid Blown Highlights
Instead of ignoring the blinkies, use them as a guide.
Here’s the simple approach:
1. Take your shot
Review it immediately.
2. Look for blinking areas
Focus on important parts of the image:
- Faces
- Skies
- Key highlights
3. Decide if it matters
Not all blinking is bad.
- Specular highlights (like sun reflections) → usually fine
- Important detail (like clouds or skin) → not fine
4. Adjust exposure if needed
If important areas are blinking, reduce exposure:
- Lower ISO
- Use a faster shutter speed
- Stop down your aperture
Then shoot again.
Exposing Properly in Tricky Light
This is where the highlight warning becomes incredibly powerful.
In high-contrast scenes (like sunsets, backlighting, or harsh midday sun), your camera struggles to capture everything.
So you have to prioritize.
And highlights should almost always come first.
Why?
Because shadows can often be recovered.
Highlights can’t.
A Simple Rule That Changes Everything
Expose for the highlights, then lift the shadows later.
This one shift in thinking will dramatically improve your photos.
Instead of aiming for a “bright” image in-camera:
- Slightly underexpose
- Protect the highlights
- Edit for brightness afterward
Your images will instantly look more professional—especially in difficult lighting.
When It’s Okay to Ignore the Blinkies
There are times when blinking highlights don’t matter:
- Direct reflections (water, metal, glass)
- Light sources (sun, streetlights)
- Intentional high-key photography
The key is being intentional—not accidental.
Why This Matters More Than You Think
Most photographers focus on gear upgrades.
But this is a settings and awareness issue.
Once you start using the highlight warning properly:
- Your skies keep detail
- Your portraits retain texture
- Your exposures become more consistent
It’s one of those small features that quietly levels up your photography.
Final note: If you want quick-reference settings for handling tricky lighting like this, the Camera Cheat Sheets are part of the April Aperture Sale today—designed to help you dial in exposure fast without guessing.
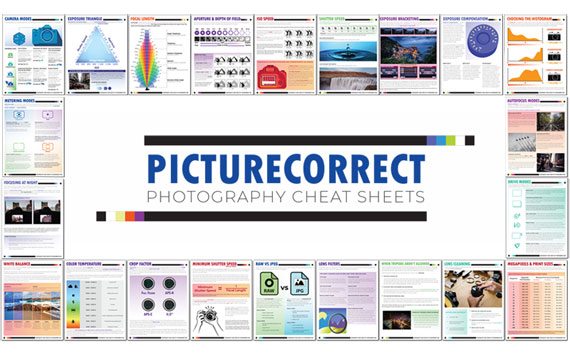
New: Fundamental Photography Cheat Sheets
Whether you’re a seasoned professional or just starting out, photography cheat sheets can be a valuable resource for improving your skills and taking your photography to the next level. The perfect companion for any photographer. Print one out whenever you need it.
Offer ending soon: The Camera Cheat Sheets 📸 April Aperture Event
Like This Article?
Don't Miss The Next One!
Join over 100,000 photographers of all experience levels who receive our free photography tips and articles to stay current:


Leave a Reply