Fall leaves can look beautiful in almost any light, but there’s one lighting direction that can completely transform them: backlighting. Instead of photographing with the sun behind you, place the leaves between your camera and the sun.
Because many leaves are partially translucent, sunlight can pass through them. Reds become richer, yellows turn almost golden, and tiny veins and textures suddenly become much more visible.
Best of all, this is an easy exercise you can try almost anywhere.
Reminder: only 1 day left for the Photography Exercises 🔥 September Savings Sale
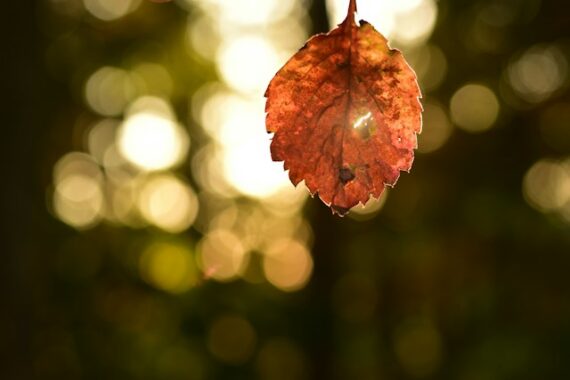
50mm, f/2.8, 1/320s, ISO 320. Captured by Carl Schlabach
The Exercise
Find a tree, branch, or even a single leaf that’s being illuminated from behind by the sun.
Late afternoon works especially well because the sun is lower in the sky and easier to position behind your subject.
Now move around until the sunlight is coming through the leaves rather than simply hitting their surface.
Take your first photo using your camera’s normal meter reading.
Then try:
- 0 EV
- +0.7 EV
- +1.3 EV
- +2 EV
Compare the results afterward.
You’ll often discover that the camera’s first exposure makes the leaves darker than you expected. That’s because the bright light behind them can cause the meter to reduce the overall exposure.
Adding positive exposure compensation can bring the brightness back and create that glowing appearance.
Watch the Highlights
There’s a limit, though.
Increase the exposure too much and you’ll start losing detail in the brightest parts of the leaves or sky.
Check your histogram or highlight warning (“blinkies”) if your camera provides them. The goal isn’t necessarily to avoid every blown highlight—especially if the sun itself appears in the frame—but you generally want to preserve detail in the leaves.
Pay Attention to the Background
Backlighting works best when the illuminated leaves have something darker behind them.
A glowing yellow leaf against a bright white sky can disappear.
The same leaf against a shaded tree, dark building, or distant forest can jump out of the photograph.
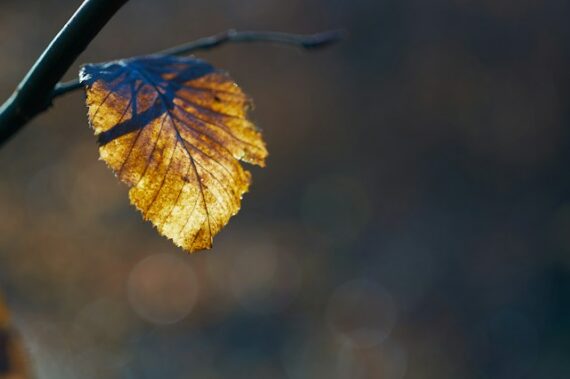
Photo captured by Wolfgang Hasselmann
So don’t just look at the leaf. Look behind it.
Try Hiding the Sun
Here’s another experiment.
Compose one photograph with the sun completely visible.
Then move slightly so a leaf, branch, or tree trunk blocks the sun.
That tiny change can dramatically reduce flare while still allowing beautiful light to shine through the leaves.
You may also notice a glowing rim of light around their edges.
Your Fall Photography Challenge
The next time you’re outside near sunset, spend 15 minutes photographing nothing but backlit leaves.
Change your position. Change your exposure compensation. Hide and reveal the sun. Look for dark backgrounds.
Then compare the photographs afterward.
You’ll quickly see that sometimes the secret to stronger fall color isn’t adding saturation in editing.
It’s simply putting the light on the other side of the leaf.
If you want to try more exercises like this—clearly structured, easy to follow, and designed to build real shooting instincts—the September Savings Sale on the Photography Exercises is wrapping up soon. It’s a practical way to keep improving, even when winter limits your time and motivation to shoot.

A practical way to build confidence for challenging shooting situations that often trip photographers up. Each exercise focuses on real-world scenarios—difficult light, motion, exposure decisions, and creative problem-solving—so you learn how to take control instead of relying on auto settings.
Only 1 day left: Photography Exercises 🔥 September Savings Sale
Like This Article?
Don't Miss The Next One!
Join over 100,000 photographers of all experience levels who receive our free photography tips and articles to stay current:





Leave a Reply