Years ago when I first started in photography, I did all of my editing in Photoshop because Adobe had not yet introduced Lightroom. However, once the program was finally introduced, I gradually made the transition as I realized that Lightroom could not only organize and edit my photos, it could also seamlessly publish them to various media outlets and channels with the click of a button. That’s when my work flow completely changed.

In comparison to my early post-processing and editing methods, Lightroom now meets 90 percent of my photography needs with Photoshop only meeting around 10 percent, if even that.
So what makes it my favorite tool?
While its nondestructive RAW editing and dozens of other features make Lightroom a fantastic tool for any photographer, my absolute favorite feature and the one that I use most often is Lightroom’s option to create presets.
First introduced in Lightroom 3, I initially passed over and ignored the preset functionality until I started studying and evaluating how I take and edit photos. Determined to increase my efficiency during the editing process while further developing my personal photography style, I noticed certain patterns in my process and the fact that how I take pictures directly affects the way I use Lightroom. What do I mean exactly?
When I shoot landscapes or cityscapes, I set the exposure for the highlights or the sky, which usually produces an underexposed shadows in the foreground. Using Lightroom, I enhance and open the details of the highlights and add a graduated filter to the sky while also increasing clarity, contrast, vibrance and saturation. Because this almost always produces an oversaturated sky, I only desaturate the blue hues. Then, to avoid any vegetation taking on an electrifying green hue, I shift the greens toward the yellow spectrum before finishing post-processing with sharpening, noise reduction and vignetting.

Lightroom Presets: Efficiency and Style
Over the years, I’ve repeated these steps so often that they’ve become second nature to me especially after doing the same 20 to 30 adjustments to every photo. And, while this may be perfectly fine to many photographers, I knew I needed to increase my post-processing efficiency. That’s where Lightroom’s preset functionality saved the day.
I created my first preset, which I named “Natural,” using the editing steps outlined above. Not only does Natural give my image rich colors, it allows me to save time and steps in creating a well-balanced and natural image that reflects my overall photography style.

Using the Natural preset as my starting point, I created two additional presets: “Sunrise” and “Overcast.” For Sunrise, I mimicked the warm hues of an early morning sunrise by making the color balance warmer and moving it toward the yellow and orange end of the spectrum. For Overcast, I decreased the saturation and increased the contrast of the Natural preset to emulate a cloudy, darker and overcast feel.
Since creating the foundation of my Landscape Collection with the Natural, Sunrise and Overcast presets, I have gradually created additional presets that continue to reflect my photography tastes and style. That’s when I realized that, in creating presets, I am not only defining, evolving and perfecting my artistic style, I am also discovering a variety of artistic opportunities and directions that will undeniably influence my future work.
Now, with the Landscape, Cityscape and People Collections complete, my preset-based editing approach works both effectively to maintain consistency of my artistic style and efficiently by saving a vast amount of time during the actual editing process. What’s even better is that I can continue experimenting with a variety of styles and approaches that can easily be saved to reflect my continuously evolving style and technique.

Take my advice. Give Lightroom’s preset functionality a fair try and see firsthand how your photography style further develops while also saving you an incredible amount of time. You won’t be disappointed!
Getting Started with Lightroom’s Presets
If you’re ready to take my advice and jump into the world of Lightroom presets, you can get started in just a few simple steps.
For photographers who have already built their photo collection in Lightroom, begin by selecting a few of your favorite photos to create your own unique presets. Remember: don’t be afraid to occasionally refine your presets over time to ensure they are truly generic enough to work with a variety of photos. Also, make sure to organize your presets (by topic, style, etc.) in order to make your growing collection more manageable and user-friendly. It’s all about consistency and saving time!

For photographers who are still building their photo collections or are just getting started, use another photographer’s Lightroom presets to begin. Believe it or not, many well-established veteran photographers are happy to share their presets to help aspiring photographers learn and grow in the field. Simply find a photographer whose style you like and use his or her presets as your foundation. Then, adjust the settings until you find a look that is truly unique to you, one that you feel reflects your own photography style.
For an added challenge, you can even reverse engineer presets to learn more about the individual settings and effects.
Whether you’re a veteran photographer who is well-known in the industry or are just settling in behind the camera, developing your personal photography style and artistry is a fluid process that is often long and sometimes chaotic. Through Lightroom’s preset functionality, you can not only record the evolution of your style, you can also save time and simplify your post-processing with a preset-based editing routine. Why not speed up and streamline the process at the computer so that you can have even more time behind the lens?
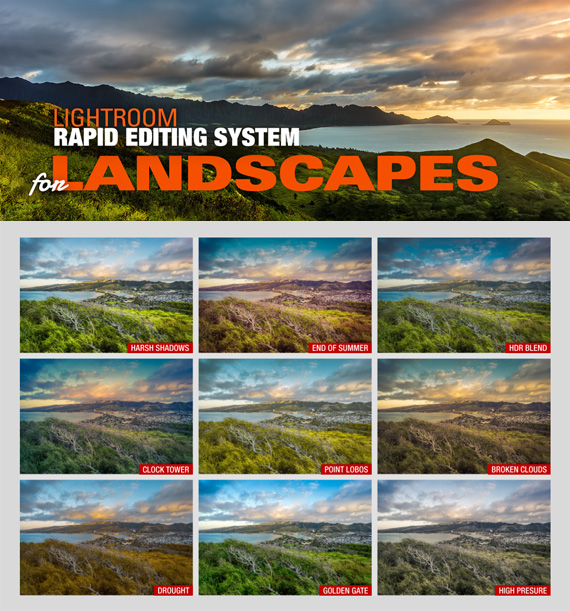
Landscape Photo Rapid Editing System
The author of this article, Viktor Elizarov, designed the popular Landscape Rapid Editing System to help photographers spend less time editing and more time out in the field.
Like This Article?
Don't Miss The Next One!
Join over 100,000 photographers of all experience levels who receive our free photography tips and articles to stay current:


Leave a Reply