The final task after you’ve downloaded and culled your images is to edit them and make them look presentable. This is where photo editing tools like Photoshop and Lightroom come onto the scene. Phlearn demonstrates how you can expertly enhance your subject in Photoshop:
How you process your images depends on the area you wish to bring attention to, whether that be the highlights or the shadows. Different editing ideologies warrant different approaches.
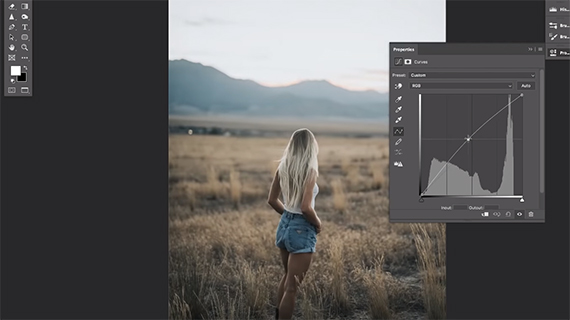
Curves Adjustment Layer
Whatever your approach may be, a curves adjustment layer will probably be a part of the process.
In this technique, the subject is slightly brightened with a blur effect that blends in with the rest of the image.
Step one is to adjust the exposure. Select a curves adjustment layer from the ‘Create new fill or adjustment layer’ option. You can also use the Layer > New Adjustment Layer > Curves option in the menu.
Once the exposure is adjusted press Command (Control) + I to inverse the effect of the layer mask.
Use the Elliptical Marquee tool to create a selection of the subject. Then press Command (Control) + I again to inverse the effect of the mask.
Blur
Use Gaussian Blur to blur out the effects of the elliptical marquee tool and the difference in brightness.
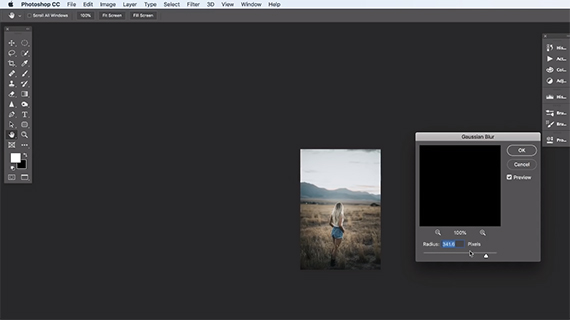
Pro Tip
Make sure that you’re zoomed out to 33 percent or smaller when using the blur and the exposure adjustment using the marquee tool. Essentially when you’re applying the changes to a selection of the whole image. If you’re zoomed in at anything 1:2 or larger the impact is easily overlooked. The result is usually over the top in such cases.
Multiple Effects: How to Copy Layer Mask
Copying a layer mask is a useful thing to know, especially, when you need to apply multiple effects like exposure, vibrancy, and sharpness to the same selection area. Did you know you can quickly copy a pre-existing mask in Photoshop?
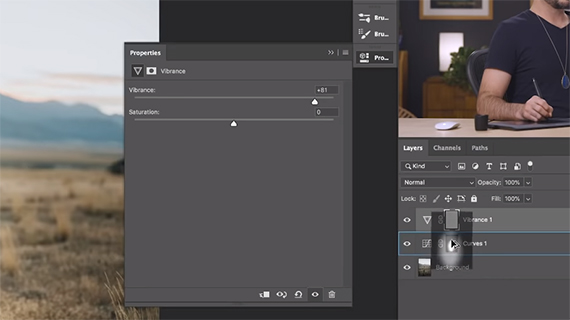
In the video, Aaron Nace needed to add some color and vibrancy. However, he needed this to be only on the same selection area where he applied the curves adjustment. To copy the selection he pressed Alt (Option) and dragged the original mask over the new layer.
Iris Blur
There are different blur tools in Photoshop.
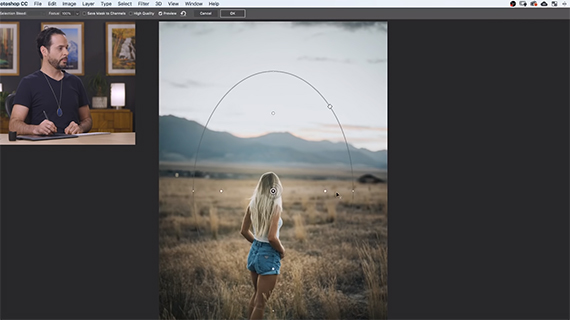
The Iris blur is yet another tool you could use for enhancing your images. There are five markers inside this blur tool. These are your central points. There are four points at the periphery.
The central points mark the area where blur will be the minimum. The farther you move away from the center the larger the amount of blur. However, you can move the points around.
The objective is to make sure that the effects look as natural as possible. As a result, always zoom out or use other precautions as elaborated in the video.
What are your tips for enhancing your subjects with post-processing?
Like This Article?
Don't Miss The Next One!
Join over 100,000 photographers of all experience levels who receive our free photography tips and articles to stay current:


Leave a Reply