A magician practices the art of illusion. Many times a photographer may practice the same thing. Who knew the art of levitation was only a few photographs and mouse clicks away? In three easy steps, Brooke Shaden shows us how to channel our inner Houdini:
Making levitation photographs is a great way to create intriguing and creative photos while having a bit of fun. Follow these simple steps to become the master of levitation!
Levitation Photographs in 3 Easy Steps
1. Take a picture of your model balancing on a stool in whatever position you like.
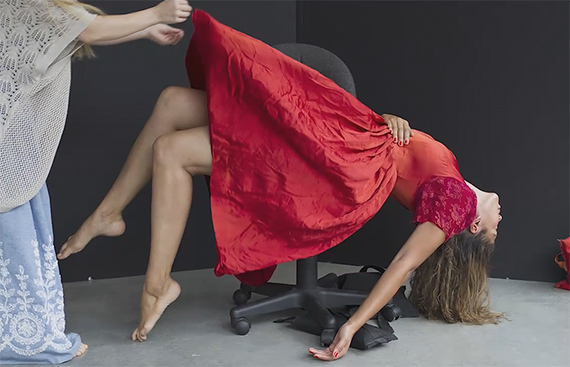
Take a photo of the model balancing on a stool or chair.
Use a 10 second timer to give yourself time to run back and create motion in the subjects clothing. Use a plain backdrop for quick results or if you will be transferring your subject to a new background.
2. Remove the model and the stool from the background.
Take a blank shot or a ‘plate’ of the empty set.

Take a shot of the set without the model or chair.
3. Erase the stool out from under your model in Photoshop.
Use the move tool and place the image of your subject on top of the blank or plate shot. Use the eraser tool or layer mask to get rid of the stool.
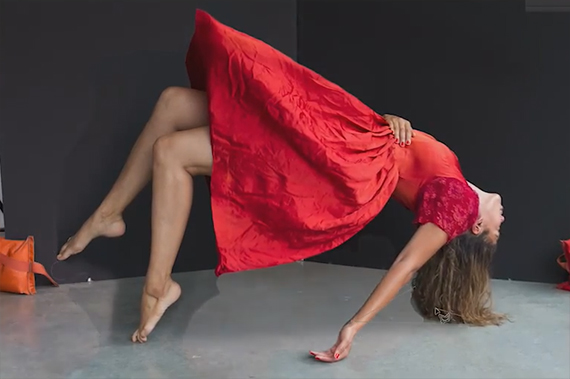
Leave as is, or replace the background. The post-processing options are endless.

Presto chango! You’ve got yourself a wonderful levitation photograph.
For Further Training on Photography Tricks
Check out this best-selling eBook on how to do photography techniques that produce unusual, eye-catching results. It can be found here: Trick Photography and Special Effects
Like This Article?
Don't Miss The Next One!
Join over 100,000 photographers of all experience levels who receive our free photography tips and articles to stay current:


Leave a Reply