In 1851, Frederick Scott Archer introduced the wet plate collodion process of making negatives. The process became the most popular method for making photographs until the 1880s. It allowed photographers to print multiple copies of the same image onto paper using a durable glass negative, something that couldn’t be done with the daguerreotype or the calotype.
Today, some photographers still use the technique, which produces highly detailed images. LeClair Photo shares this video showing a first person view of the wet plate process using a Graflex Crown Graphic 4×5 camera:
Because collodion loses sensitivity and dries up after only about 10 minutes, photographers using the wet plate method must work quickly and efficiently. In the 1800s, photographers set up portable darkroom tents, where they could rush to develop their images before the glass dried.
The photographer featured in the video had the advantage of studio lighting and a nearby darkroom. He used the following steps to make his portrait on black glass:
- Put on gloves and a mask to reduce exposure to the chemicals used in the wet plate collodion process.
- Insert the plate into its holder.
- Prepare a silver nitrate bath. silver nitrate makes plate sensitive to light.
- Prepare the fixer bath for the developing process.
- Clean the glass plate thoroughly.
- Pour the collodion evenly onto the plate, returning any excess liquid to the container. Collodion serves to make the silver nitrate adhere to the glass.
- Make the plate light sensitive by placing it in the silver nitrate bath.
- Turn off the lights and let the plate sit in the silver nitrate for three minutes.
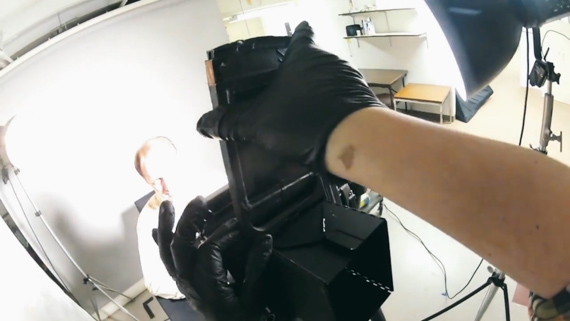
- Prefocus the camera on the subject. Once the plate is loaded into the camera and the shutter is opened, exposure will begin, so the shot must be set up in advance.
- Put the plate into a film holder to keep it from being exposed to the light as it’s transported to the camera.
- Slide the prepared plate into camera and take the photo.
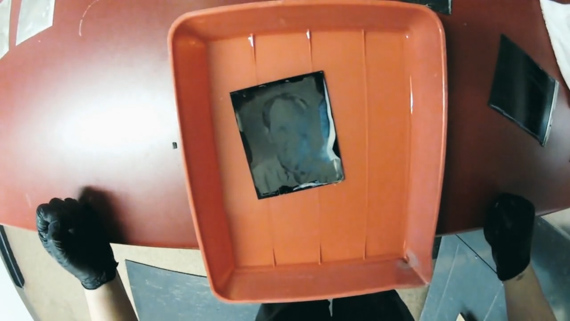
- With the lights still off in the darkroom, remove the plate and pour developer solution on it, rocking it gently for 10-15 seconds.
- Water wash the plate for 10-15 seconds to stop development.
- Plate the plate in the fixer bath for at least five minutes. Turn on the lights and watch the image take shape.
- Dry and varnish the plate.

The wet plate collodion process is an interesting way to experiment with old photographic methods. The volatile chemicals and limited timeframe used for developing photos from decades past can give a new appreciation for our modern, flexible photographic processes.
Like This Article?
Don't Miss The Next One!
Join over 100,000 photographers of all experience levels who receive our free photography tips and articles to stay current:


Leave a Reply