Today’s lesson is based on concepts from the Lightroom Mastery Guide which is currently 50% off if you want to dig deeper for further training.
In this tutorial we’ll go through the steps required to create that coveted desaturated look that is quite common in movies and television, as well as in advertisements and posters—it’s often referred to as a cinematic look. Adobe Lightroom is the perfect tool to help us achieve this effect.
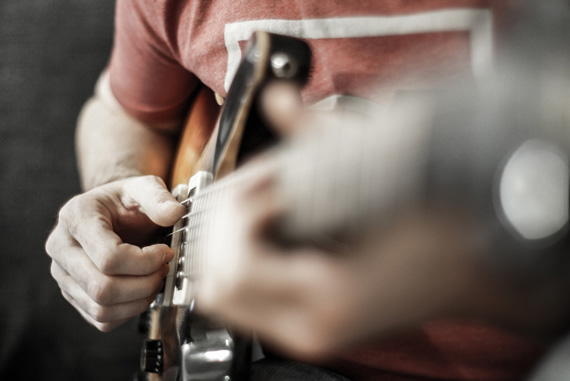
To start we’ll need an image. I shot the one below using a Sony NEX-6 fitted with a Minolta MD 50mm f/1.2 lens, shot at f/1.2.

Because of the depth of field and the already somewhat muted colors of the image, I find it’s a good start point to create a cinematic look.
To jump start our editing we could easily apply one of Contrastly’s Desaturated Cinematic Lightroom presets, and already get a nice effect:

But, for the purpose of this tutorial, we’ll start from scratch and go through all the adjustments one by one. This look is usually characterized by strong contrasts between the lighter and darker areas of an image, as well as increased clarity and reduced vibrance and saturation.
Fortunately for us, a lot of those adjustments are right in the Basic panel in Lightroom. Let’s move those sliders!
For this image specifically I would rather not introduce any Temp or Tint adjustments. So we’ll leave those sliders alone. The Tone section is where we’ll start—though since the image’s exposure was correct we’ll also leave this slider alone.
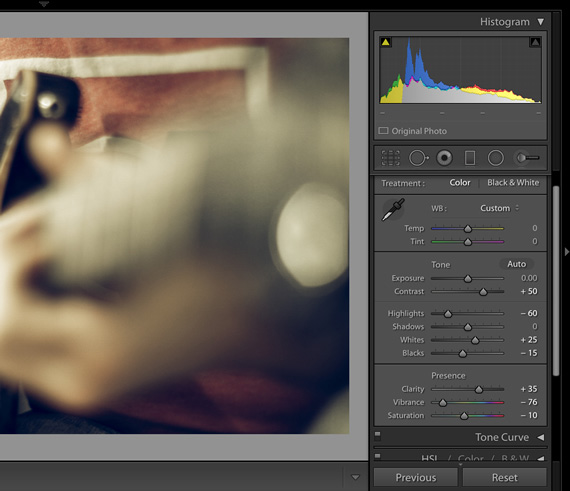
To give the image more oomph, I went with +50 on the Contrast slider. Then, in order to reduce the highlights, I went with -60 on the Highlights slider and then adjusted the Whites and Blacks sliders to better fit the image. The real magic comes in when you start working with the Presence section.
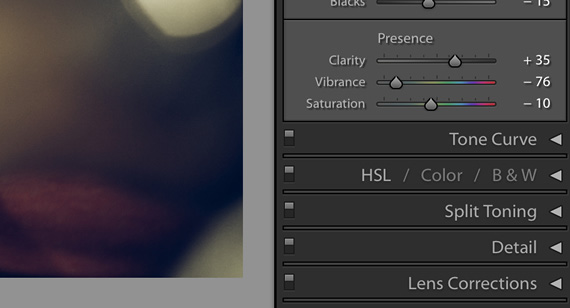
To complement the boost in Contrast, I adjusted the Clarity slider to give the image more definition. Then to get closer to the sough-after desaturated effect, the Vibrance slider had to go way down at -76. And, to give the colors a more neutral feel, I adjusted the Saturation slider to -10. The Vibrance and Saturation sliders really helped make the reds and oranges in the image more subdued, which is what we’re after.
Below is our result so far. We could of course stop there, but we’re not quite done yet!
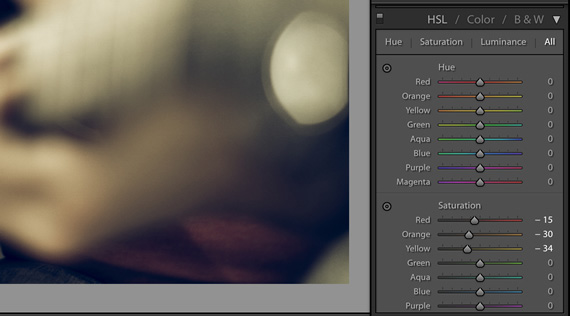
In order to make the stronger colors even more desaturated, let’s open up the Adjustments panel, click on HSL, and go to the Saturation section. When we adjusted the saturation and vibrance a little earlier, we adjusted those settings globally. But, in the HSL section we get to adjust saturation for each color.
Since our original image has a lot of reds and oranges, those are the sliders we’re most interested in. In order to desaturate the red in the shirt and the orange of the guitar we’ll set a negative value for the Red, Orange and Yellow sliders at -15, -30 and -34 respectively.
Obviously those settings will need to be adjusted to fit your own image, but using the Saturation and Vibrance settings as well as desaturating the specific colors in the Adjustments panel will help you achieve the desaturated cinematic look.
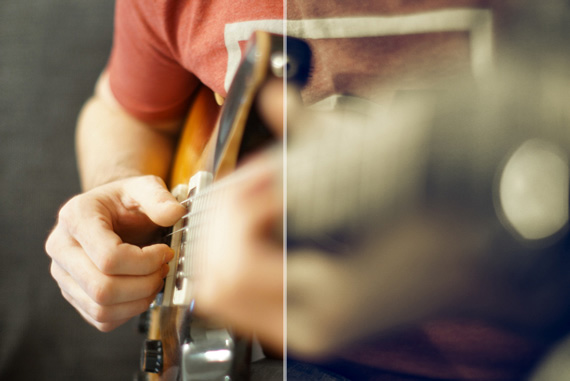
Here’s a before/after preview of our image:
I hope you enjoyed this quick tutorial. Please chime in via the comments section!
For Further Training:
Are you tired of spending hours on end fiddling around in Lightroom Classic and not getting the results you expect? This in-depth eBook is designed to help photographers master Lightroom Classic to its full potential. We were able to arrange an additional 50% discount for our blog readers which ends soon.
Lightroom Mastery (Click to Learn More)
Not by droning repetitions of someone else’s editing style, but through teaching you the basic premises of the software using easy to understand, real-world language that will unlock your potential for learning.
Deal ending soon: The Lightroom Mastery eBook at 50% Off
Like This Article?
Don't Miss The Next One!
Join over 100,000 photographers of all experience levels who receive our free photography tips and articles to stay current:


Leave a Reply