Have you always wanted to capture the excitement and emotion of dance? Do you want some easy steps to enable you to take great dancing photos?
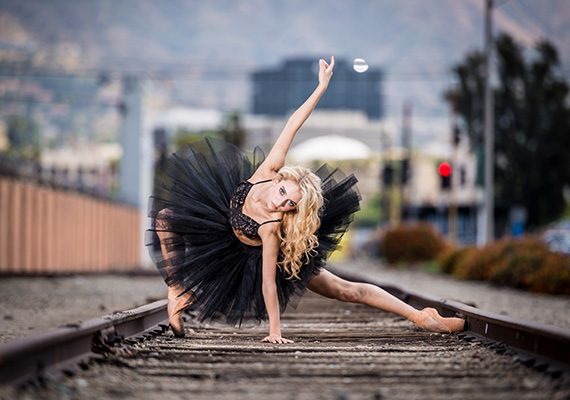
Photo by David Hofmann
If the answer is yes to these questions, read on.
1. Take your photos from a low angle. This in itself will produce an exciting photo that will stand out. If you’re taking photographs at a wedding, the venue will often be decorated elaborately, so make sure you include the background detail in your photograph.
Don’t be tempted to use a zoom lens; on a crowded dance floor other people will get between you and the person you’re trying to photograph. Be confident and get close up to the people you want to photograph. You may have to stand amongst the dancers to get the right shot.
2. To get the most dynamic selection of dancing photos, you need to move around the floor. Don’t be tempted to only shoot from one side; it’s a common trap that many photographers fall into. Secondly, if you want to photograph one or two people in particular, do not separate them from the others. You want to try to capture the excitement of the other dancers as well.
Take photos from unusual angles. If you’re lucky enough to be using a camera that has a rotating screen, hold the camera high above your head and take a photo looking down at the dancers. In contrast to this, you can take photos from waist level, looking up at the dancers.
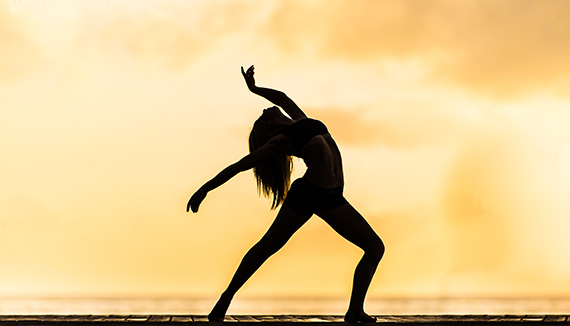
Photo by David Hofmann
3. You will need to use a flash, but don’t use the internal flash as it will produce flat lighting. Use an external remote flash unit, and get someone to move around with you while they hold the flash. The second advantage of an external unit is that with the flash unit away from the lens you will not get the red eye effect. Let’s face it, red eye reduction functionality on cameras rarely works, anyway.
If I haven’t already sold you on the advantages of using an external remote flash unit, also bear in mind that you’ll be able to shoot longer distances—internal flashes barely have a range of four meters.
4. For some of your dancing photos, try using a slow shutter speed. Now this might seem strange, but hear me out. With a slower shutter speed, you introduce a small amount of blur into the background of the shot, capturing the motion, yet still getting a clear picture of the dancers in the middle of your frame.
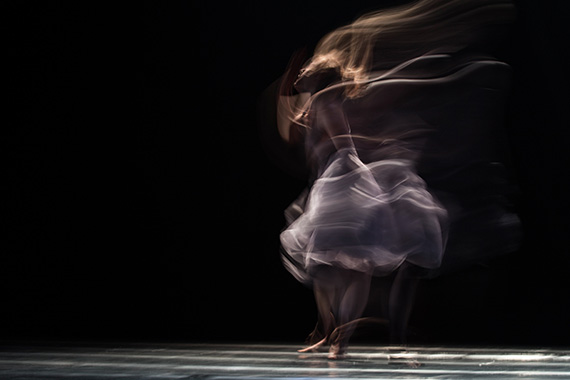
Photo by Ahmad Odeh
5. Lastly, use a tripod. This is useful if you’re following the movement of people across the dance floor in a panning effect, and it also produces better shots when using slow shutter speeds.
About the Author
The writer is a regular contributor of articles related to photography, and is also the author of a website containing dancing photos.
Like This Article?
Don't Miss The Next One!
Join over 100,000 photographers of all experience levels who receive our free photography tips and articles to stay current:


Can I use a picture of yours on Facebook profile please
love the slow shutter speed idea. creative idea, i’m sure it will take several photos to get the one with just the right amount of blurr. thank you i’ll try this in my wedding photography