Photographing insects is a daunting task. The subjects are tiny, skittish, and you have no control over them. Another challenge is the shallow depth of field of macro lenses. Chances are very high that your shot will be out of focus, even if the insect barely moves. Photographer Ross Hodinott explains how you can overcome the challenges of macro insect photography in this video:
Finding Insects
“It doesn’t really matter where you live. You’re never going to be far from insects.”
One good thing about photographing insects is that you don’t have to travel too far to find them. You can find them in your own backyard. If you happen to have wetlands, meadows, or reserves in your vicinity, those are great places to find insects.
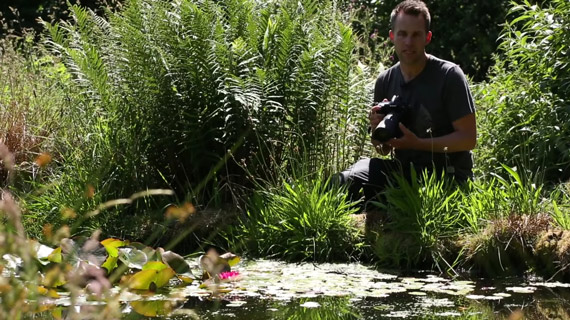
Once the location is sorted out, it’s about finding your subjects. Weather conditions play an important role, too. Insects tend to come out and get more active when the weather is sunny and warm. This can make your work challenging because of the increased level of activity of the insects. On the other hand, when the sun is low during the early morning and evening, they’re less active, making it favorable for you to take their photos.
Once you notice an insect, study its behavior. Territorial insects tend to return to the same area. In that case, be patient and be prepared to photograph in that particular area. And when you’re approaching the insect to photograph it, keep from disturbing the surrounding grass/branches, and also be sure not to cast your shadow on them.
Composition
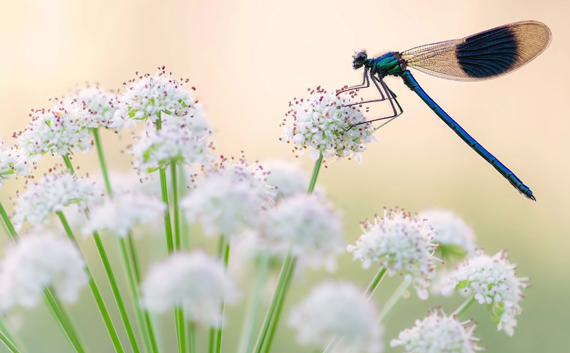
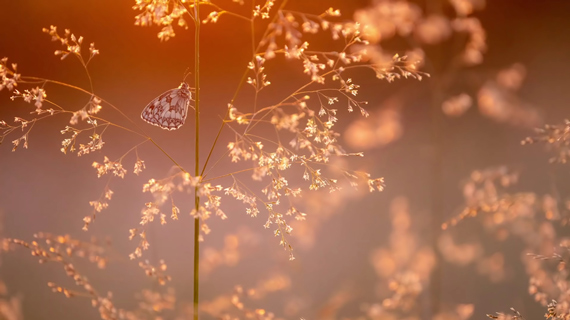
“A good composition will greatly depend on your subject and the kind of effect you’re trying to achieve.”
Hodinott’s key to good composition is to keep things simple and not to cram a lot of elements in a frame. He also suggests that you leave a little bit of space to include the surroundings instead of filling the frame entirely with the insect. This gives a sense of scale and context.
Choosing a Lens
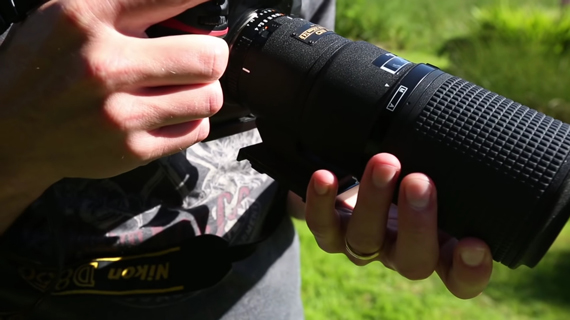
Macro lenses are the best choices when it comes to photographing tiny subjects from a close distance. They’re optimized for close up images and can resolve minute details superbly. But, if you’re on a budget, you can get away with using close-up filters and extension tubes. They help you to take close up images using your existing lenses.
If you’re getting yourself a macro lens, it is a good idea to invest in a telephoto macro lens. Using a macro lens with a greater focal length, 200mm, for instance, provides you with a greater working distance. This minimizes the risk of you disturbing the insect, as you can maintain a good distance from the subject.
“Any macro lens over 100mm is a really good lens for macro photography.”
Focusing
“One of the most challenging aspects of insect photography is achieving sharp images.”
When shooting at high magnifications, the depth of field becomes extremely shallow. You need to nail focus in order to achieve a detailed image. If you’re not careful enough, you could miss focus even by a hairline, and the image will not come out great.
If you have a larger subject, you can get away with auto-focus. However, if your subject is small, or if you’re shooting at a high magnification ratio, auto-focus won’t cut it. It will be very slow and inaccurate. The best solution is to work in manual focus mode.
If you’re not well-versed with using manual focus in macro photography, it can be a nightmare out in the field. Hodinott suggests the following steps for nailing focus using manual focus:
- Set the lens to the level of magnification you want for your particular subject.
- When the insect is in place, look through the viewfinder and slowly move forward until the subject is in focus.
- Once you feel that the subject is sharp enough, take a short burst of images in continuous mode.
“You end up gently rocking backwards and forwards, and every time your subject comes through the focal plane, take a shot.”
Aperture is another important aspect that dictates how much of the subject is in focus. And unfortunately, there is no concrete answer to which aperture value you should be using. It depends on the size of the subject and the type of effect you’re aiming for.
“I tend to shoot with the largest aperture that I can get away with in order to achieve a fairly shallow background and also to generate a relatively fast shutter speed.”
Ethics
When photographing insects, treat them like you would treat any other subject. Some photographers restrain the insects for the sake of a photograph. Always put your ethics first. Try to photograph the insects in their environment.
Lighting
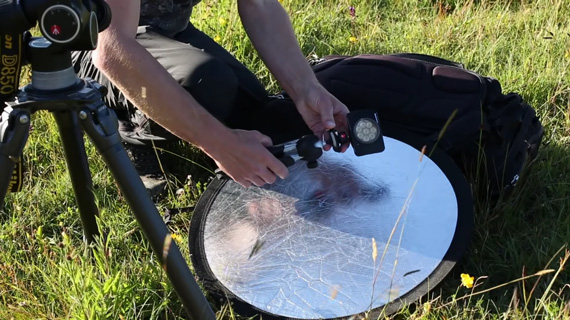
You actually don’t get to have control over light when photographing insects during the day. However, if you’re out photographing them during the evening, you can start manipulating light. Hodinott carries a small reflector and an LED light with him that he uses to add in a creative backlight. And if the light is too harsh, you can use a diffuser to soften it.
“Ultimately, there is absolutely no substitute for beautiful golden sunlight. And that’s one of the reasons why I do most of my insect photography either early in the morning, or late in the evening when the light is naturally beautiful.”
If you’re thinking of trying your hand at macro photography, be sure to give these tips a shot.
Like This Article?
Don't Miss The Next One!
Join over 100,000 photographers of all experience levels who receive our free photography tips and articles to stay current:


Really nice and interesting post. I was looking for this kind of information and enjoyed reading this one.