This article is based on concepts from The Photography Action Cards which are currently 88% off for a summer sale if you want to dig deeper for further training.
Creating stunning portraits of teens is a super rewarding project – whether it’s your child or you are working as a portrait photographer. With a little knowledge and some ingenuity, you can create pictures that will be cherished for years to come.
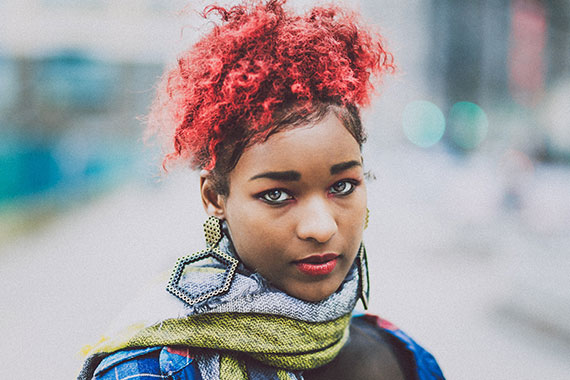
Photo by Photos 4 Donations
Teen portraiture can be accomplished virtually anywhere and with a basic camera kit.
Getting Started
To get started, sit down with your subject and ask some questions.
- What type of location would they enjoy being photographed in?
- Do they have a particular style that they would like to showcase in their pictures?
- Do they have hobbies or interests that would enhance the story aspect of their photos? One teen might play guitar, while another likes to surf, and yet another is a chess champion.
- Talk to them about clothing and colors.
- Discuss hair and makeup.
- Ask them if they would like someone else to appear in some of their photos with them.
- Find out their needs regarding scheduling – days and times that they could be available.
- Share with them a mood board (more on that in a minute). The mood board will help you determine ideas or strategies for your shoot.

Photo by Tareq Ahmed Ruman
Lighting
A teen portrait will often be printed to be handed out to friends and relatives. In 90% of the teen portraits that you produce, you’ll want to keep the contrast well under control.
Remember This: To keep contrast under control, you want soft, even lighting with minimal shadows.
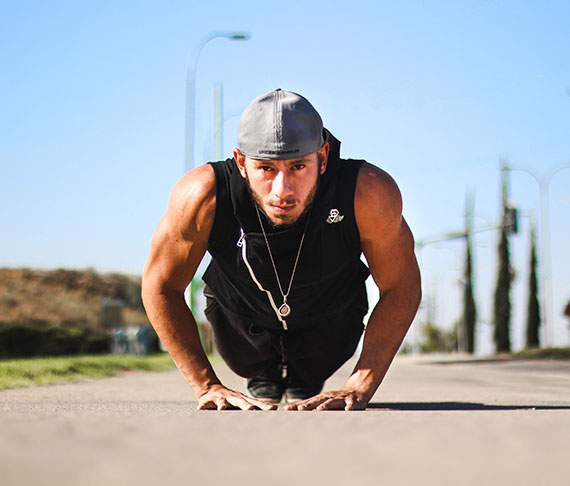
Photo by MatanVizel
Important Thought: On occasion, a harsher, more direct light source might be called for. Capturing a teen in a sporting or athletic portrait is one example. Direct lighting and harsh shadowing emphasize muscles.
In your initial conversation with your teen subject, discuss what they’re looking for, and sort out the lighting accordingly.
IDEA: A simple lighting kit would include the sun and a decent-sized reflector board. The reflector board can be cardboard or foamboard (foamboard is a little stiffer and holds up better if there’s any breeze). The reflector board should be white on one side and silver on the other. If you’re making your own reflector, use tinfoil for the silver side. Crumple the foil up, and then straighten it back out. Use spray glue to adhere it to your board. The white side will reflect a softer light, while the silver side will reflect a more specular light. If you’re comfortable using an electronic flash, that can be helpful as an additional primary light source or as a fill light source.
For Soft Light
To find soft, even lighting with minimal shadows, do the following:
- Shoot in the evening around the time of the Golden Hour. This is one hour before sunset until approximately one hour after. (Cloud cover must be taken into account.)
- Place your subject in the shade.
- Shoot on a slightly overcast day. (Cirrostratus clouds work best. They are thin white clouds that cover the entire sky like a veil.)
- Find indoor locations that have windows or doors without direct sunlight hitting them.
White Balance
Pay careful attention to the white balance when placing your subject into the shade or photographing them on an overcast day. In these settings, the color balance will often capture a cyan and blue tint, as seen in the left version of the example photo above. The right side version of the photo below has the white balance correctly set.
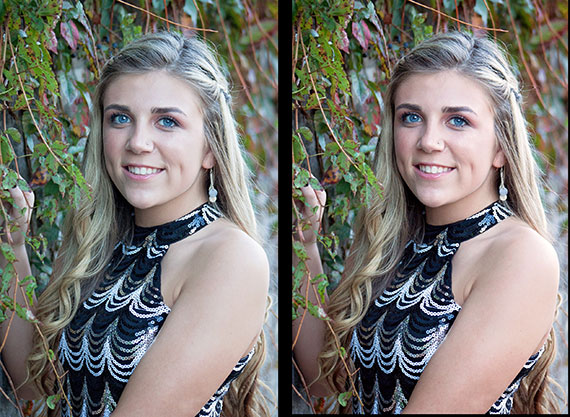
Photo by cherylholt
Placing your teen directly into the light of the setting sun doesn’t guarantee perfect color. The lighting during the Golden Hour can often create an unnatural red to yellow skin tone in a portrait that can be hard to correct in post-processing.
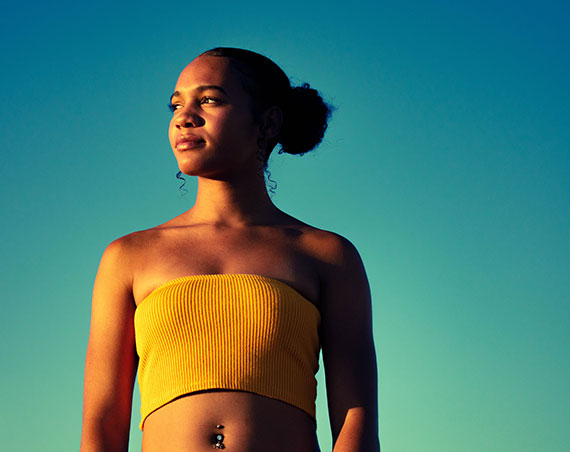
Photo by Ernest Brillo
Remember This: Judge your white balance setting by visually studying how your subject’s skin tone looks.
To achieve proper white balance, do one or more of the following:
√ Set the white balance to the appropriate auto setting for the situation, such as clouds, shade, or full sun. This is the least effective method, but better than auto.
√ Manually set your white balance using a white card. This requires some experience. Practice it before you go on location with your subject.
√ Always shoot with the camera raw file format so that you have complete control of the color balance in post-processing.
√ If you’re shooting at sunset, and the lighting is exceptionally red to yellow, place the sun behind your subject at a 45-degree angle, and then set the camera exposure and white balance for the front side of your subject.
Background
Choosing a location is really important when you’re photographing teens.
You want the background to compliment them without taking over. If you’re just starting out, simple backgrounds work best.
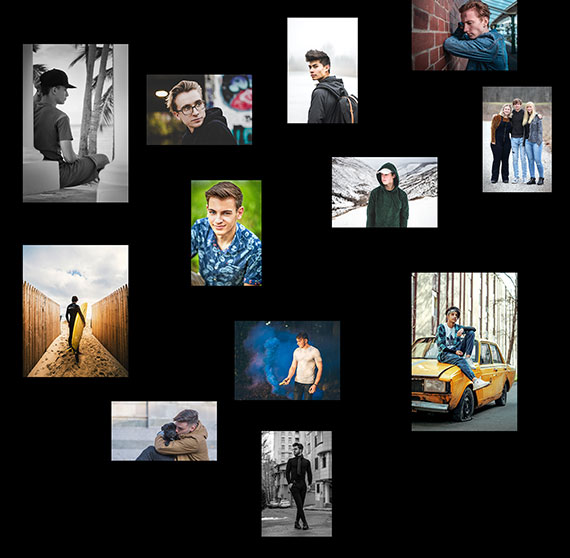
IDEA: Spend some time looking around your area and taking shots of potential shooting locations. Print these shots and put them into a book that you’ll call your background book. You can then share these locations with your subject during the planning session.
Let me give you an idea of what you might include in your background book.
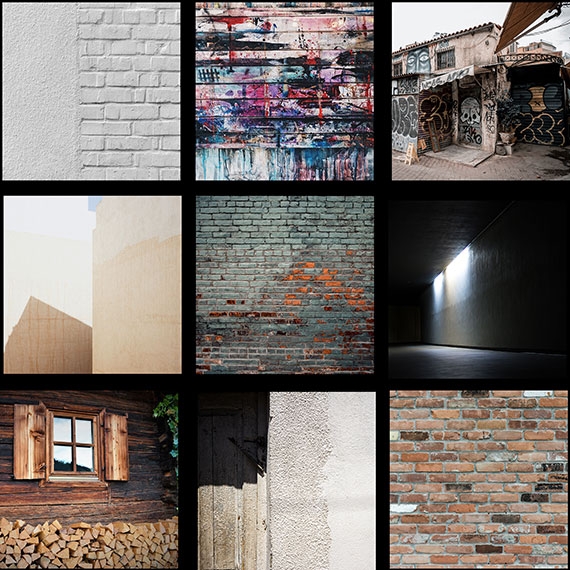
Top left photo by Pawel Czerwinski, top center photo by Patrick Tomasso, top right photo by Anastase Maragos, middle left photo by Mukuko Studio, center photo by Donnie Rose, middle right photo by William Daigneault, bottom left photo by Waldemar Brandt, bottom center photo by Artemis Faul, bottom right photo by Math
- Keep the backgrounds free of clutter
- Look for color schemes and exciting textures.
- Keep excellent notes as to the location and time of day that would work best for lighting.
- Look for architectural variations that can create an appealing light and mood.
- Make sure it’s ok to shoot at the location. Do you need permission?
Posing
When starting out in teen portraiture, keep things simple. Concentrate on three types of shots: the head and shoulders pose, a simple half body shot, and a full-length standing shot.
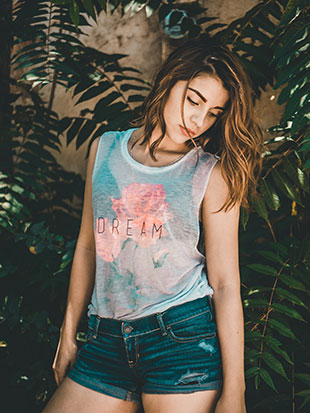
Photo by Daniel Apodaca
Teens don’t necessarily want to smile. If that’s the case, accommodate them, and then ask for a few smiles at the end of that pose.
Remember This: The last thing you should do before taking the picture is to look at the neck, hands, knees, and feet. Do any of these body parts look awkward or display a less than pleasing look. Pay special attention to folds in the skin!
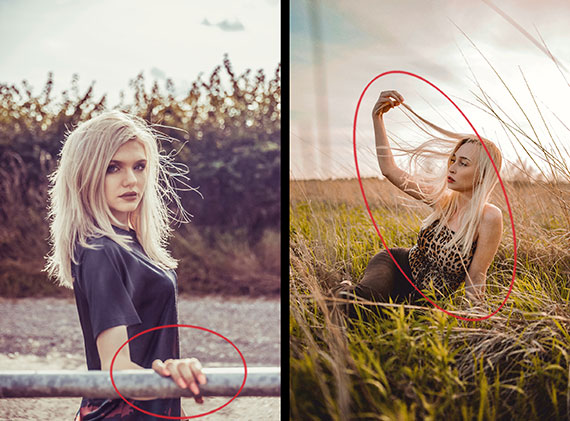
Left photo by Mike Austin, right photo by Jayson Hinrichsen
Keep an eye on the hands and feet. When they extend outward, toward the camera, they can take on a ‘larger’ than life perspective. Also, check them for odd skin tones. Generally, you will want to keep the hands and feet in line with the torso.
Camera POV
Your camera point-of-view plays a crucial role in the success of your teen portraits.
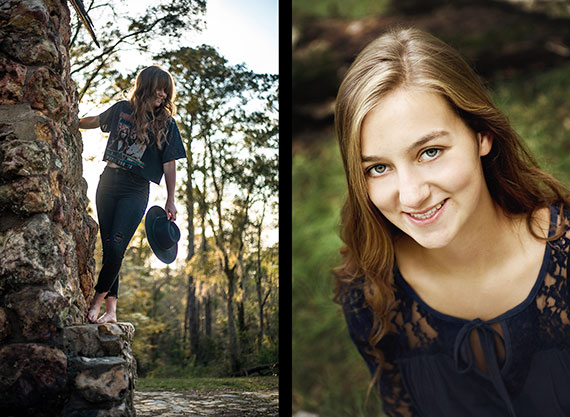
Left photo by Blake Barlow, right photo by Jen Theodore
Remember This:
- Looking up at a subject tends to thin the body and make a person look taller.
- Looking up also creates a subliminal message of the subject having power and being in control.
- Looking down at a subject tends to foreshorten the body and facial features.
- When looking down on a subject, watch the neck for skin bunching up. Have them lift their chin slightly.
- Looking down creates a subliminal message of the subject being approachable and friendly.
- In both cases, always keep an eye on the background for clutter.
Critical Thought: When composing your shot, make sure to leave a little extra room around the edges of the frame so that the image can be printed in any standard print format. For example, a 5×7 print is much narrower than an 8×10 print.
Hair
Outside of capturing their sense of style, nothing is more important to a teen than their hair. Cover this topic thoroughly in your opening discussions with the subject. For example, would they enjoy a hair blown look, or do they want every hair in place?

Top left photo by Elijah Hiett, top center photo by Thibault Debaene, top right photo by Jeffery Erhunse, bottom photo by TaniaVdB
IDEA: If a teen emphasizes that they want every hair in place, you must give special consideration to your shooting location. Even a light breeze can become a severe problem. Look for sheltered areas. Also, you should bring hair ties, perhaps some hairspray, and if the teen is willing a stylish hat or two.
Props
Most teens are not entirely comfortable in front of the camera. Giving them something to do, or to hold on to, will lighten their mood for your photo session. It doesn’t have to be complicated. In fact, simple is better. Try to incorporate the activity or prop into the composition using color, background, and posing.

Photo by mahdighphoto2
Friends and Family
Many teens would like to have at least some pictures taken with a friend or a family member.

Photo by Kristopher Roller
IDEA: If you include other people in your teen portrait, make sure you pose them so that your subject teen maintains a dominant position in your photo composition. The above example photo is an excellent illustration of including a friend while still keeping the subject dominant.
Mood Board
A mood board is a collection of photos that you save, print, and paste-up into a book that you can take to your subject interview.
Photos by Tim Mossholder, Anika Huizinga, Talen de St. Croix, Peter F. wolf, Asaf R, NATHAN MULLET, Jeremy Thomas, Sheri Hooley, Erica Magugliani, Jamie Street, Pedram Normohamadian, and again Pedram Normohamadian
It’s a valuable and professional tool that will help you get a handle on what the subject’s expectations are.
- Do they like color photos?
- Do they like casual dress, or do they want to portray a more stylish dressed up look?
- Do they like black and white?
- What are their favorite poses?
- Do they want to include pets, friends, and family?
All of this information will help you produce a better photoshoot!
Let’s Recap
√ Conduct a thorough pre-shoot interview with your teen and keep careful notes.
√ Use soft, even lighting to control contrast – unless you’re looking for a unique effect such as to accentuate muscle structure.
√ Judge your white balance setting by looking at the subject’s skin and then taking into consideration the light source.
√ Keep your backgrounds simple. Watch out for clutter. Create a background book.
√ When posing, keep the hands and feet close to the body. Watch out for folds in the skin around the neck, knees, and elbows that might look awkward.
√ When you choose a camera POV that looks up, or looks down, make it meaningful while sending the right message.
√ Give a little extra room around the edges of the frame so that the photo can be easily cropped into different picture formats.
√ Give special consideration to the hair. Bring tools to help control flyaway hair.
√ Use props to add a story element while also relaxing your subject.
√ Include friends and family when appropriate, but keep your subject the star of the party.
√ Create mood boards to help you figure out what your subject really wants from their portrait session.
Have fun!
About the Author:
Kent DuFault is an author and photographer with over 35 years of experience. He’s currently the director of content at the online photography school, Photzy.com
For Further Training, Deal Ending Soon:
With summer here and readers looking for more photography practice near home, we were able to get another huge markdown on the popular Photo Action Cards – which includes cards and exercises specifically on various types of portrait photography. Expand your photography skills with 65 printable project sheets that will give you over 200 photography assignments, covering everything you can imagine. They are currently 88% off today if you want to try them out.

New: The Photography Action Cards (Click to See How They Work)
These Action Cards discuss a photographic topic, provide you with suggested considerations, and give you specific photographic assignments. They’ll kick you out of the “nest” to go have a personal discovery experience all on your own. P.S. try the coupon code picturecorrect at checkout for even more of a discount which ends soon.
Deal found here: The Photography Action Cards at 88% Off
Like This Article?
Don't Miss The Next One!
Join over 100,000 photographers of all experience levels who receive our free photography tips and articles to stay current:


Leave a Reply