Neutral density (ND) filters are essential tools for long exposure photography. They allow you to slow down your shutter speed, smooth moving water, blur clouds, and create effects that aren’t possible with normal exposure settings.
But what happens when one ND filter isn’t strong enough?
You can stack multiple ND filters to achieve longer exposures. However, stacking filters can introduce vignetting, color casts, unwanted reflections, and reduced sharpness.
Here’s how to combine them while preserving image quality.
Related reminder: only a few days left for the Long Exposure Guide at 70% Off
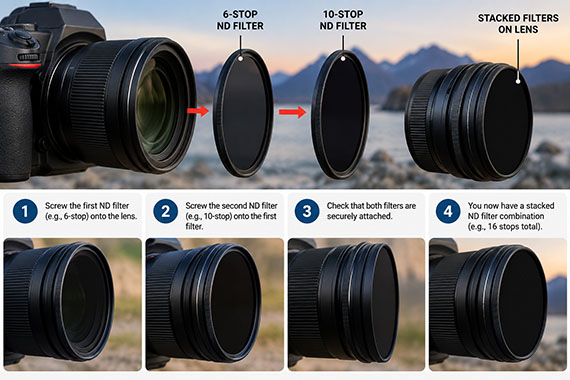
1. Understand How ND Filter Strengths Combine
ND filter strengths are additive when measured in stops. For example, stacking a 3-stop filter with a 6-stop filter gives you 9 stops of light reduction.
ND Filter Stacking Examples:
- 3-stop + 3-stop = 6 stops total
- 3-stop + 6-stop = 9 stops total
- 6-stop + 6-stop = 12 stops total
- 6-stop + 10-stop = 16 stops total
Example: If your normal exposure is 1/125 second, stacking a 6-stop and 10-stop filter would extend it to approximately 8 minutes and 44 seconds.
That’s enough to transform moving water into a smooth, misty surface or make moving people disappear from a busy scene.
2. Use Quality Filters and Avoid Vignetting
Every additional filter adds glass surfaces that can introduce reflections, color shifts, or reduced contrast.
Choose high-quality, multi-coated ND filters whenever possible. A single excellent filter often produces better results than several inexpensive ones stacked together.
Vignetting is another concern, especially with wide-angle lenses. Stacking thick screw-on filters can physically block light near the corners of your image.
To minimize this, use slim-profile filters, avoid unnecessary layers, or consider larger filters with a step-up ring.
Always check the corners of a test photograph before beginning a lengthy exposure.
3. Watch for Reflections and Color Casts
Stacked filters can create unwanted reflections when light bounces between their glass surfaces. This is particularly noticeable when photographing toward the sun or bright artificial lights.
Keep your filters clean, use a lens hood when possible, and shade the filters from direct sunlight without obstructing the photograph.
Color casts can also become more noticeable when combining filters. One might introduce a slight blue tint while another adds a warmer or magenta tone.
Shoot in RAW format so you can adjust white balance more effectively during editing. Taking an unfiltered reference photograph can also help you identify color differences.
4. Focus Before Attaching Strong Filters
A strong ND filter significantly reduces the light reaching your camera, making autofocus more difficult.
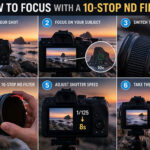
For reliable results, follow this simple workflow:
- Compose your photograph without the strong ND filters.
- Focus carefully on your subject.
- Switch to manual focus to lock your focus position.
- Attach the ND filters without moving the focus ring.
- Calculate your new exposure time and take the photograph.
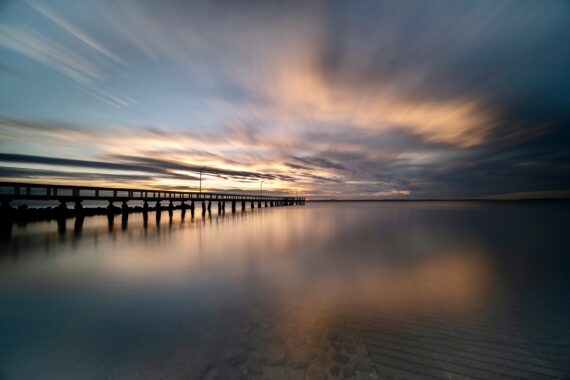
60 second exposure captured by Walter Winiana
For very long exposures, also check for light leaks around filter holders. DSLR users may need to cover the optical viewfinder to prevent stray light from entering.
5. Be Careful with Variable ND Filters
Variable ND filters use polarizing elements to adjust light reduction. While convenient, they can produce uneven darkening or an X-shaped pattern at stronger settings, particularly with wide-angle lenses.
Stacking variable ND filters with other polarizing filters can make these problems worse.
Fixed-strength ND filters are generally the more predictable choice for stacking, especially when image quality is your priority.
6. Test Your Combination Before Shooting
Before committing to a multi-minute exposure, take a few test photographs.
Compare an unfiltered image with photographs taken using individual filters and your stacked combination. Adjust shutter speeds to maintain similar brightness.
Inspect the images for sharpness, corner darkening, reflections, and color shifts.
This quick test can reveal problems that might otherwise ruin an important photograph.
Final Thoughts
Stacking ND filters is a practical way to achieve extremely long exposures without purchasing a dedicated filter for every strength.
The secret is simple: use quality filters, minimize unnecessary layers, focus before attaching them, and check your results carefully.
With the right technique, you can combine ND filters confidently while maintaining the sharpness, color, and contrast your photographs deserve.
For Further Training:
Some of the most breathtaking photographs reveal something the human eye can never see: the movement of time. Our new Long Exposure Photography Guide & Cheat Sheets (currently 70% off today for our 🍂 Autumn Afterglow Sale) walks you through everything from choosing ND filters and camera settings to photographing waterfalls, oceans, clouds, and nighttime scenes.

You’ll also learn how to avoid common mistakes and edit your long exposure photographs for professional-looking results.
Only a few days left: The Long Exposure Photography Guide at 70% Off
Like This Article?
Don't Miss The Next One!
Join over 100,000 photographers of all experience levels who receive our free photography tips and articles to stay current:



Leave a Reply