Sometimes it’s a good idea to get back to the roots of photography and get a feel for how photographers used to work with film. Photographer Shannon Beveridge explains everything you need to know before getting started with film photography:
Start With a Disposable Camera
“We live in a instant gratification type of world.”
Today’s generation expects instant results. If we like something, we take out our phone, take a photo, and share it with others via social media. All of this can happen in less than a minute. But when it comes to film photography, there’s a good deal of time and cost involved in the process.
You can’t preview your images immediately, and furthermore, you need to find a good place to get the film developed and printed. Even the printing process can take days. So, even though at first you may think that you’ll love film photography, you may end up hating it. Before you invest in an analog camera, start off with a disposable camera. It will give you a feel for using an analog camera with much less of an investment.
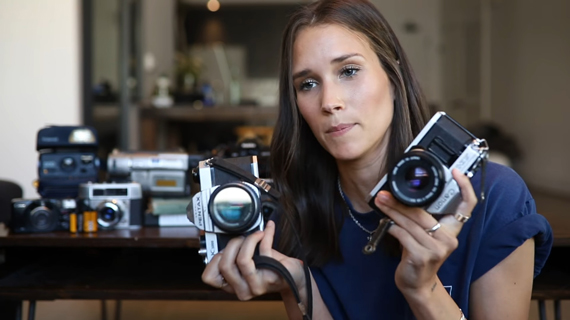
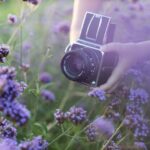
Get Yourself an Analog Camera
Once you’ve decided that film photography is something that you definitely want to try out, get yourself a proper analog camera. Look around at local camera stores and online. Be sure to get yourself a camera that has manual controls. Beveridge recommends that you get something like the Canon AE-1 or the Pentax K1000.
Understand Camera Settings
Analog cameras essentially have three basic settings: shutter speed, aperture, and ISO. In order to get a good exposure, you need to find a balance between these three variables.
ISO or film speed is the light sensitivity of the film. For film with low ISO values, you will need more light for proper exposure. This is good for bright daylight photography. For shooting in situations with less light, opt for a higher ISO film like ISO 800. For beginners, it’s a good idea to start somewhere in the middle, like ISO 400.
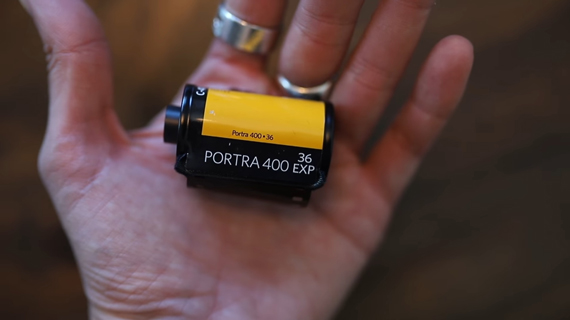
Be sure to dial in the ISO value of the film that you’re using in the camera. Unlike digital cameras, you will need to change the entire film roll if you need to work with a different ISO value.
Aperture is the opening in your lens that controls the amount of light that will fall on the film. When the aperture is wide open, it lets in a lot of light, which is great for low light situations. And, when it’s narrowed down, it lets in less light. You can control the aperture by changing the f-values. The greater the f-value, the smaller the aperture size. And the smaller the f-value, the bigger the aperture size. For instance, f/1.8 means that the aperture will be wide open, while f/16 means that it will be narrowed down.
Besides controlling the amount of light passing through, aperture also controls depth of field. Using small f-values like f/1.8 will have shallower depth of field, meaning that it will have some part of the subject in focus while the foreground and the background will be blurred out.
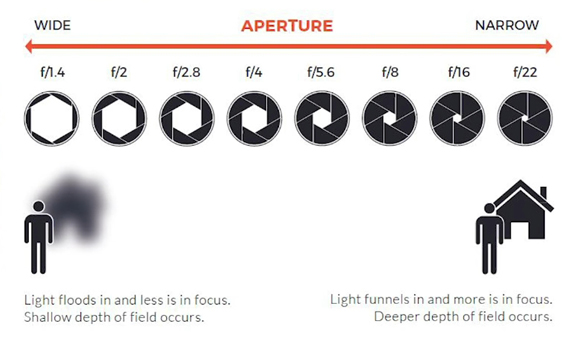
When you need to shoot with a greater depth of field, like when shooting landscapes, use a greater f-value like f/16. This will have a greater area of the scene in focus.
Shutter speed determines the time period for which the film is exposed to light. When you use a fast shutter speed like 1/1000 second, the shutter opens and closes pretty quickly. This has two implications: it lets in a very small amount of light and it freezes the action. You’ll need a good amount of light if you plan to use a fast shutter speed.
Using slower shutter speeds like 1/60 second lets in a relatively greater amount of light, as the film is exposed for a longer period. On the flip side, this also makes the images prone to camera shake. Use a tripod when using slower shutter speeds.
Getting a Correct Exposure Using Film
Your ISO will be fixed depending on the film stock that you’re using. You can set a combination of your aperture and shutter speed to expose your image properly. Keep an eye on the light meter to get an idea of whether or not your exposure is okay.
If the needle points upward, your image will be overexposed. And if the needle points downward, your image will be underexposed. Adjust your aperture and shutter speed to get it pointing toward the center. This works out in most cases.
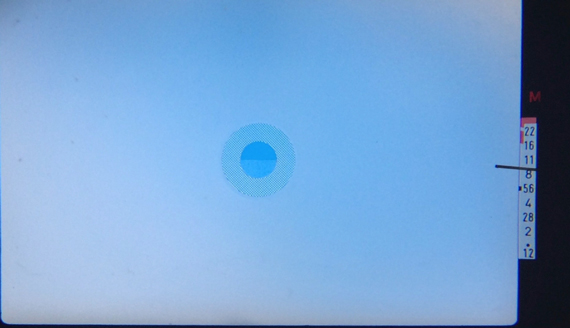
Light meter in an analog camera
If your image is overexposed, either use a faster shutter speed, greater f-stop values, or a combination of both to cut down on the light. On the contrary, if the image is underexposed, try using a slower shutter speed, smaller f-values, or a combination of both.
Get a Point and Shoot Camera
If you feel that working manually with a film camera is tedious, you can get a point and shoot camera. Point and shoots often don’t have any manual controls for you to choose from. The camera itself will do the heavy lifting to expose the image properly; a point and shoot is totally automatic and will give you results with a film effect without you having to learn too much about film photography.
If you’ve been thinking of trying your hand at film photography, these tips will help you out. Is film photography your cup of tea?
Like This Article?
Don't Miss The Next One!
Join over 100,000 photographers of all experience levels who receive our free photography tips and articles to stay current:


How long will film material be available in the future, plus, will photo labs? Be more available to the average photographer, to assist them in their passion for film.
This discussion doesn’t really address film photography. All that it mentioned applies to modern digital photography as well, with the exception that ISO (or ASA as it used to be called in the film days, that might have been worth mentioning!) is not as flexible. All three “basic settings” are exactly the same as the three basic settings on all digital cameras.
What should be addressed is the printing and processing procedures which are of course very different and the key reason why most people want to try film.