Digital camera technology is improving at a rapid pace. It’s easier than ever before to take a correctly exposed, correctly focused photo. Yet most people’s photos just look like snapshots. They’re a long way from the beautiful photos you see in magazines. I’m a professional photographer based in London and I’d like to share with you three simple ways to instantly improve your photography, even if you’re a complete beginner.
1. Improving your Composition
Most people’s instinct when taking a photo is to place the most important thing in the middle of the picture. When photographing a person, that person’s head is the main subject of interest, so they place that right in the middle. This is the sure sign of an amateur.
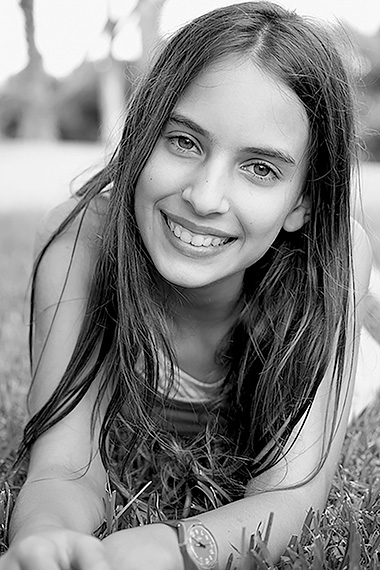
photo by Jimmy Baikovicius
What it means is you get tons of empty space/sky in the top half of the photo, and the person is squished into the bottom half. If the photo is framed horizontally (meaning you’re holding the camera the normal way up and the picture is wider than it is tall), then this effect is even worse because there is also lots of empty space to the left and right of the person you’re photographing.
Instead, try looking at the whole space of the picture and fill as much of it with the person as possible. Tilt the camera on its side so the picture is vertical (taller than it is wide), as that naturally fits the shape of a person better. Zoom in or lower the camera until the top of their head is almost at the top of the picture. Immediately the photo will look more professional. Practice that a few times and you’ll never take an amateur-looking shot again!
2. Improving the Lighting
Cameras need a certain amount of light to be able to take a photo, and when there isn’t enough light, it takes longer to take a photo because the camera has to wait longer to let in more light. The longer it takes, the more the risk of the photo being slightly blurry, because hand holding the camera makes small shaky movements that affect the photo. To compensate for this, most digital cameras come with flash, and in most ‘automatic’ modes, the camera will automatically detect if there’s insufficient light and pop up the flash. When you’re outdoors in bright sun, the flash never goes off because there’s plenty of natural light. When indoors, the camera flashes, because it detects there’s not much light and compensates with a flash.
However, the flash on a camera is horribly unflattering. This is because the light comes from the same direction as the camera. As a result, it ‘flattens’ whatever you’re shooting, eliminating shadows and taking away any sense of depth in the person’s face. When light comes from the side, or above, it tends to look much more flattering; you get a nice sense of 3D depth. Yes, we use flash in studio photography, but from flattering angles—-not the same angle that the camera’s looking from.
Turn off the flash on your camera. This is possible in most digital cameras. So look in the menu for your camera—read the manual if you have to—and figure out how to turn off the flash.

photo by Wendelin Jacober
Instantly your pictures of people will look better than when you used flash. You will need to become more aware of what the natural light is like though, because you now need to make sure there’s sufficient light to avoid the photo being blurry. Position the person by a window or a light if you’re indoors. Reduce camera shake by placing the camera on a steady surface or a tripod.
3. Choosing Your Subject
Tourists often take photos of each other with a famous landmark next to or behind them. This can look amateur unless you really know what you’re doing. Imagine someone seeing a photo. They must first determine what the subject of the photo is, and then they can appreciate how well you’ve captured that subject. The problem with the tourist photo is that there are two subjects. The viewer’s eye is drawn between the person and the famous statue (or whatever it is) and it’s never clear which the photo is about.
You can avoid this by simply getting your subject clear in your mind. (Hint: Usually it’ll be the person!) So give your friend the starring role in the photo and reduce the statue to a bit part in the background to give it atmosphere. You can still have it in the picture—just make it seem incidental.

photo by Philippe Put
Enough for now, have fun out there!
About the Author:
Titus Powell (www.tituspowell.com) is the only independent professional photographer in London who specializes solely in modeling portfolio and studio portrait photo shoots.
Like This Article?
Don't Miss The Next One!
Join over 100,000 photographers of all experience levels who receive our free photography tips and articles to stay current:


Hi. Thanks for the tip. I’m in Grade 7 and studying photography, though i’m never really good at it. I like how you explain each perfectly, it looks really easy. I hope you can teach me more.
Good reminders. Composition is basic & under appreciated.
thanks a lot for the post! I would probably combine tip#1 pic and tip#2 pic. and implement #1 idea to #2 pic)) The third photo is just great!
Nice! I was wondering why some of my photographs look so much better than others. Thanks. Adrian.
Thanks for using my photo in your post. I also like your post. Straight to the point, easy to follow tips for people eager to learn!
-Jason
Thanks a lot! I’d always hated taking tourist pics and because of this I just took pictures of the sights not the people. But wow! The last pic is FANTASTIC. I’m definitely gonna use the tips.
Great information I took a few awesome shots with this direction put a whole new spin on my pictures. Thanks Titus
Great stuff hun!! and nicely put in layman’s terms :)
Thanks
Great read, thanks!
Hope there is more to come!