Relevant note: version 6.3 just released of the Photomatix HDR Photo Editor
Many people would nominate twilight as the best time of day for photography, and that definitely includes real estate photography.
The combination of deep blue skies and dazzling lights is perfect for show-stopping exterior shots and bright interiors. However, shooting at this time of day isn’t easy.
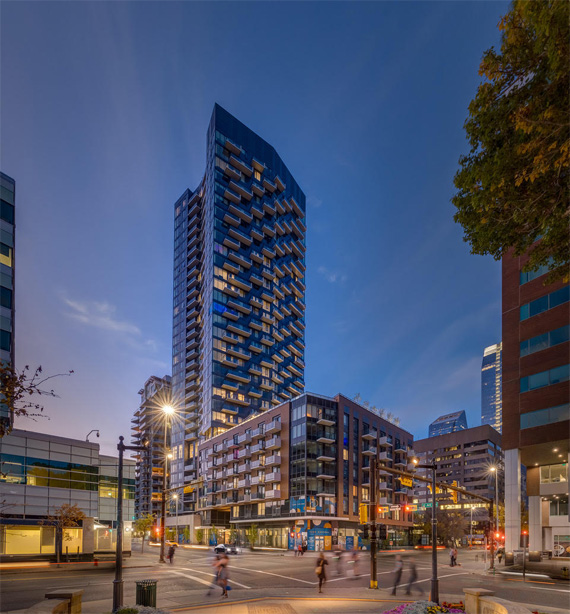
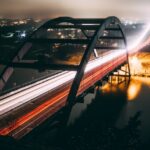
Photo by Rob Moroto
To help you nail your twilight shots time after time, here’s a look at the settings and techniques used by the top real estate photographers.
The challenge: shooting real estate during twilight
Twilight begins the moment the sun dips below the horizon, and it continues until dark. Depending on where you are in the world, this alluring light can last for as little as 20 minutes.
Assuming you want to capture a good selection of images, you will need to work fast. In addition, the light can change significantly even within this short amount of time.
What camera settings work best at twilight?
For the best possible image quality, set your aperture to f/8 and your sensitivity to ISO 100.
You can then select a shutter speed to match the light you encounter. At twilight, this could be up to four seconds. If possible, focus manually to ensure all the main parts of the scene are sharp.
However, you may need to adjust your technique if you want to complete your full shot list during the twilight period, especially if you have a lot of photos to take, and want to capture both interior and exterior twilight images.
When you are trying to squeeze dozens of images into 20 minutes, all with bracketing, every long exposure takes precious time. Four seconds might not sound like a lot, but take 100 shots of this length and you will spend nearly six minutes just waiting for your camera.
Choosing the right ISO and aperture
Raising the sensitivity of your camera to ISO 400-1600 will reduce your shutter speed, which means that each exposure will take less time. That said, you may introduce unwanted noise at a higher sensitivity — so consider what level of image quality you need.
Choosing a small aperture, such as f/13, will force you to use longer exposures or higher sensitivity, but the benefit is that you can ditch autofocus.
This means you can put your lens on manual focus and choose the hyperfocal distance — the focusing distance that offers the maximum depth of field for any given focal length.
Using this technique, you can simply place your camera down and hit the shutter without thinking about focus.
PhotoPills is a popular smartphone app that helps you calculate hyperfocal distance. In addition, it has a neat feature that shows you where the sun will be in relation to your subject at any given time.
Do you need to use exposure bracketing?
It’s a very good idea to take multiple exposures at different shutter speeds for each composition. This will give you the option to use HDR to brighten up dark corners and bring down highlights.
To save time, you might want to bracket your shots. If possible, set your bracketing range to one or two stops.
While it might be tempting to leave your settings untouched between shots, this isn’t advisable. Bracketing works best when the mid-point is correctly exposed. If the middle image is too dark or too bright, you can easily find yourself having to mount a post-capture salvage operation.
How many exposures will you need when bracketing at twilight?
During the twilight hours, contrast is relatively limited. As a consequence, three bracketed exposures for each composition should be enough for interior shots.
Depending on what natural light you are working with, you might need to take a couple more exposures for the exterior of a property. This is particularly likely if you shoot just after sunset, when the dynamic range of your camera is stretched.
Choosing the right aperture to enhance point lights
A pleasing side effect of using a smaller aperture is that point lights will take on the appearance of stars. This is a natural consequence of light bending around the blades that form the aperture within your lens.
The F-stop that causes this effect varies between lenses.
On wide-angle glass, you will probably see it appear between f/11 and f/14. The effect increases as you continue to reduce the aperture size, but this comes with the drawback of reduced sharpness.
Besides, you probably just want a little sparkle rather than the full Christmas tree look.
Do you need a tripod for twilight photography?
Yes. Any time you are shooting after sunset or under artificial lighting, you should be using a tripod.
In these conditions, you won’t be able to use a fast shutter speed to counteract hand shake. This applies even if you are shooting with your phone.
Using a tripod is also important for interior shots when bracketing or taking multiple exposures with a flash.
Do you need a flash for real estate photography at twilight?
Flash isn’t strictly essential. Many real estate photographers use bracketed captures exclusively. But flash is a very useful tool to have.
One of the biggest challenges of real estate photography at twilight is color balance. Many homes have a variety of light sources, each giving out different hues. This can make it pretty tricky to correct white balance in the edit suite.
One solution is to use flash. This can be on-camera, but you have far greater control with a wireless flashgun.
In spaces with poor lighting, it’s possible to illuminate every corner by moving your flash around the room, and taking multiple exposures which you can blend together later. Using a remote trigger makes the process much faster.
If you are going to use on-camera flash, make sure to bounce it off a surface such as a wall, rather than pointing it directly at what you’re photographing.
This can result in a nice diffused glow, rather than harsh light and shadows. This is relatively easy in large spaces, but the effect is difficult to achieve in tight spaces.
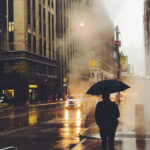
Photo by Rob Moroto
What about flash in exterior shots?
An easy and popular method of capturing the dusk sky, as well as the dark exterior areas of the house and grounds, is to take bracketed shots and merge them to HDR in Photomatix or other HDR software.
By using exposure bracketing and HDR, you can eliminate over and underexposed areas, and you may not need a flash at all.
For exterior shots in certain situations, on-camera flash can provide subtle fill-lighting.
But this technique should be used with caution; you can easily add unwanted shadows and a bright patch in the foreground. It works best when you are relatively near to the property.
Some pro photographers, whether using bracketing or a single shot, prefer to take greater control using a flash.
A single ‘pop’ of the flash might be all that’s needed to highlight a certain area, but some may take 10 or even 20 exposures for a single exterior composition to achieve balance in the scene, or their style or vision.
When starting out using flash photography outside, focus on areas that you wish to appear more inviting such as a sheltered doorway, or a pathway for instance.
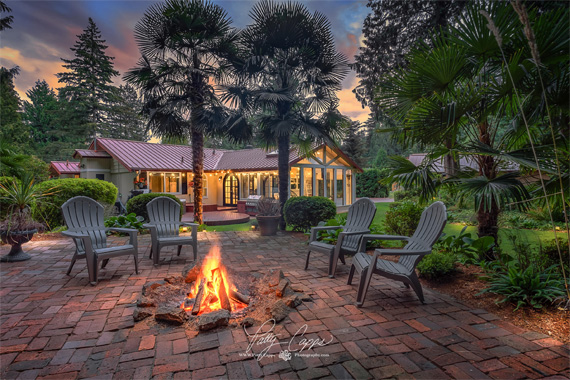
Making the Most of Twilight
It might seem like a lot of hassle, but most professional photographers agree that twilight is the best time to shoot real estate.
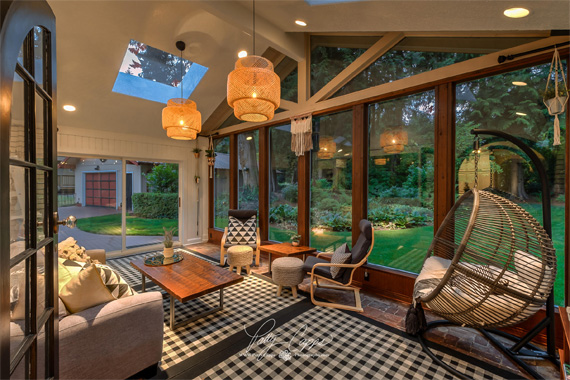
With all the lights on, you can peek into the property from outside. Once you walk inside, those lights make every room look bright and airy – yet there is still enough light coming through the windows to see the view.
To capture real estate in this amazing light, remember these tips:
- Get there early and switch on the lights
- Create a plan to accomplish your shoot in the short twilight period
- Use bracketing and hyperfocal distance to save time
- Don’t start shooting inside too early
For Help with Photo Editing:
Photomatix HDR software lets you create HDR images and adjust them with various settings or one-click presets to get the look you want. It can work as a standalone program or as a plug-in for Photoshop, Lightroom, or Apple’s Aperture. There is a free trial version users can try before purchasing a license.
They are kindly providing a discount to PictureCorrect readers on any version of their software. For 15% off, try the coupon code picturecorrect at checkout.
See how it works: Photomatix Pro HDR Photo Editor
Like This Article?
Don't Miss The Next One!
Join over 100,000 photographers of all experience levels who receive our free photography tips and articles to stay current:

Leave a Reply