This article is based on concepts from The Photography Action Cards if you want to dig deeper for further training.
Do you remember the children’s game, Barrel of Monkeys? The one where you would hook their curved arms into a chain until you dropped one?
I did a little research on the phrase “barrel of monkeys” and learned it dates back to 1895. It references the playful nature of primates. However, the exact origin of the phrase is unknown.
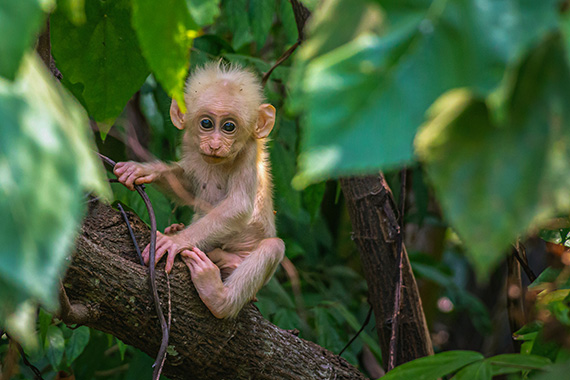
Photo by Erik Karits
Zoo Photography
I was a teenager when I started in photography. To take pictures, I often went to the zoo, since it was free back then and offered exciting and challenging subject matter.
I never lost my love of zoo photography, and I think that’s true for many photographers who visited them when they were growing up.
I break down my efforts in zoo photography into two categories: the animals on their own and the animals interacting with people.
But not all zoo photography is the same. The type of zoo photography you choose will dictate what equipment and camera settings you’ll need.
However, bear this in mind: when I was shooting zoos back in the 1970s, all I had was a Ricoh Singlex TLS (that cost about $200 new) and the standard 50mm f/2.8 lens that was included with this film camera. Later, I invested in a very inexpensive 200mm Vivitar telephoto lens for another $200. It was a basic setup, but I still managed to get some shots that won a couple local photography contests.
Photograph by Kent DuFault
This photo is one of the local contest-winning images I created with that simple Ricoh camera, a roll of Kodak Plus-X film and my darkroom.
Let’s Talk Equipment
I won’t lie: having a longer telephoto lens is a considerable advantage in zoo photography. Having a long, fast telephoto lens with a maximum aperture of f/2.8 is even better.
Of course, you can get by with less and still have fun.
Equipment for Zoo Photography
- Any camera can work—even a mobile phone camera (some with limitations).
- A lens from 50mm or higher works well for animal zoo photography. A fast telephoto lens or a telephoto zoom lens is a massive advantage. A perfect zoom lens for zoo photography would be an 18-300mm, or—on a fixed lens camera—a 5-12x zoom.
- A lens from 20mm through a telephoto works well for animal-human interaction photos.
- A monopod, with a ball head, helps stabilize the camera. Many zoos do not allow tripods within indoor exhibits. Plus, a tripod can become a nuisance when you have to carry it around all day.
- Invest in some fast memory cards to take advantage of your camera’s high-speed burst feature.
- You will want an excellent solid lens hood and a polarizing filter.
- This is optional, but you may find an electronic flash useful in some situations. Many zoos do not allow them indoors and may have restrictions outdoors. Check the rules.
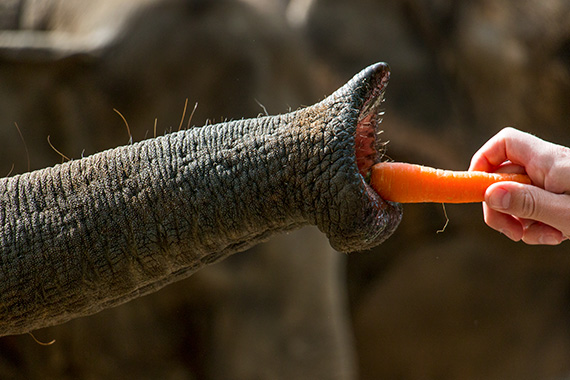
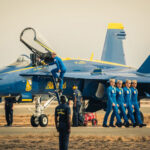
Photo by mordilla-net
This type of human-interaction moment, such as the one above, can only be captured with at least a moderate telephoto lens.
- Full-frame camera: 100mm or longer
- APS-C camera: 50mm or longer
- Smartphone camera: 2x or longer
Camera Settings
- Manual mode or A/Av
- Start with ISO 400 outdoors and ISO 1000 indoors and adjust as needed.
- AF-S (one-shot AF on Canon) for slow or stationary animals and AF-C (AI Servo on Canon) for faster subjects.
- Use a minimum shutter speed of 1/300th of a second for longer telephoto lenses and at least 1/125th of a second for shorter lenses.
- Use an aperture of f/5.6 or wider. In most cases, you will want your lens to be set wide open at the largest maximum aperture possible.
- Outdoors set the white balance to Auto; indoors set the white balance appropriate to the lighting.
- Shoot in RAW, but if the speed of uploading is critical, shoot RAW and JPEG.
- When composing distant shots, set the metering pattern to the evaluative/matrix mode unless the scene is backlit. For backlighting, use the spot metering mode for midrange shots. Set the metering pattern to center-weighted for close-ups. In macro shots, use center-weighted or spot.
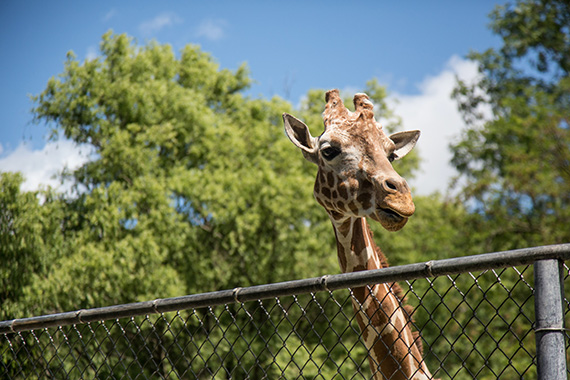
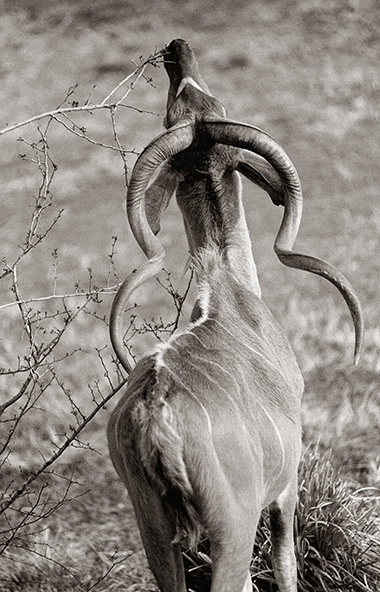
Photo by Alexander Ross
A considerable challenge for zoo animal photography is trying to eliminate unsightly fencing and other humanmade objects.
A telephoto lens, or a zoom lens that advances to a telephoto focal length, is a huge advantage for eliminating this problem.
However, it’s not the only solution.
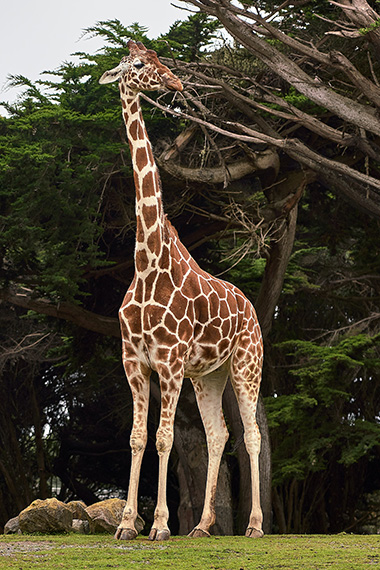
Photo by Nikolay Tchaouchev
If you only have shorter lenses, or are only working with a smartphone camera, walk around the animal habitat, searching for the best angle with the least amount of clutter in the background.
Place the lens of your camera right up to the fencing or glass. Be sure to keep the lens aperture wide open.
Key Thought: Zoo photography presents particular problems that you will need to overcome. These problems include wire fencing, glass reflections, limited mobility, crowds, low light levels or highly contrasting light levels and an unpleasant or unrealistic background.
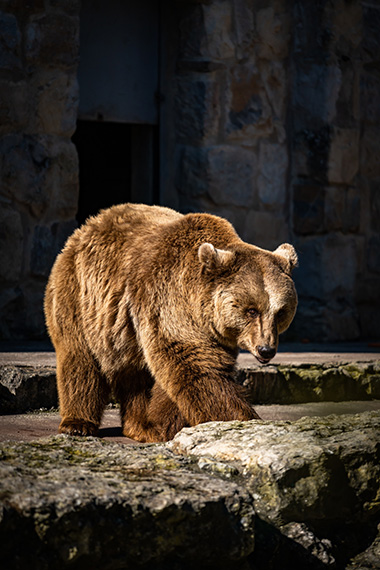
Photo by Sinval Carvalho
Zoo photography requires planning. The time of day and weather are important factors. Evaluate the habits and activity times for the animals that you wish to photograph. Practice patience. Learn the zoo rules.
Ask a zookeeper questions; you may get special access. It’s happened to me!
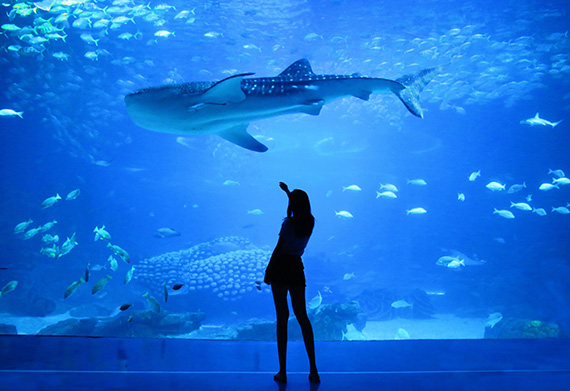
Photo by Silas Hao
Many zoos also have an aquarium section. These areas generally have low light and will require a higher ISO setting.
Capturing someone interacting from the outside of the aquarium often yields better pictures than merely focusing on what is inside the aquarium.
Aquarium areas will often have lighting that skews the white balance toward the color blue. This color can create pleasing pictures. If you don’t like it, you will have to adjust your white balance. Some cameras have an underwater setting in the white balance selections to remove the blue and green spectrum of light.
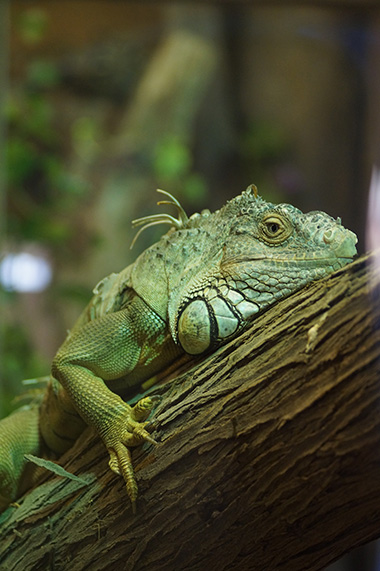
Photo by Swag Photography
The reptile and amphibian habitats will always give you the most headaches with white balance. In auto white balance, your images will often record with a green or blue tint.
If you know how to do a custom white balance, this is an excellent time to put that knowledge to work. If you don’t know how to custom white balance, try using the fluorescent setting.
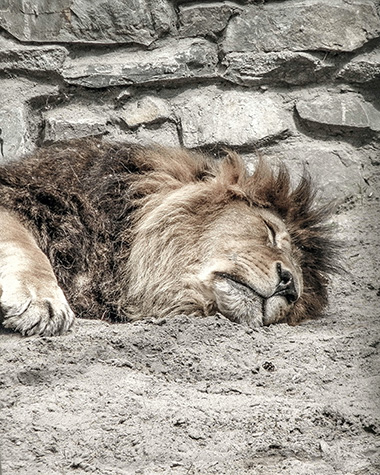
Photo by somebody_anywhere
As a zoo animal photographer, the above image is the kind you do not want to go home with. Success is often tied to your knowledge of animal habits and the weather.
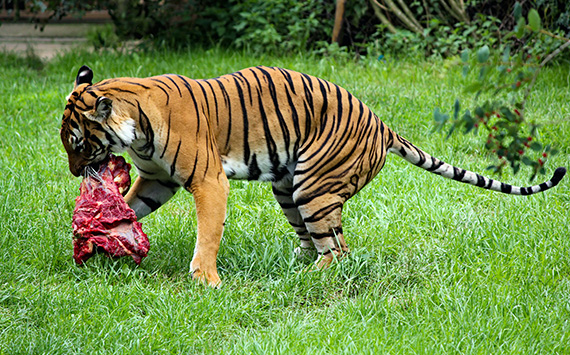
Photo by Dušan Veverkolog
Most animals at the zoo begin to come alive at about one hour before feeding time. At most zoos, feeding time is first thing in the morning and also in the evening.
Ask some questions. Find out when feeding times occur and if you are allowed to be there.
I asked a zookeeper once about the feeding time. He told me the best time was the morning feed before the zoo opened, then he invited me back for a private tour the next day while he fed all the big cats.
You never know if you don’t ask.
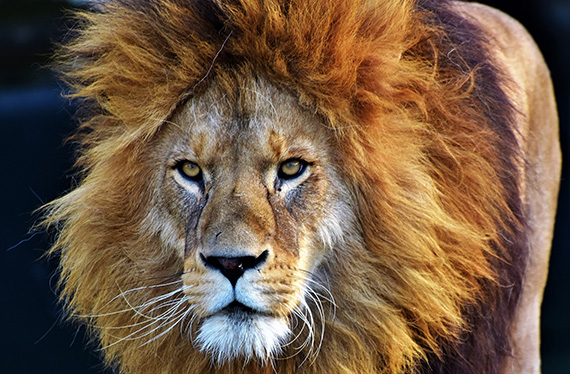
Photo by Ralph
Perhaps the actual feeding doesn’t excite you (as the example photo of the tiger and meat illustrates).
However, having your camera ready to shoot in the hour that leads up to the feeding time will garner exciting shots, such as the one of the lion above, versus having the king of lions sleeping on a stone somewhere.

Photo by Sameer Mohsin
A better camera angle on this photo would have been from the direction of the red arrow. That point of view would have placed a tree behind the lioness rather than fencing.
Pro Tip: Pick two animals that you are going to photograph on your zoo photo safari. Research these two animals. If possible, select two that are in close proximity in the zoo. Research their habits and ask questions of the zookeepers. When are these animals most active? What types of enclosure are they in? Are they always out in the open, or are they sometimes hidden from the public? Does weather alter public viewing? What days and times have fewer crowds? If outdoors, check the direction of the sunrise and sunset relative to your best camera angles.
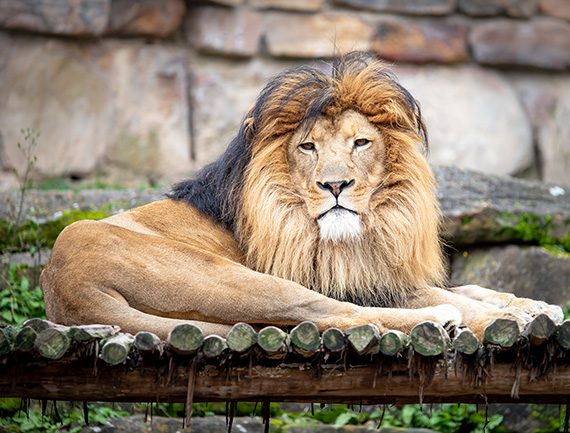
Photo by Stephanie LeBlanc
Not all human-made objects will be objectionable, as long as your subject dominates the photograph. You don’t want any visible distractions (eye snags) to pull a viewer’s eyes away.
Pro Tip: Look for little attention-grabbing details that will help lock a viewer onto your subject and provide them with a better and more exciting viewing experience. In this photograph above, the tuft of mane falling onto the lion’s eye is a perfect focal point that grabs attention.
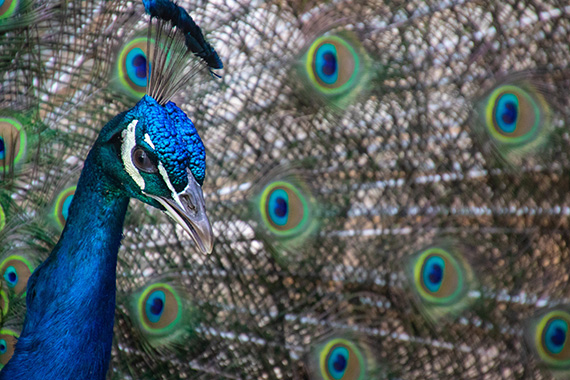
Photo by Magda Ehlers
Pro Tip: If you’re having trouble finding a proper camera angle, try getting closer. Get as close as you can. You can also explore using parts of the animal’s body, or the bodies of other animals in the habitat to block out ugly background elements.
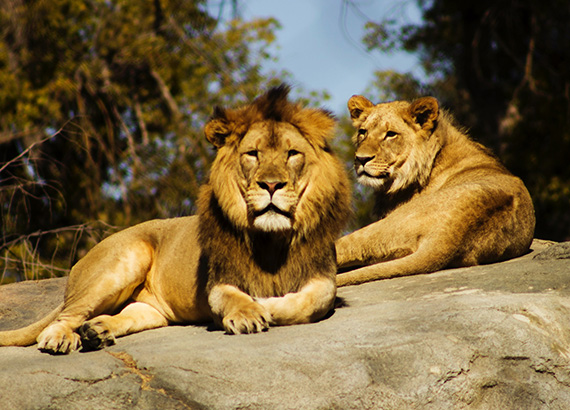
Photo by Jeremy Avery
Pro Tip: If your frame includes more than one animal, make sure your active focal points are set onto the primary subject. In the photo above, the camera’s focus is clearly misplaced upon the lioness in the background. In contrast, the male lion holds the spot of being the subject within the composition, yet he is out of focus.
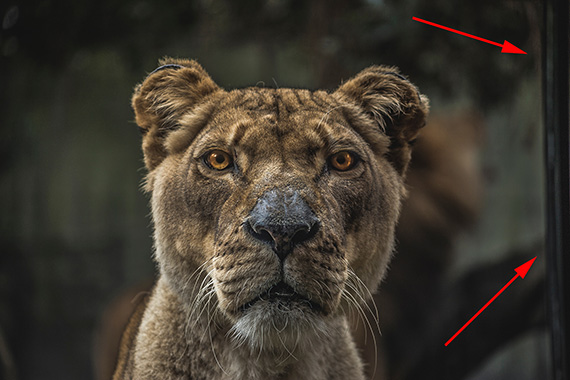
Photo by Samuel Scrimshaw
I would classify the photo above as an almost perfect zoo animal shot. Don’t get lazy at the end of the process!
A slight crop would have quickly eliminated that human-made object on the right.
Pro Tip: Study your final photo with a scanning view that starts in the upper left and crosses to the right. Move your vision down one imaginary row at a time while scanning from left to right. Focus your eyes on the imaginary row and not the entire picture. This editing technique is a fabulous method for spotting small problems within your photographs.
Equipment Tip: Many habitats are now behind glass rather than bars. You will find a polarizing filter to be extremely valuable in zoo photography!

Photo by Vidar Nordli-Mathisen
The key to exciting zoo photography is action. Either the animal or a person should be doing something. In the best circumstances, the animal and a person are doing something together.
Pro Tip: In still photographs, action is best conveyed by body language, eye contact and facial expression. Take note of the polar bear photograph above: those three elements elevate that photograph from ordinary into exceptional!
Now It’s Your Turn!
- Pick two animals to concentrate on and do your research.
- Plan a day at the zoo.
- Plan to stay a minimum of at least four hours: two hours for each animal. (Yes, just like wildlife photography, zoo photography is rewarded when the photographer is patient and observant.)
- Choose your camera angles based on the lighting and background. Wait for the animal to move into your chosen point of view.
- If there is fencing, keep your camera lens close to the fence and positioned in the space between the metal bars.
- If there is a glass barrier, use a polarizing filter or shoot through the glass at a 45-degree angle.
- Keep your aperture open—f/5.6 or faster.
- Watch your shutter speed. Avoid camera shake or blurred photos from subject movement unless you’re going for an effect.
- Be careful of the animals and watch their movements. Wild animals can move extremely fast. You don’t want to become a statistic.
The Five Key Points of Zoo Photography
- Focus the lens on the animal’s eyes.
- Beware of backlighting and set your camera meter mode accordingly.
- Constantly scan your eyes for annoying human-made objects in the background.
- Be aware of fencing obstructions or glass reflections.
- Strive to capture the action—body language, eye contact and facial expression.
About the Author:
Kent DuFault is an author and photographer with over 35 years of experience. He’s currently the director of content at the online photography school, Photzy.com.
For Further Training, Deal Ending Soon:
65 beautifully designed & printable Photography Action Cards are now available that will give you over 200 photography assignments, covering everything you can imagine. They are currently 88% off today if you want to try them out.

New: The Photography Action Cards (Click to See How They Work)
These Action Cards discuss a photographic topic, provide you with suggested considerations, and give you specific photographic assignments. They’ll kick you out of the “nest” to go have a personal discovery experience all on your own. P.S. try the coupon code picturecorrect at checkout for even more of a discount which ends soon.
Found here: The Photography Action Cards at 88% Off
Like This Article?
Don't Miss The Next One!
Join over 100,000 photographers of all experience levels who receive our free photography tips and articles to stay current:


Leave a Reply