Need some inspiration for indoor photos? Try this window light portrait technique.
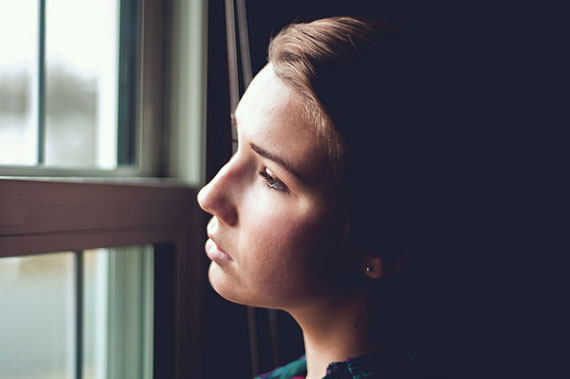
Photo by Send me adrift.; ISO 100, f/1.8, 1/40-second exposure.
This is a basic indoor portrait with soft window light from one side. You’ll need:
- A window that does not face the sun (or it is overcast outside)
- Daylight
- A willing model
Camera Setup
- Mode: Aperture Priority (Often shown as Av on the mode wheel)
- ISO: 100-400, as low as possible
- White Balance: Custom
- Aperture: As low as your lens will go. Lower f-numbers mean a larger opening which creates nice fuzzy backgrounds.
Shutter Speed
Watch out for the shutter speed. With a low-f-stop, you should not have low shutter speeds (below 1/60 second), but your ambient light and ISO setting will determine that. You may need to stabilize your camera if the shutter speed is lower than 1/60 second.
White Balance Setup
Put the white paper in front of the subject. Take one image of the paper, and make sure it is more white than grey than in the playback. Then go to your menu, and choose Custom White Balance, and select that image to use as a reference. What you are doing is telling the camera to use the paper (which is grey/white) as the source of the definition of “white”. It will then translate all of the other colors to show them correctly in the images taken. This is always preferable to a canned white balance setting, or the brainless “Auto” setting.
The Pose
Position your subject back from the centerline of the window, so a little light falls on the “dark” side of their face. Have them turn their head to look slightly out of the window.

Photo by Oleg Afonin; ISO 640, f/3.5, 1/200-second exposure.
Framing the Image
If you have a zoom lens, you can either be close and “zoomed out” or farther away and “zoomed in”. With people portraits, it’s usually better to be back and zoom in, as it reduces the size of the nose and other features in the middle of the face. Turn the camera to portrait (tall) orientation, half-press the shutter, and look at the read-out. You should get a focus blip where the camera thinks the focus point should be. Move the center point to the closest eye to the camera, and half-press again. Once you get a focus lock, move the camera to recompose the image. You’re doing this to cause the tightest focus point to be on the eye closest to the camera. If your camera has live view, ignore it and use the viewfinder. Using the live view encourages poor camera holding technique.
Take the Image
Play back and look for blown-out highlights in the subject’s face. Some cameras have the ability to show blown-out highlights as blinking white/black. If the background (out the window) has some, don’t worry, but you don’t want the face blown out. If you do have white highlights, use the Exposure Compensation to reduce by ½ stop to 1 full stop and re-shoot.
Analyzing and Improving
Look at the image. Is it exposed well? The window side of the face should be nicely lit, and as it is facing slightly away from the camera, is called the “short side”. This is an example of short lighting, where the short side gets the light and the broad side (facing the camera) gets the shadow. If the shadow side is too dark, get a bit of reflective material, be it aluminum foil or white cardboard, and hold it just off of the camera on the dark side.
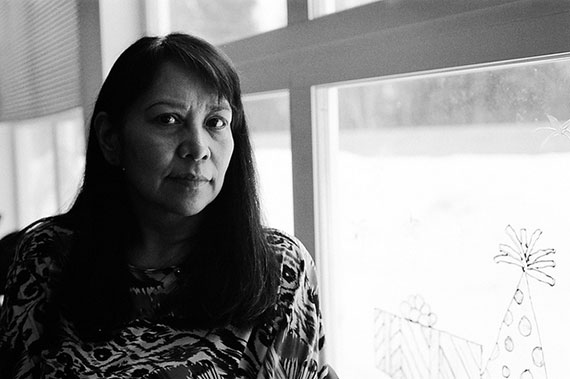
Photo by Laura Avellaneda-Cruz
It will reflect a bit of light from the window back to the shadow side and will reduce the contrast or shadow level. Experiment with the subject looking out the window (I call that the “dreamy shot”), and looking at the lens (but still not straight on).
Advanced Tricks
Pull this image into your editor and try converting to black and white using the Channel Mixer tool. Choose 70% red, 15% blue and 15% green, and you’ll see a very nice BW image with the skin tones nicely highlighted!
About the Author:
John Huegel is a photographer in the Erie, Pennsylvania area who specializes in Seniors, Dance Studio, Families and other groups. He operates a blog for professional photographers at http://newphotopro.blogspot.com. He is active in many charitable and volunteer activities in the Erie area.
Like This Article?
Don't Miss The Next One!
Join over 100,000 photographers of all experience levels who receive our free photography tips and articles to stay current:


Thank you for this tips!
My attention was drwan especially by the first image, with the dark side of the face and the dark background.
Would you have any additional tips to achieve this look?
Thanks!
Hello. I am writing to ask copyright permission to use one of your photographs to create an acrylic painting. I live in New Zealand and have been looking for something inspirational which I can recreate to relate to these covid times. Of course it will be my interpretation so will not be identical. It is a photo by ‘send me adrift’ of a young women looking through a window. I look forward to hearing back from you.
Best regards Karen
Toady’s lead article, about window photography, is great! The demo photo itself is so lovely and you have given detailed step-by-step on how to get similar results. The article itself is very well written.Thanks.
Thanks for such a nicely described practically helpful article.
Thank you for the breakdown. I shoot as a hobby, and I’m always looking for both TIPs and the HOW TO, on how to be creative and get the shot.
Thanks for introducing this topic – Window Light is classic for portraits and my all-time favorite. Even when I worked in a studio with strobes and soft-boxes, I still often took brides into our reception area where we had rock walls and a large picture window for this beautiful strong-but-indirect light. (I kept a large piece of white matte-board I could quickly prop on an easel for bouncing some fill light back and shot no-flash.)
Keep in mind that as the seasons change, light will come into some windows differently – which can provide a variety of strength-vs-softness at different times of the year.