There are a lot of travel photography videos out there, most describing all the things you should do to get the perfect travel photos. What many of them don’t do, however, is tell you what not to do. In the video below, Mark Harrison bucks the trend by telling us seven (and more) of his favorite travel photography no-nos:
Travel photography is one of the most popular genres, and rightfully so. Who doesn’t want to fill their Instagram feed with awesome photos of the places they’ve been? But finding ways to make those photos unique and well-composed while having a good time doing it? That’s a bit more challenging.
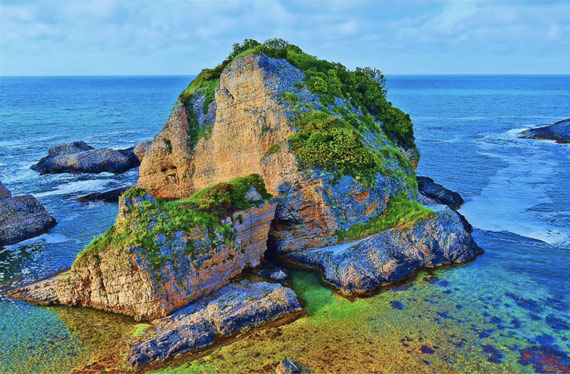
1. Avoid posting the “classic” travel photo
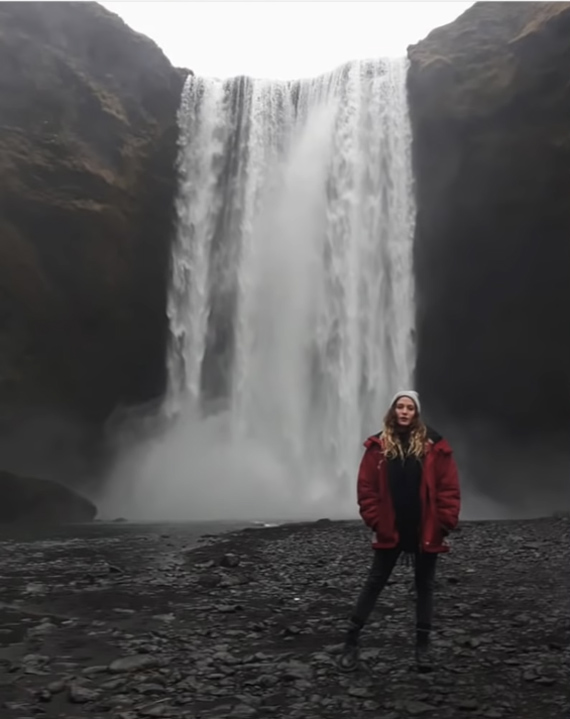
While this isn’t a bad image, it’s entirely predictable.
This may seem obvious, but it’s pretty difficult to get a unique image if you’re taking the shot that’s “expected.” Spend some time experimenting with new ways of looking at things. While this can include using different gear (e.g. interesting lenses or drones), simple changes to point of view and perspective can make a world of difference.
At the same time, if getting the quintessential touristy photo is important to you, by all means take the shot. Just don’t limit yourself to those types of shots.
2. Don’t avoid tourist areas
There’s a reason why a destination becomes a tourist spot. Usually it’s because there’s something interesting or beautiful to be found there. The trick is again to exercise your creativity. Find a non-standard way to capture whatever the location has to offer.
3. Don’t frame the subject looking the wrong way
The place where the subject of your photo is looking has a lot of visual weight; it’s where the viewer’s eyes will want to go. That’s why it looks funny when you frame the subject so that they’re looking at the frame of your photo rather than into it.
4. When shooting sunsets, don’t leave as soon as the sun dips below the horizon
If you’ve taken the time to get to an amazing spot for the golden hour, then you’re really cutting yourself short if you leave the moment the sun sets. Some of the most beautiful reflected light happens after the sun dips beneath the horizon, not to mention the incredible light displays on clouds. Stay through at least the first half of the blue hour. By then you’ll be able to see if you’re going to get some more stunning sights or if the light’s just over.
5. Avoid messy backgrounds

The background of an image is easily as important as the subject, and a messy background can seriously detract from the overall impact of your photo. The background needs to either isolate or frame the subject. It’s especially important to avoid having trees or telephone poles growing out of your subject’s head.
6. Avoid carrying too much gear
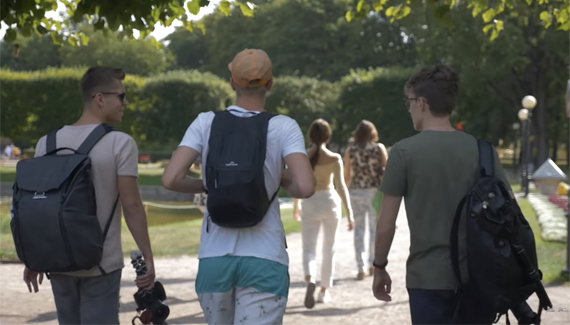
While it’s nice to know that you have everything you might possibly need on a shoot, carrying more gear than is comfortable, especially if you’re on a long excursion, can definitely distract from your overall experience. A sore back and shoulders can often be avoided if we just take what we know we’re going to need—not every lens in our collection.
(That being said, I’ve often been known to carry my 60–300mm zoom on a hike in the hopes that I might see some interesting wildlife.)
7. Be careful not to over- or under-edit your images
Harrison’s last tip is probably the one most frequently abused. We’re so used to seeing over-saturated and otherwise unrealistic images in our feed. It’s often a challenge not to match them. But your images will come out looking more realistic if you go at the editing with a light hand. One rule of thumb is to adjust the image to where you think it should be then back it off by 10 or 15 points.
On the other hand, not editing your photos wastes a huge amount of potential. Simple things from lens corrections and levels/curves adjustments to straightening the horizon and adding a bit of sharpening can really help bring out the best in your work.
In the end, Harrison’s tips are all quite useful. But it’s important to remember that they’re just guidelines.
What are your travel photography dont’s?
Like This Article?
Don't Miss The Next One!
Join over 100,000 photographers of all experience levels who receive our free photography tips and articles to stay current:


Leave a Reply