As a photographer don’t you just hate it when you’re stuck indoors due to bad weather? Well, being indoors doesn’t necessarily mean that you can’t get your creative juices flowing. Using a simple equipment setup and modeling by yourself can be a good way to pass time effectively when you’re stuck indoors. In this video, photographer Mark Wallace from Adorama shows you how you can take a chiaroscuro self portrait:
What is Chiaroscuro?
Chiaroscuro is an Italian term that means light dark. If you’ve come across images or paintings where some areas are well highlighted by light while other areas are very dark, then it is based on the chiaroscuro principle. This creates a very contrasty and a dramatic looking portrait.
Lighting Setup for Chiaroscuro Self Portrait
For the lighting setup, here’s what you will need:
- an artificial light source (Mark uses the Profoto B2)
- a softbox
- a grid
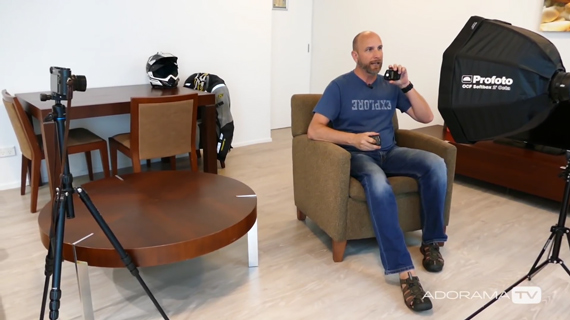
Wallace controls the light by setting it up in the following way:
- Place the light at almost 90 degrees from the camera.
- Cover the light with a sofbox with a grid to avoid any spilling. Place the entire lighting setup very close (less than a foot) to where you’ll be sitting.
- Meter the camera for the light coming from the light source only and not the ambient light. Wallace points the light meter toward the Profoto B2 from the position where he will be sitting for the self portrait.
The entire point of placing the light source close to the subject is to obtain chiaroscuro using the inverse square law. According to this law, the light intensity falls off pretty rapidly from one point to the next. So if one area is brighter, the brightness will fall off rapidly as we move a bit farther away from that area. This enables us to achieve the light dark look that we are aiming for.
Camera Setup for Chiaroscuro Self Portrait
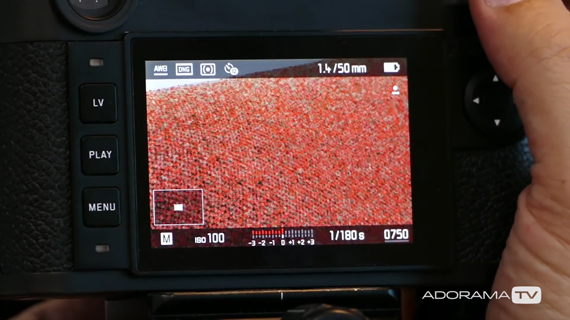
Wallace uses a wireless transmitter on his camera to trigger the flash. To expose for the flash, he sets his aperture at f/11, ISO at 100, and shutter speed at 1/180 second.
When it comes to focusing, he uses the manual focus mode with a feature that is quite common in mirrorless cameras these days know as focus peaking, which overlays the areas that are in focus with some color. Using this feature he determines that the entire chair where he will be in focus, which means that he will be in focus, too.
And finally, he sets a self timer of 12 seconds so that he gets ample time to get himself ready for the shot. He takes a couple of shots with varying poses to make sure that he has a handful photos to work with later.
Editing Chiaroscuro Self Portraits
After he is done taking his self portraits, Wallace uses Adobe Lightroom to edit them. When editing a chiaroscuro image, Wallace’s primary objective is to remove any light spills that may be seen in the image, and make some adjustments so that the image packs some punch.
To get rid of the light spill, Wallace simply paints over it with the adjustment brush with the exposure set to -4.
Next, he opens up the image in Adobe Photoshop and crops the image in a 16:9 ratio so that he is not dead centered.
After he’s done cropping, he goes back to Lightroom and opens the same file using Analog Efex Pro 2 to add some punch to the photo. If you are not familiar with Analog Efex Pro 2, you can play around with the contrast and color adjustment layers in Adobe Photoshop to obtain a grungy look in the final image.
Finally, he does a tighter crop to the image to draw attention to his face.

And well, that’s about it. The important thing about taking chiaroscuro images is that you need to make sure that the area you want to highlight in the image is well lit while the rest of the image is totally dark. By keeping this simple idea in mind, you can easily obtain the light dark look in your images.
Like This Article?
Don't Miss The Next One!
Join over 100,000 photographers of all experience levels who receive our free photography tips and articles to stay current:


Leave a Reply