When I’m photographing models I love to use prime lenses (fixed focal-length lenses that have no zoom). Like my 50mm, 85mm, 100mm or 130mm lenses.
The reason I love these lenses is because they are super sharp and fast – meaning they let in a lot of light at the wide open aperture range. I’m talking f/1.8 up to the f/2.2 range.
Using this wide open aperture range means that my model is in sharp focus and the background is out of focus, making my model pop even more. And the Bokah looks silky smooth.
Normally if I’m photographing with my 85 mm lens I’ll shoot it with a very wide aperture of around f/1.8-f/2.2 to get that super shallow depth of field. After all, I’ve invested a lot of money in these lenses and I want to use the benefits of their large apertures.
Shooting with a wide aperture can work out really well and I’ve created many beautiful images of models in the past – but sometimes I’ll run into problems with focus.
In this article I’m going to run through a real photo shoot I did and show you the mistakes I made when it comes to focus, why they happened and then how to overcome these mistakes to get tack-sharp images that look stunning.
This is one of the 12 Focus Mistakes I talk about in my Secrets to Tack Sharp Images Book and bonus videos – you can grab the book here at a special price.
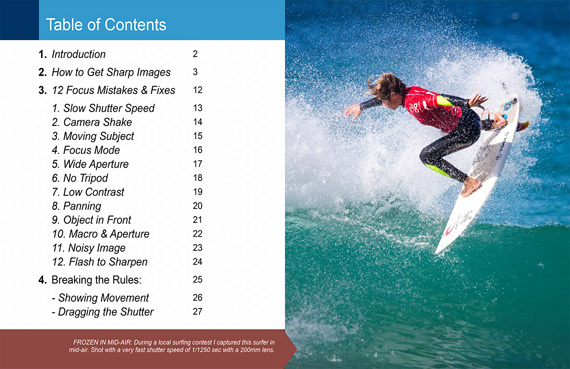
Topics Covered in Sharp Image eBook
I’m going to run through my images in sequence to show you what happened.
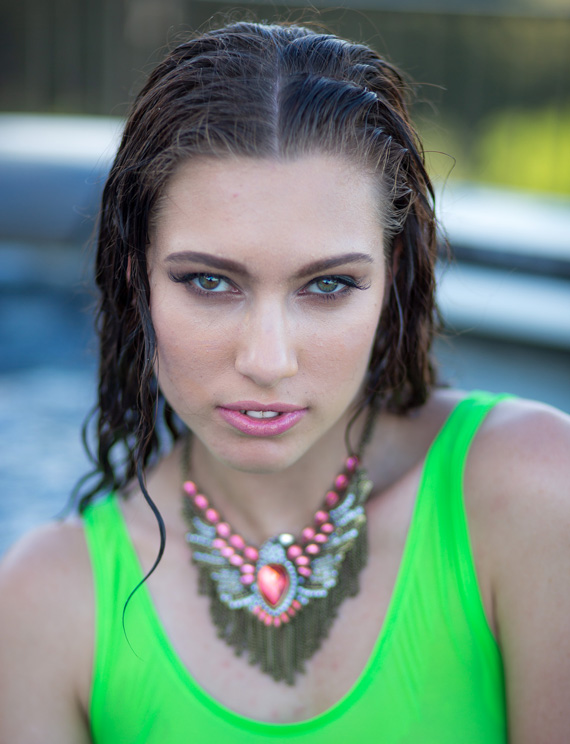
All of these images were photographed in a swimming pool on a beautiful summer’s day here in Australia using a beautiful and experienced local model called Teigan.
SETTINGS: all images were photographed in aperture priority mode using a large aperture of f/2.0 with the shutter speed and ISO in auto. I relied on natural light and my model was in the shade at all times.
Camera Shake & Shutter Speed: Because I photographed this with plenty of light I didn’t need to worry about shutter speed which can result in camera shake – my shutter speed was fast enough to overcome this problem. I’ve developed a simple rule for this problem – I’ve called it Brent’s shutter speed rule and it goes like this: Make sure your shutter speed is 2x the focal length. So in this case I was photographing on my 85 mm lens which means that I needed to shoot at 1/160th sec shutter speed (2 x 85 = 160) to avoid camera shake. Most of my images ended up being 1/500th sec so there is no chance of blurry images due to camera shake. I talk about this in more detail here – The Ultimate Guide to Shutter Speed in Photography.
Let’s have a look at this first image in the sequence. As a thumbnail the image looks fine, but as we zoom in you’ll notice that Teigan’s face is out of focus.
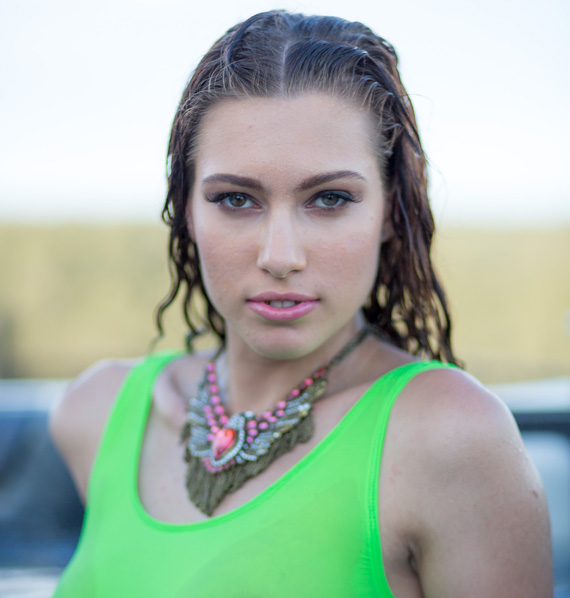
Because of the very shallow depth of field using a wide aperture of F/2.0 her nose is in focus but her eyes and eyebrows are out of focus. A throwaway image which is a pity because I like her pose in this shot.
This next image I’ve managed to nail the focus on her eye that’s closest to the camera but because of the shallow depth of field her other eye is out of focus. Sometimes this is what a photographer is looking for but in this case I think it’s another mistake. What a pity because I really like her smile in this shot.
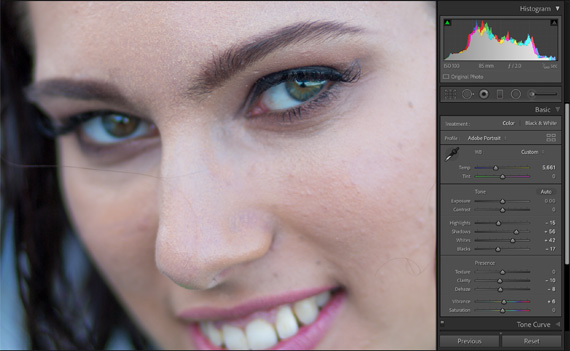
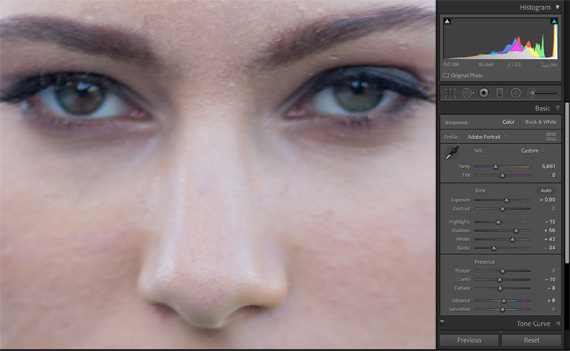
The third image below I have Teigan facing directly at the camera with both her eyes the same distance away from my lens but again I’ve missed the focus. Looks like I focused on her eyebrows and her eyes are out of focus. You see what’s going on here… my depth of field is too shallow.

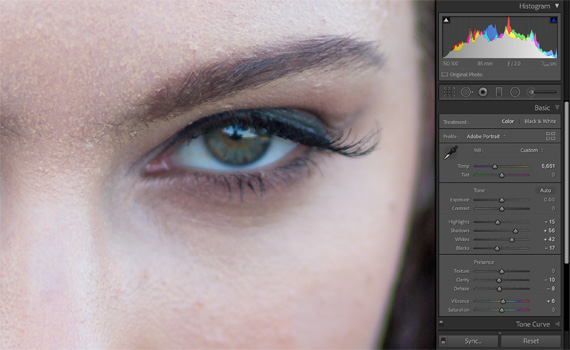
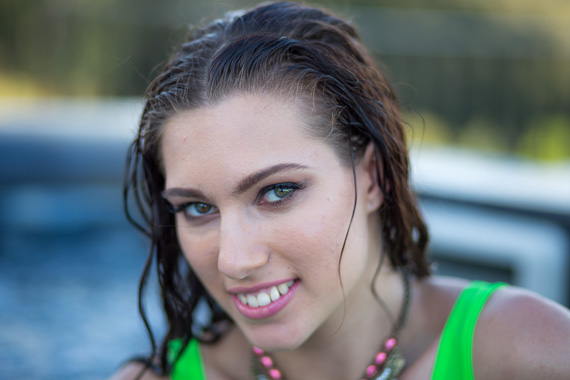
In this last image I manage to get it right. I nailed the focus on her eyes and her eyebrows and nose and mouth are soft. This is the look I was after and I’m glad I got the shot but it took me a few tries.

So how do we overcome this focusing problem?
There are two things we can do in a situation like this:
1. We can keep shooting with a wide open aperture and make sure to use the focus and recompose method I talk about to get my models eyes tack-sharp.
Because of the very shallow depth of field this means I need to take a lot of images and there will be many that are throwaways. Fortunately with new technology and eye autofocus this is becoming less of a problem.
2. The easiest solution to this problem is to close down my aperture just a little bit. Shooting at f/2.8 or even at f/4 will mean that I still have a shallow depth of field but not too shallow. This means that I can get both of Teagan’s eyes in-focus. Her eyebrows and part of her mouth will also sharp and her head and body will still pop from that background.
You want to be careful that you don’t close down your aperture too much and have a larger depth of field which will mean that the viewer’s attention will be taken away from the main point of interest which should always be the model’s eyes.
What do you think, what is your favourite prime lens and aperture when you’re photographing models? I’d love to know please comment below this article.
For Further Training:
Are you tired of having your favorite photos spoiled by focus issues? This guide from professional Australian landscape photographer Brent Mail was written to help. It is currently 77% off if you want to check it out.
Tack-Sharp Image Guide
Take a peek inside the in-depth eBook containing heaps of secrets to help you overcome the 12 most common focus mistakes that spoil photos.
Deal ending soon: Secrets to Tack-Sharp Images Guide at 77% Off
Like This Article?
Don't Miss The Next One!
Join over 100,000 photographers of all experience levels who receive our free photography tips and articles to stay current:


Leave a Reply