Many of us are spending a lot of time at home these days for the cold weather. Why not use this time to learn a fun and exciting photography technique called Minimalism?
This article is based on concepts from the The Photography Action Cards which are currently on sale.
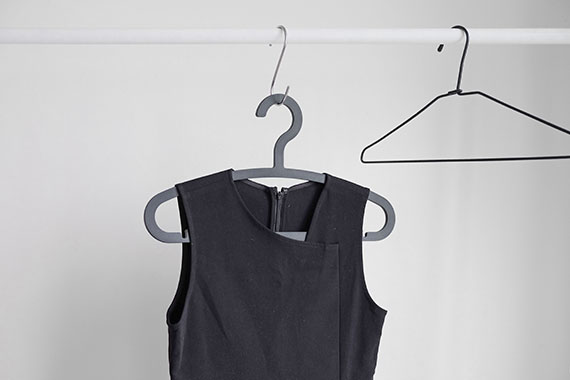
Photo by Henry & Co.
The definition of Minimalism is a genre of photography that emphasizes the extreme simplification of form, as by the use of shapes, colors, tone, and negative space.
To get started, you’ll need to locate some objects within your home that have interesting shapes and colors.
Here’s some inspiration for you.
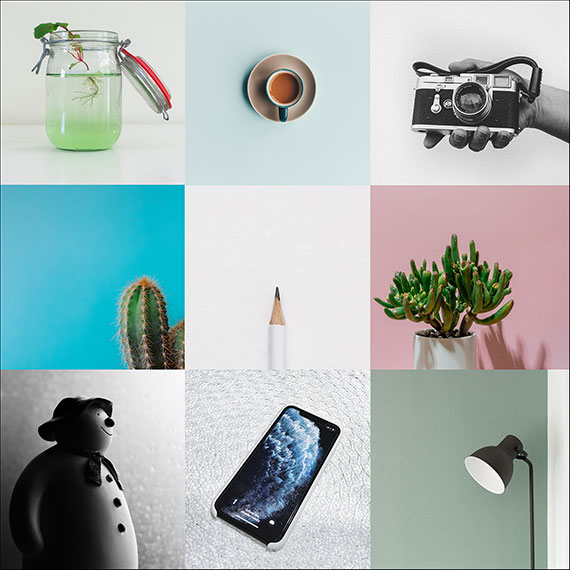
Top left photo by Maarten Wijnants, top center photo by Annie Spratt, top right photo by Leonard Rb, middle left photo by Annie Spratt, center photo by Yoann Silonine, middle right photo by Ruslan Bardash, bottom left photo by James L.W., bottom center photo by David Švihovec, bottom right photo by David van Dijk’s
Lighting
Next, you need to select your lighting. A window with indirect light (no direct sunshine), can be your best option if you are really new to photography. If you don’t have an appropriate window, then you could do this activity on an overcast day.
IDEA: There are no set rules to photo creativity. Let some sunshine blast into your picture and see what happens!
Having some additional lights does provide you with more control. If you don’t own photography lights specifically, no problem. Try using table lamps, flashlights, or any other light source that you have around the house.
IDEA: If you use various light sources, and you’re worried about the color balance, transform your project photos into monochrome black and white pictures!
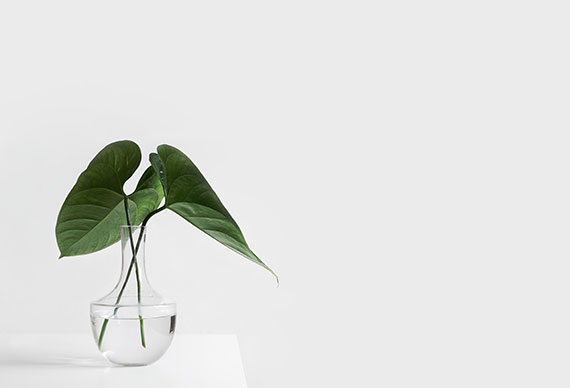
Photo by Sarah Dorweiler from Aesence
Indirect window light will produce soft shadows and muted colors. This lighting scheme makes it easier to determine your exposure setting.

Photo by Henry & Co.
Bright sunlight through the window produces sharper shadows and vibrant colors. Determining exposure for this lighting scheme can be tricky. Take a test shot and adjust as necessary.
Next, you need a backdrop.
In most cases, you’ll want to select a backdrop that sets off your chosen subject, either through color, tone, or texture.
Here are some suggestions.
• Various types of wood
• A wall in your home
• Bed sheets or blankets
• Art paper of varying colors
• Cardboard
• Vinyl sheeting
• Plastic – smooth or crumpled
• Tinfoil
• Pieces of rock or brick
• Countertops or tables
You get the idea. Once you start looking, you’ll be amazed at what you can find around the house.

Photo by Imani Clovis
Setting Up
1. Putting your camera on a tripod is a huge advantage. It allows you to set up your picture and then make changes to your set or lighting while the camera doesn’t move.
2. For a shooting mode, use aperture priority or manual mode. The goal is to set your depth of field so that everything you want in focus is actually in focus. Ideally, you’re on a tripod, so the shutter speed is less of a concern. If the shutter speed drops below 1/60th, I recommend the use of a cable release, so that you don’t cause camera shake while taking your picture.
3. Start with a middle of road aperture, such as f/5.6 or f/8. Adjust as necessary to get your depth of field correct.
4. Set your ISO to 100-400. You want to avoid the digital noise that comes with higher ISO settings.
5. If you have the option, shoot in camera raw.
6. Auto white balance is acceptable if you’re shooting in camera raw. If you’re shooting in .jpeg, then you’ll want to set the white balance to the appropriate light source.
7. Your choice of lens is wide open and based upon your vision of the final picture. Most of the time, you will likely be using a lens somewhere between 35mm up to 135mm, or a zoom lens within that range.
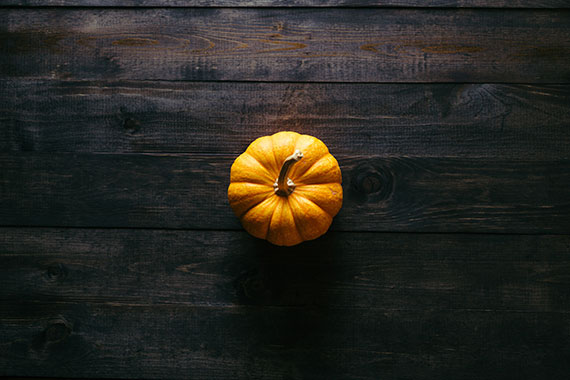
Photo by Patrick Fore
IDEA: Any white object can be used to lighten up the shadows in your picture. The white object is called a bounce card or a reflector, and it can be a wall, a bedsheet, a towel, or an artboard. Many professional photographers use a product called ®Foamcore, which is a rigid foam-based board that you can buy at most art supply stores or some photography shops. If you want more light popping off your reflector, take some cardboard and glue tinfoil to it. If you leave the foil smooth, it will reflect a brighter harsher light. If you crumple the foil up and then smooth it back out before gluing it onto the cardboard, the resulting light will be brighter but softer.
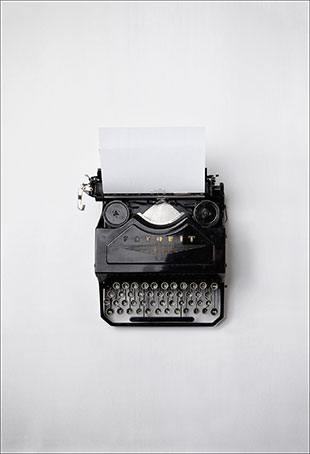
Photo by Florian Klauer
Negative Space
A large part of Minimalist composition is negative space. I’m sure you’ve noticed that all these example photographs have large areas of empty space surrounding the subject. This is a negative space. But don’t take negative space lightly – it should, in some way, enhance your theme, thus adding visual energy to the composition.
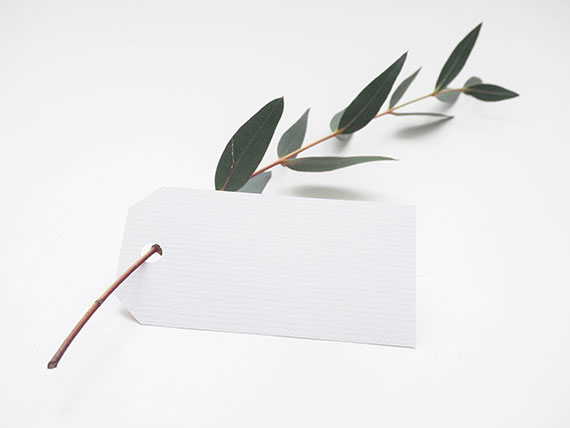
Photo by Helena Hertz
Key Thought: Many subtle factors can contribute to your Minimalist photography. Your photo should contain liberal use of negative space. It should also be a very simplistic composition that makes use of only one to four colors – often one of those colors is a primary color. Also, shape and repetition are common elements within Minimalist artwork.

Photo by Raphael Renter
Skill Points for Minimalism
√ Try composing your picture in a less literal sense (have some fun with it)
√ Simplify, typically one subject works best in Minimalism
√ Think in terms of negative space, shape, and color (try to send a message to your viewer)
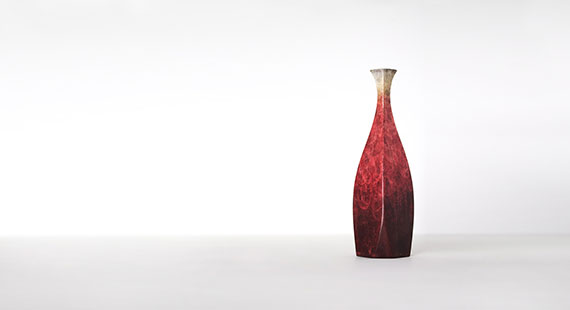
Photo by 五玄土 ORIENTO
Great News
You don’t need fancy equipment to master Minimalism. You can do this – even with a smartphone camera. All you need is your creativity and some time.
Advanced Technique
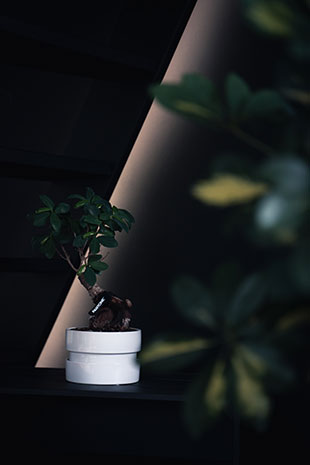
Photo by Tim Christopher Klonk
Minimalist photography is often portrayed as being light and bright.
However, it doesn’t need to be. In fact, low key Minimalist photography can be some of the most dramatic.
It does require a bit more effort with the lighting. That said, your results will be truly satisfying.
In case you’re not sure what the term low key means…
Low Key Photography: A low key image is one that contains predominantly dark tones and colors. It should also include some small area of a white or bright tone to create a full tonal range picture. The example photo (above) is an excellent example of a low key Minimalist photograph.
IDEA: Study the low key photograph above. Did you notice how the photographer created layers in the image? Your minimalist photos don’t require a flat background. Creating Minimalist layered photography is an advanced skill. But you can do it. To experiment with this skill, you need to focus on the lighting.
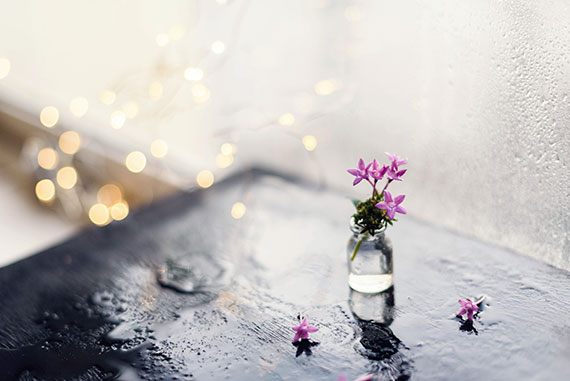
Photo by Anshu A
Post-Production
Minimalism doesn’t require fancy post-processing skills. However, you can further enhance your vision with post-processing should you desire.
This is one area where presets and actions can be a lot of fun.
You’ve created your Minimalist set, and you’ve adjusted your lighting. You take the picture.
Now spend some time running it through presets and actions for various creative options.
The last example photo (above) is a perfect example of post-production taking a Minimalist photograph to the next level. You can even perform edits like this on your smartphone using apps like Snapseed and Lens Distortions.
How did you do?
Once you’ve finished your Minimalism photography project, sit back and look at the results.
• Does your subject command immediate attention?
• Does your background complement the subject without overwhelming it?
• Does your lighting draw attention to the color, shape, and lines of your subject?
• Did you make use of negative space?
• Was your exposure accurate?
• Did your depth of field capture everything in focus that you wanted it to?
• Did you experiment with different light sources and types of light?
• How was the color in your final image, or did you go black and white?
• Was your final image sharp?
• Did you play around with post-production?
• Do you feel that your final photograph powerfully conveys your thoughts to a viewer?
About the Author:
Kent DuFault is an author and photographer with over 35 years of experience. He’s currently the director of content at the online photography school, Photzy.com.
For Further Training and Exercises:
65 beautifully designed & printable Photography Action Cards are now available that will give you over 200 photography assignments, covering everything you can imagine. They are currently 88% off today if you want to try them out.

New: The Photography Action Cards (Click to See How They Work)
These Action Cards discuss a photographic topic, provide you with suggested considerations, and give you specific photographic assignments.
Deal ending soon: The Photography Action Cards at 88% Off
Like This Article?
Don't Miss The Next One!
Join over 100,000 photographers of all experience levels who receive our free photography tips and articles to stay current:


Leave a Reply