One major issue that many photographers have is that their home studio is very small. However, the size of your studio shouldn’t be a hindrance at all. By placing the lights in the right places you can take amazing portraits even in the tiniest studio. Photographer Mark Wallace from Adorama demonstrates:
Wallace’s idea is to use small lights close to the subject to give an entirely different feel to a small space. He uses two Profoto lights, but you could use any type of light.
“We’re going to be using the inverse square law and lens flare to make things look really cool.”
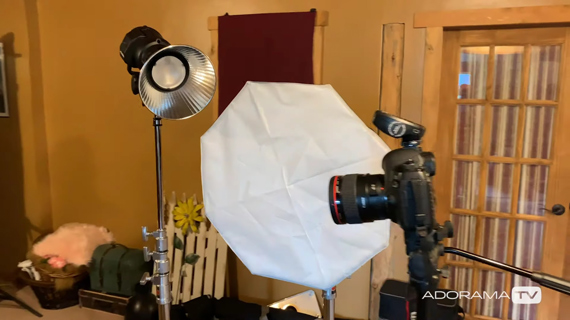
Lighting Setup
Wallace places one Profoto light with a standard reflector on it pointed toward the lens to mask the small space while creating some lens flare. He places a small octabox on the other Profoto light to be used as a small light source. You could use an umbrella or a softbox, but be sure to position it close to the subject for a soft light effect. Finally, to make things fall into darkness, Wallace uses a black cloth for his background.
In order to create some lens flare, you can place the light with the reflector pointed toward the camera so that the light creeps in from one of the corners. Be sure to move the camera and light around until you find the right spot.
Next, place the other light with the octabox or a softbox close to the first light source to be used as a fill light. Doing so will also even out the lighting on the model.
Taking the Portrait
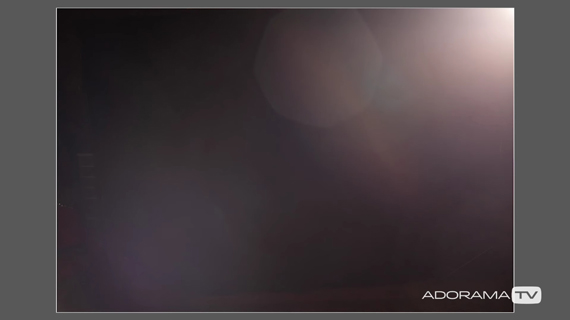
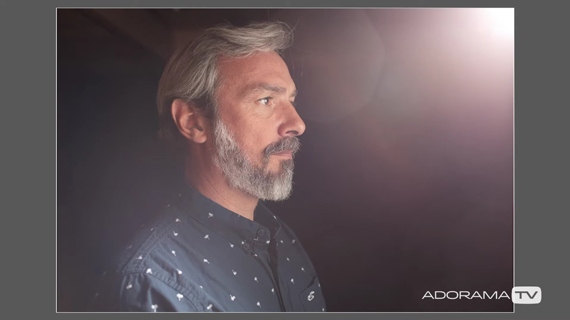
Once the lights are in place, start by placing the subject so the key light does not spill over them. Take a test shot with the fill light turned off, and check for any light spillage.
Notice the harsh light spill on the subject’s face
If you notice any light spill, the subject is too close to the subject. Simply ask them to move away from the camera and see how it affects the image.
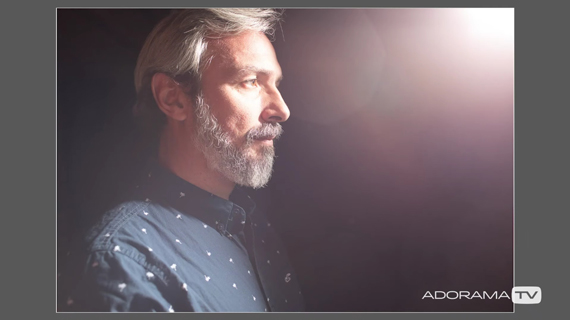
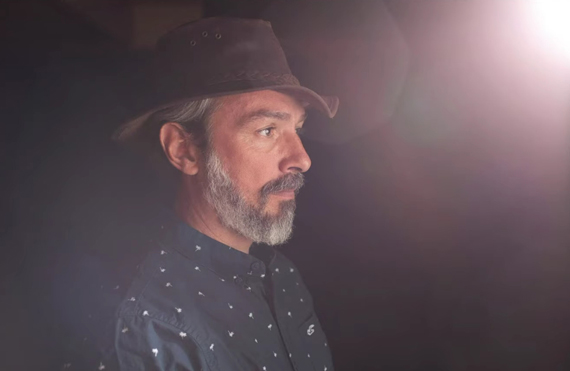
Now you’ll notice that there is no harsh lighting on the subject. The face, however, appears flat. This is where the fill light kicks in. The second softlight will help by illuminating and shaping the subject.
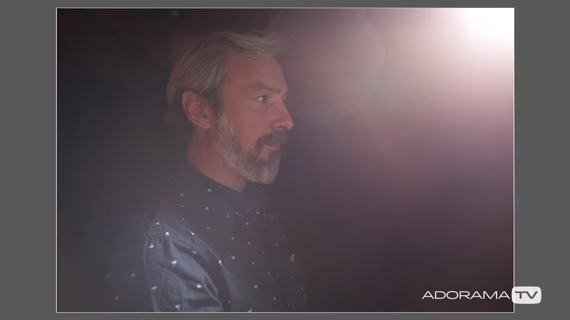
Wallace meters for the second light to about f/3.2 with the light meter pointed toward it:
Wallace goes on to improvise on the image by adding in props.
Post-Processing
With the photoshoot done, Wallace imports the photos to Lightroom for some post-processing. Here’s a quick summary of what he does:
- Take the blacks down a bit to mask the background.
- Choose a color profile that complements the photo. In his case, Wallace uses the Artistic 07 profile in Lightroom.
- Emphasize texture by sliding the Texture slider on the Presence panel. This gives a grungy effect to the photo.
- Use the Split Toning panel to add some blues to the shadows region.
With the basic adjustments done, Wallace opens up the image in Photoshop. He uses the Analog Efex Pro 2 module of Nik Collection to get his job done. If you have the Nik Collection plug-in installed for Photoshop, you can access it by going to Filter > Nik Collection > Analog Efex Pro 2.
Within Analog Efex Pro 2, Wallace uses a custom filter that adds some film grain and some artificial bokeh around the subject’s shoulder. This is Wallace’s artistic choice and so it’s not mandatory that you do the same.
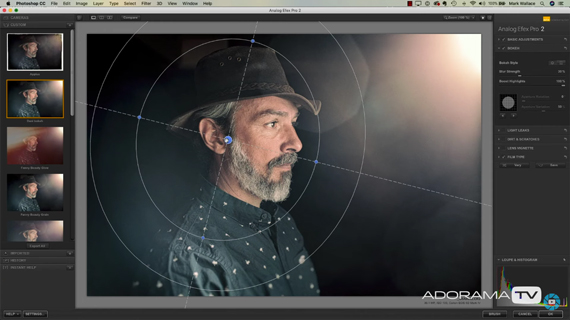
Wallace’s next approach is to add some contrast to the image using the High Pass filter. Here’s how you can do it too:
- Duplicate the top layer in Photoshop (Analog Efex Pro filter layer).
- Go to Filter > Other > High Pass…
- Choose a low radius filter that just affects the fine details and textures in your image, and hit OK.
- Select the Overlay blending mode.
This will add some fine contrast to the texture and details in your image instead of affecting the entire image.
Lastly, Wallace crops the image in Lightroom to show less of the subject’s shirt, and to convert the image in a 16:9 ratio. And here’s the final result:
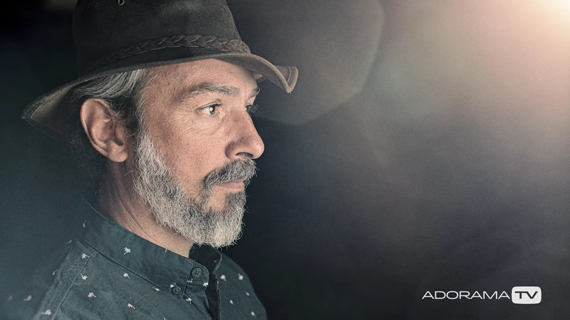
“A little bit of creative lighting in a small space, with some creative post-production, and you can make your small space look a little bit more expansive.”
Like This Article?
Don't Miss The Next One!
Join over 100,000 photographers of all experience levels who receive our free photography tips and articles to stay current:


“The subject is too close to the subject” is an interesting thought. I am trying to figure out how to separate the subject from the subject to make a better photo. Chain saw, maybe?